


Related Resources
How many times have you angrily tossed your drawing papers into the bin because you couldn’t get your character’s eyes right?
We feel you.
Most artists struggle to get their eye drawings right.
The eyes are the second most complex organ in your body (after the brain), and, not only are they physiologically complex, they are said to “reflect” our emotions and personality.
No wonder learning how to draw eyes is challenging!
But, we can help!
BioWar’s lead illustrator Gonçalo Lopes created a video tutorial to walk you through the process of drawing eyes step by step.
This guide is beginner-friendly, so don’t worry if you have no formal training in drawing or art in general.
We’re also going to break the video into several steps, so you can read about the process of drawing eyes in addition to watching the video.

The Tools You Need When Learning How To Draw Eyes
Before you start learning how to draw eyes, you should first get the right tools for the job.
To create realistic drawings, most professional artists use:
- An H pencil: “H” stands for “hard”, meaning these pencils have a hard lead; you’d want to go in with an H pencil first because they leave a very gentle trace on paper, which is perfect for outlines and basic shapes.
- A 4B pencil: “B”, i.e. “black”, is a type of the softest lead; you’d want to use this type of pencil to create darker shadows that add to the realistic look.
- An HB pencil: “HB” means “hard black”; between “H”, i.e. the hardest type of lead and “B”, i.e. the softest, HB pencils are in the middle; they are “medium hard” and your best choice for the more intricate details and softer shadows.
- A kneaded eraser to accentuate the highlights and touch up the mistakes.
- Sketch paper that features micro-perforations, making corrections easier.
If you prefer using digital drawing tools, that’s totally fine.
What matters is that you know how to use such devices and platforms to create realistic works.

Basic Steps To Drawing Eyes
The first thing to do when you start drawing eyes is to understand the basic eye shapes.
By going from basics to specifics, you can set up a good structure for your drawing and avoid the struggles most beginners face when attempting to draw a realistic eye.
Let’s do this together one step at a time.
Step #1: Draw The Iris
What is the first thing you notice when you look into someone’s eyes?
It’s probably the color of their eyes, right?
So, let’s start drawing eyes by sketching the iris first.
Fun fact about your irises: they have a whopping 256 traits that make them unique, while your fingerprints have around 40!
Now, take your H pencil and apply slight pressure to it to draw a circle.
Don’t worry if the shape of your circle isn’t perfect; you’re creating an outline at this point, and you can fix parts you’re not happy with later on.
Then, draw a long horizontal line through the circle’s center. The ends of the line should mark the inner and outer eye corners, like this:

Step #2: Sketch The Eyelids
From the inner corner of the eye, draw a curved line that touches the top of the iris and have it end at the outer eye corner. This will be the top of the upper eyelid, i.e. the crease.
Then, draw another line that touches the bottom of the iris and bend it upwards so it ends at the outer eye corner.
This line marks the lower eyelid.
Next, let’s draw the bottom part of the upper eyelid.
Again, you should connect one eye corner to the other with a curved line, but this time, have the line cover the small portion of the iris, like so:

At this point, you’ve drawn the basic outline of the eye.
All that’s left is to add the pupil.
Step #3: Add The Pupil
The pupil is shaped like a circle about two times smaller than the iris.
Again, don’t bother drawing the perfect circle shape.
Just try to ensure every side of the pupil is equally distanced from the edges of the iris.
Now that all basic elements of the eye are in place, you can apply more pressure to your pencil and go over the eyelids, the pupil and the iris to make them more prominent.
Then, draw a short line from the upper to the lower lash line in the inner eye corner to add the caruncle — the pinkish spot at the inner corner of your eye.
If you like, you can also illustrate the light reflection in the eye by adding a circular and oval shape on the iris, like this:
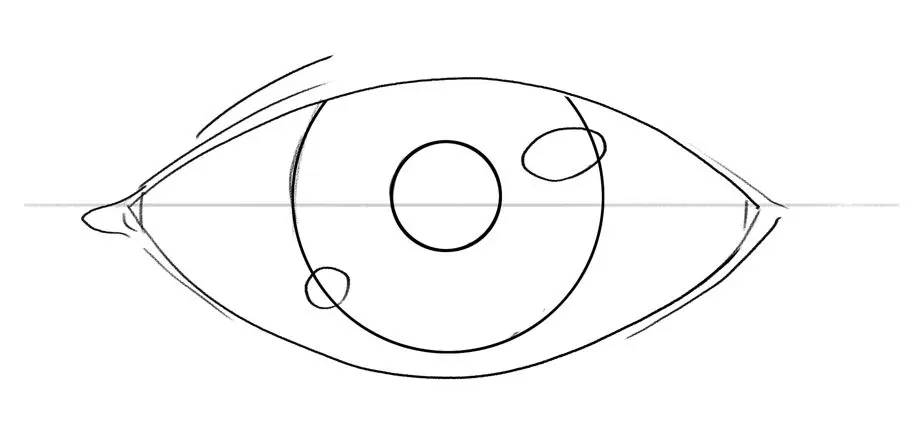
You can also leave adding the light reflection for later:
At this point, the outline for your eye drawing is ready.
Next comes enriching it with details to make it look realistic.

2 Steps To Adding Details To Your Eye Drawing
To make an eye drawing look realistic, the trick is to finesse the details and shade your sketch well.
Step #1: Shade The Pupil And Draw The Upper Lash Line
Let’s start by shading the pupil. You can now take an HB pencil to add soft shadows to your sketch.
You can shade every part of the pupil evenly as Gonçalo did:
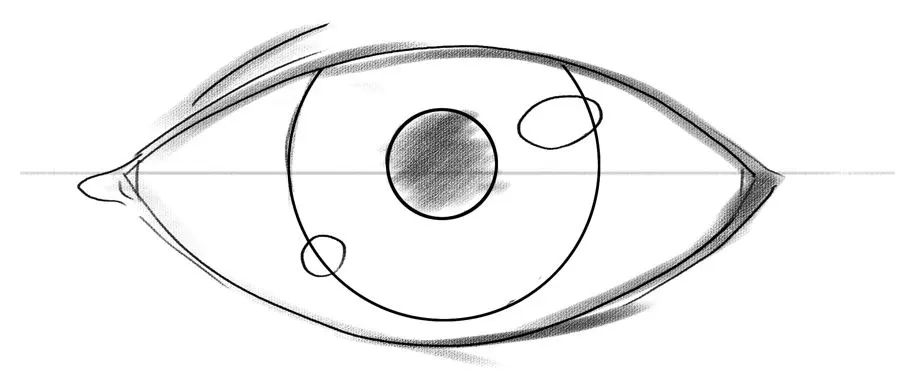
Then, go over the eyelids once more with a softer lead, to make the lines slightly darker.
Let’s also erase the part of the iris that intersects the upper eyelid and add the upper lash line by placing it below the crease.
Step #2: Shade The Iris
Next comes shading the iris.
But before you start on that, if you haven’t done it already, now’s the time to draw the light reflection in the eye.
Gonçalo shades the area around the highlights but leaves them white.
He also proceeds to overlap some of the lines to make the outline of the eye even thicker.
To add more depth to the eye, gently press the pencil and shade the eyeball.
You can do that just by adding a bit of shade at the top of the iris and in the outer eye corner.
Make sure to blend after you finish shading to avoid having sharp transitions between lighter and darker shades of the lead color.
Finishing Touches To Drawing Eyes
At this point, your eye drawing still doesn’t look quite realistic.
But that’s about to change.
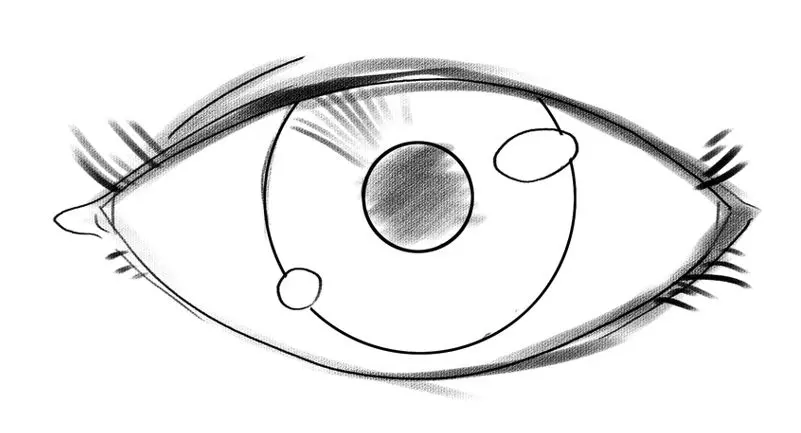
Step #1: Draw The Eyelashes
You sketched the upper lash line earlier, remember?
Now’s the time to draw eyelashes on it.
Relax your hand and make short, swift movements to illustrate the eyelashes.
Don’t bother making them all the same length.
If some are slightly longer than the rest, that’s fine, as long as there are no drastic differences in the length of the lashes.

You can also add the bottom eyelashes.
As you can see, we didn’t draw them along the entire lower lid, but only in the corners.
Step #2: Add Depth To Eyes
Now, pick up a 4B pencil and let’s finalize your eye drawing.
Once again, go over every line to make them pop and pay special attention to the iris.
Add more darkness at the top of the iris because the upper lid casts a slight shadow over it.
Then make the edges of the iris darker, too.
Next, let’s add structure to the iris.
Draw short straight and curved lines coming out of the pupil, like this:
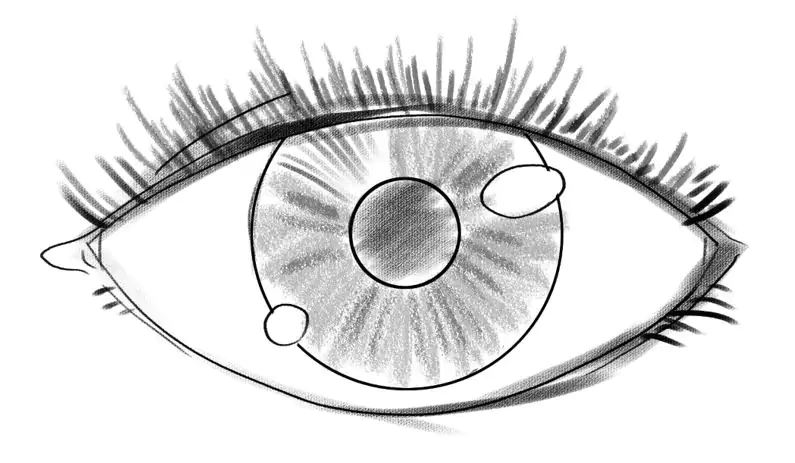
To ensure your eye drawing has even more depth, you can draw a line above the crease and another below the lower lid to illustrate the eye socket.
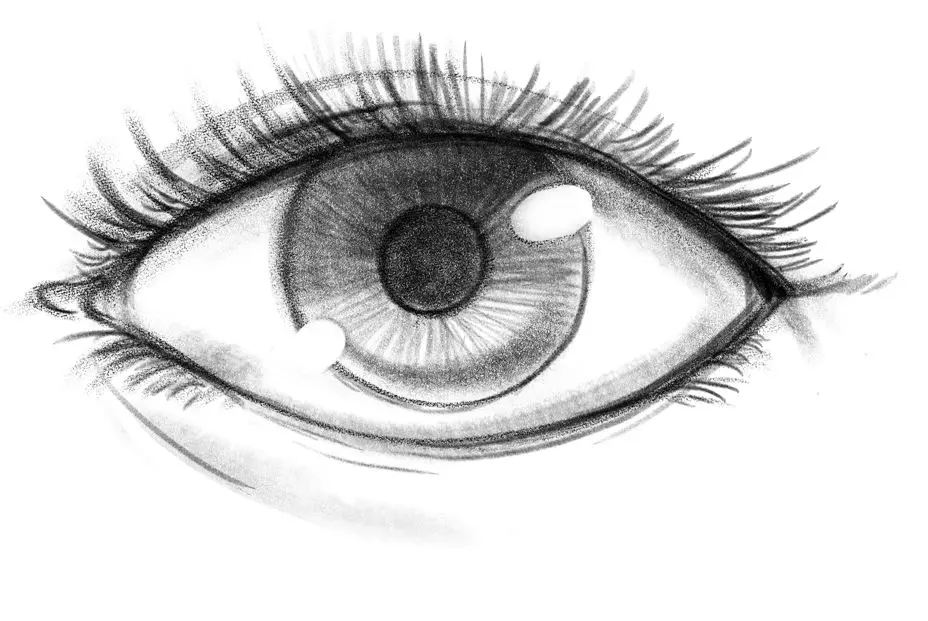
This is what Gonçalo’s finished eye drawing looks like:
Recap On How To Draw Eyes
Besides learning how to draw a person and acquiring skills to draw hands, one of the most complex skills many aspiring artists struggle with is learning how to draw eyes.
But drawing eyes becomes much easier when you break down the process into several steps
The key is to start from basic shapes, such as the circle to illustrate the iris and slowly go from there.
Sketch the eyelids, add the pupil and start thinking about the details once you finish creating the basic outline.
Decide where you want the highlight in the eyes to be, and carefully shade the pupil and the iris.
Don’t forget that the upper eyelid also casts a shadow on the iris, so make sure that shows on your eye drawing.
Use pencils with softer lead to create darker shadows and blend the lines well, so there are no sharp details that stand out.
And lastly, delete all the superfluous remnants from the outline and admire your drawing!
Once you finish learning how to draw eyes, we encourage you to continue honing your artistic skills and keep sketching! Check out these step-by-step guides:
Explore all of our how-to-draw tutorials and don’t stop drawing!


