Related Resources
Did you know that sunflowers can be red and pale white?
This is just one of the many fascinating facts about the iconic blooms that you’ll learn how to draw by the end of this guide.
Besides sunflowers, we’ll also show you how to draw daisies!
Now, get your tools ready and let’s blossom and bloom together, one stroke at a time!
The Tools You Need For An Easy Flower Drawing
Even though any type of pencil and paper will do, you can also try these tools to draw sunflowers and daisies:
- An H pencil: This pencil has a hard lead that allows for an easy creation of precise lines, which is just what you need during the outlining stage.
- An HB pencil: HB pencils produce neither too dark nor too light lines. That’s exactly what you need when adding details to your sketches and enhancing the lines.
- A kneaded eraser: Kneaded erasers are malleable, meaning you can easily adjust their shape and size, depending on what you want to erase. That way, you can erase even the smallest details from your sketch.
- Lightly textured sketch paper: This kind of paper is ideal for beginners because of its smooth surface. Your pencil is guaranteed to glide over it, which will make the drawing experience all the more enjoyable.

Sunflower Drawing In 4 Steps
First up, let’s go through the process of drawing sunflowers.
1. Draw The Base
Recommended tool: H pencil
When you’re learning how to draw something, we always recommend that you use geometrical shapes to create the outline for your drawing whenever possible.
That way, it’ll be easier for you to get the proportions for your sketch right.
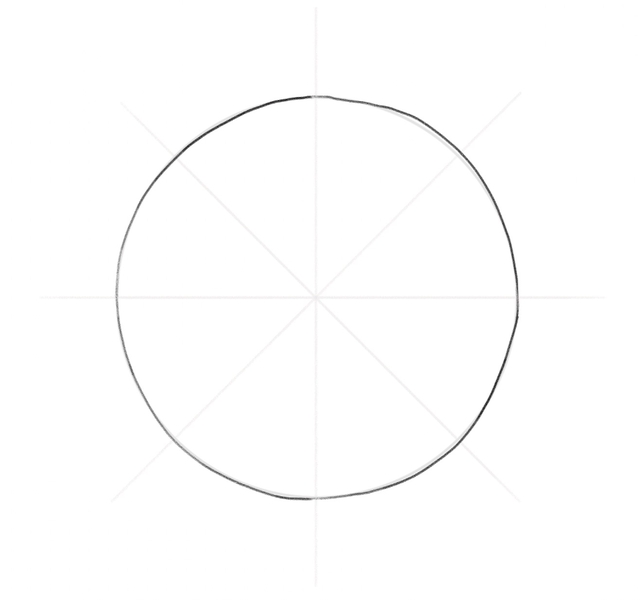
With that in mind, let’s draw a circle.
This is where its seed is:

Make sure to leave enough room around the circle for the rest of your sunflower drawing!
Next, we’ll lay the grounds for the petals.
Let’s draw one horizontal and one vertical line and have them meet at the circle’s center.
Make sure you extend the lines so that they go outside the circle, like so:

Next, draw two more diagonal lines that go through the circle’s center.
Make sure that you divide the circle into eight equal pieces:

2. Draw The Petals
Recommended tool: HB pencil
Let’s go over the circle with the HB pencil to make the line darker.
If you’re using a different pencil, simply apply more pressure to it for darker strokes:
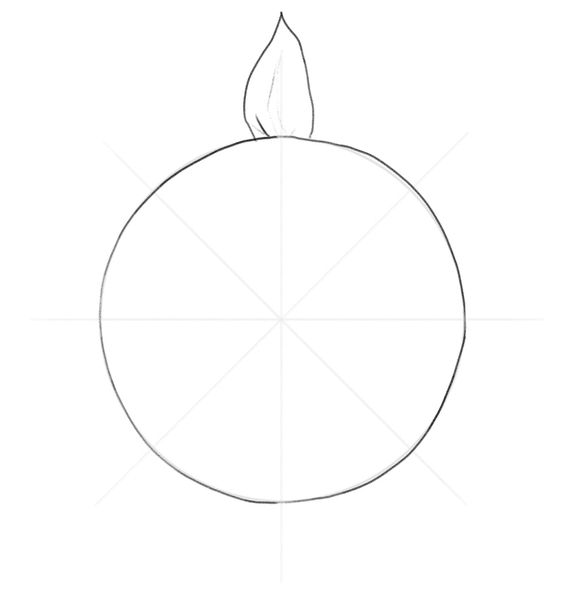
Now’s the time to start drawing the petals.
We’ll continue to use the HB pencil because of its darker lead, but you can use whatever pencil you prefer.
Start at the top of the central vertical line — its tip will be the tip of the petal, i.e., the tip of the ray floret:
Then, draw a ray floret across the one at the top:
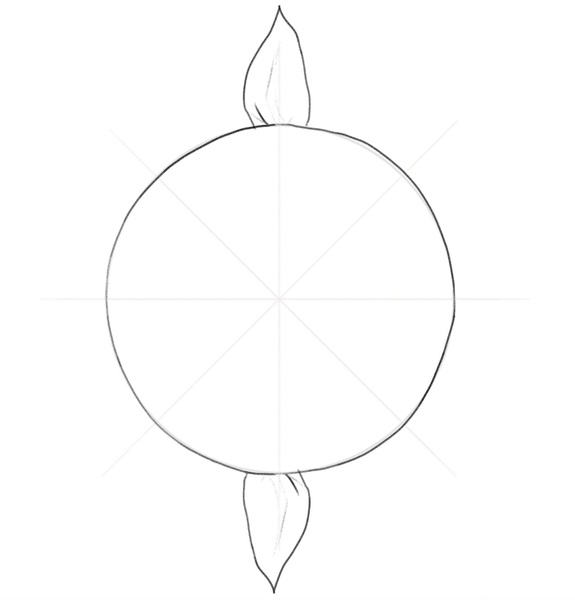
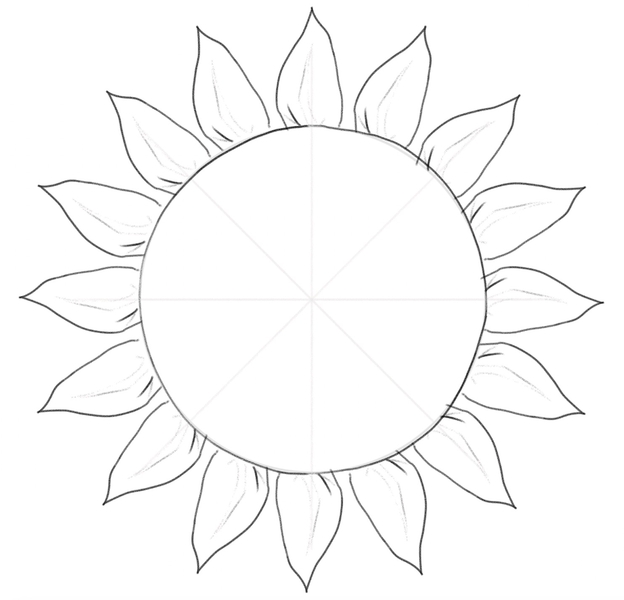
Next up, add the florets on the left and right side of the circle, like so:
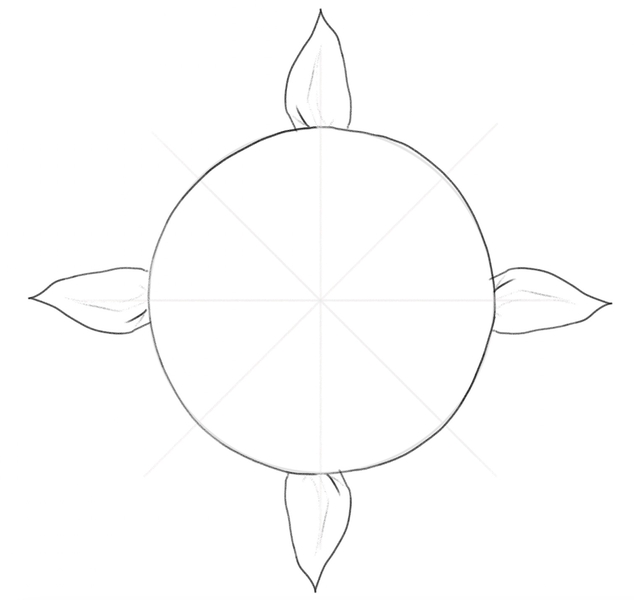
Now, let’s add the ray florets on either side of one of the diagonal lines, like this:
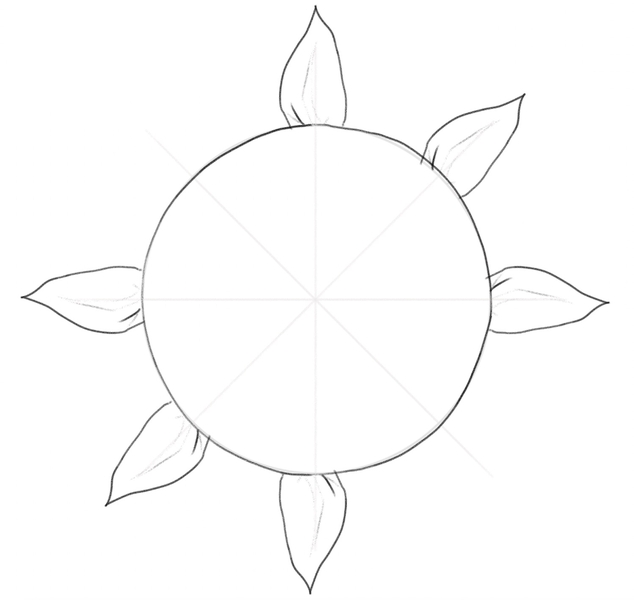
What’s left at this point is to draw the petals at the ends of the other diagonal line:
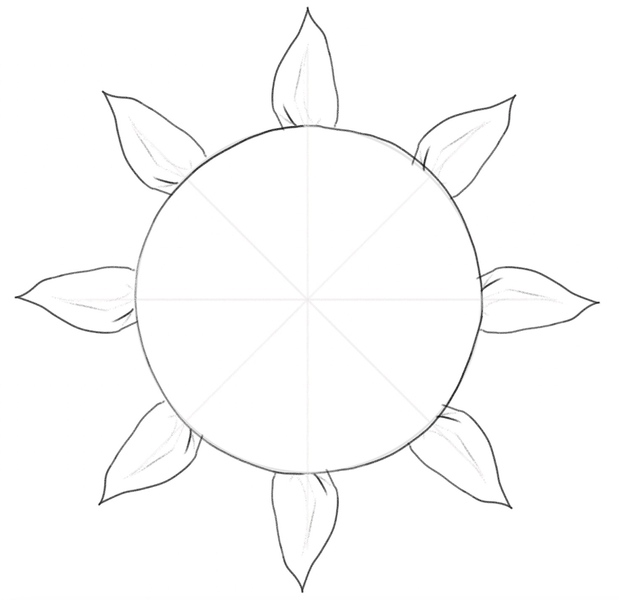
The next step is filling up the empty spaces between these ray florets with more ray florets, like so:
Sunflowers have an abundance of ray florets, so keep adding them behind the petals in the first line:
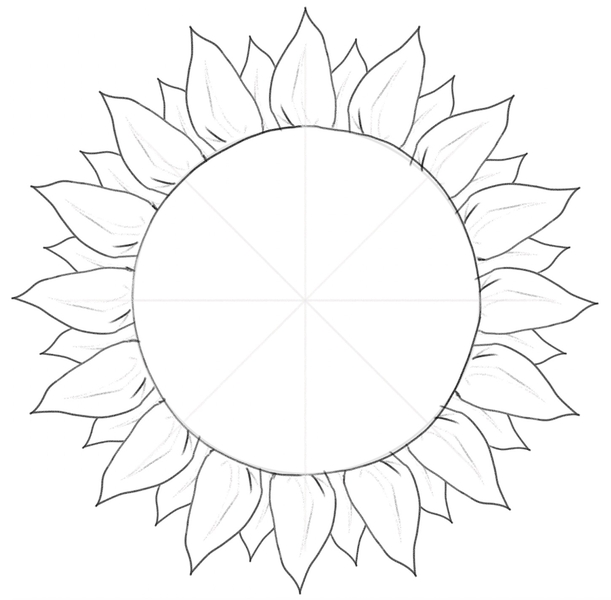
3. Remove The Guidelines
Recommended tool: kneaded eraser
Once all petals are in place, it’s time to get rid of the guidelines.
You can use any eraser you like, but we suggest going for a kneaded eraser simply because it allows for greater precision since you can change its shape the way you need.
Once the guidelines are gone, your sunflower drawing should look like this:

4. Add The Details And Finalize Your Sunflower Drawing
Recommended tool: HB pencil
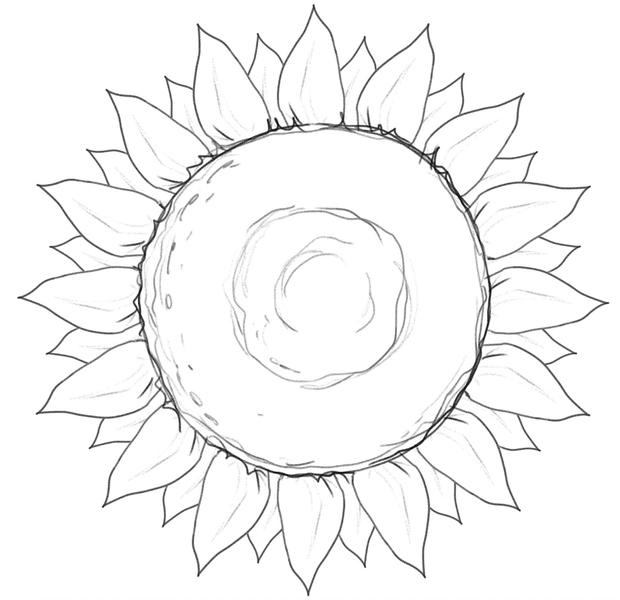
The center of sunflowers is filled with disc florets — that’s where the sunflower seeds develop.
Now, there are countless disc florets on each sunflower, but we won’t be drawing them all.
When you’re learning how to draw sunflowers, suffice to add a few more details inside the circle, like this:
To finalize the sketch, add a stem and the leaves.
You don’t have to draw them too big —it’s enough to have them at least peak to give more dimension to the flower:
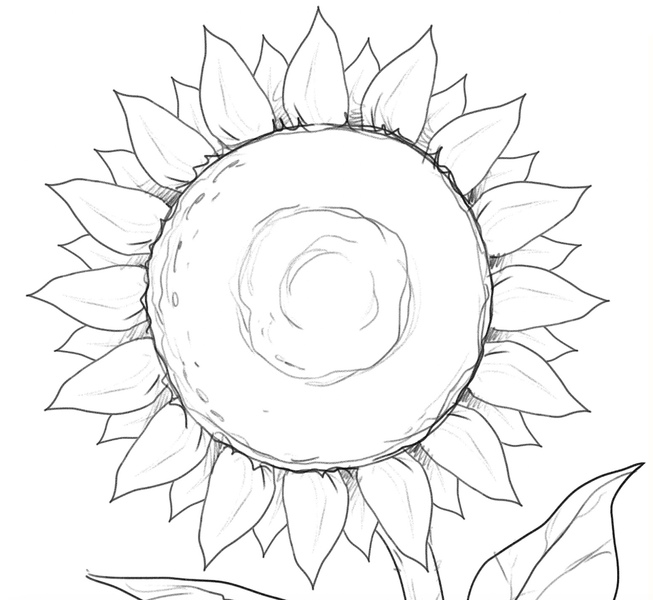
And that’s it — you can now make sunflowers stars of your art, like Van Gogh!
Daisy Drawing In 5 Steps
We want to show you how to draw another beautiful flower — daisies!
We’ll use the same approach, i.e., we’ll break the process into easy-to-follow steps that anyone can follow, beginners included.
1. Draw The Base
Recommended tool: H pencil
Let’s kick things off with a circle.
This time around, your circle should be smaller than the one you drew when sketching a sunflower simply because daisies have a smaller central part compared to sunflowers:

Now, we’ll add two straight lines — vertical and horizontal — and have them meet at the circle’s center.
It’s important that the lines are of the same size:

We’ll now add two diagonal lines and have them also go through the center of the circle, like so:

2. Draw The Petals
Recommended tool: HB pencil
If you followed the steps to sunflower drawing, you can probably guess what comes next.
At this stage of flower drawing, you’ll need a pencil with a darker lead (such as an HB pencil), or you can add more pressure to the one you’re already using to create darker lines.
First up, go over the circle to make it darker:
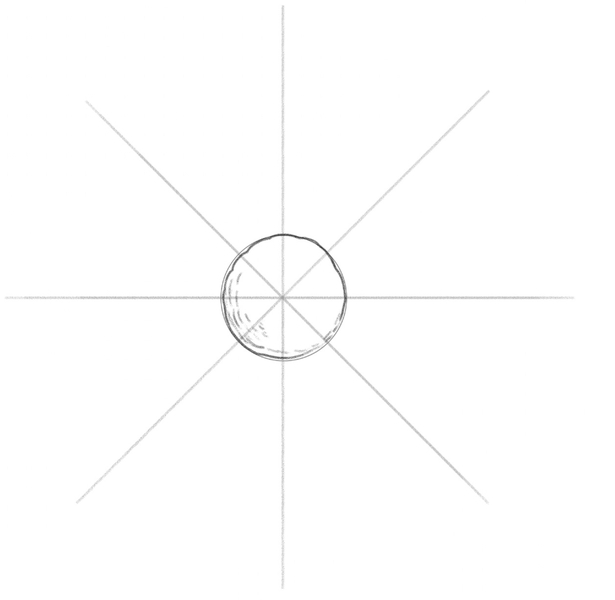
These lines will now help us add the petals to the sketch.
Like sunflowers, daisies have ray florets surrounding the central part of the flower, while their central florets are called the disk florets.
We’ll start by sketching the ray florets at the top and at the bottom of the vertical line.
Daisies’ petals are narrow and elongated, like so:
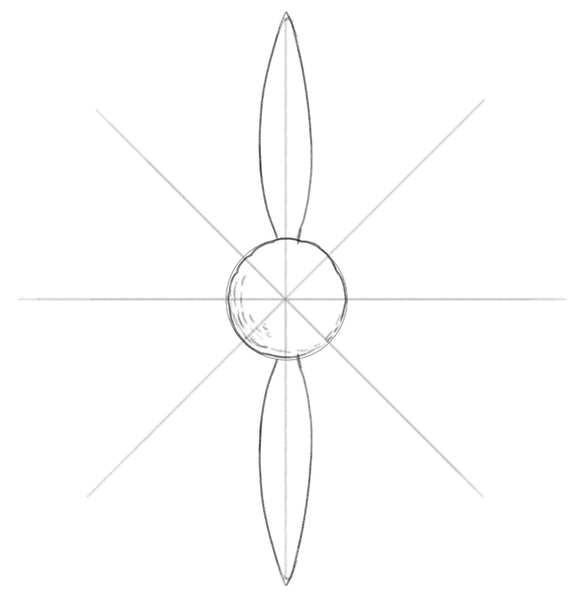
Then, add the petals along the horizontal line:
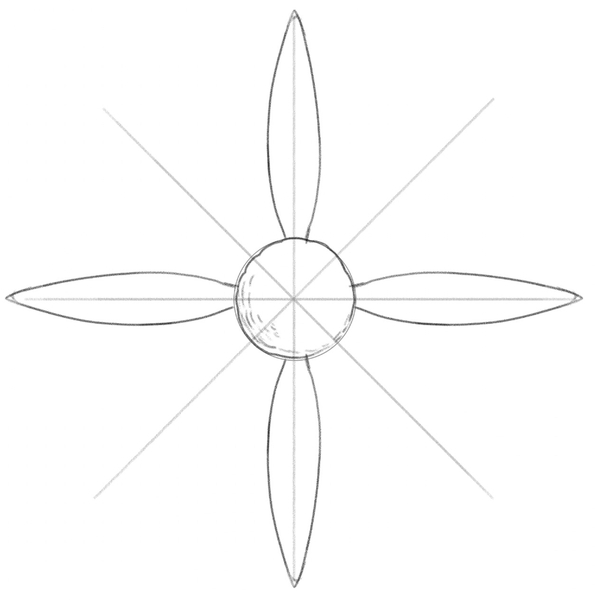
Now, let’s draw the ray florets on the diagonal guidelines, like so:
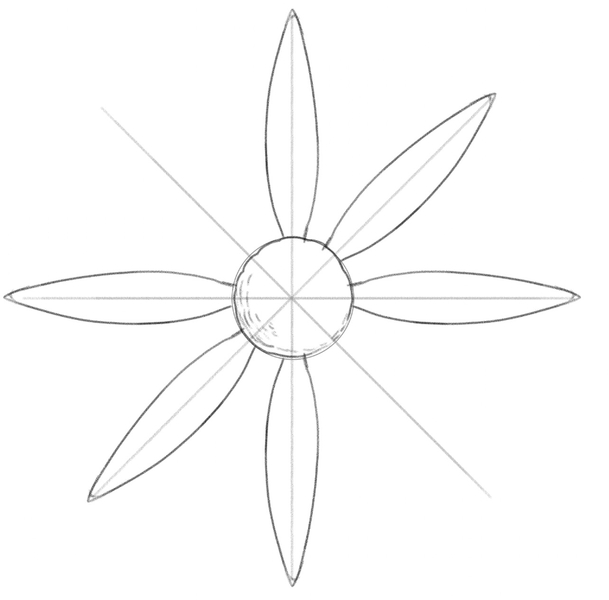
And on the other diagonal line as well:
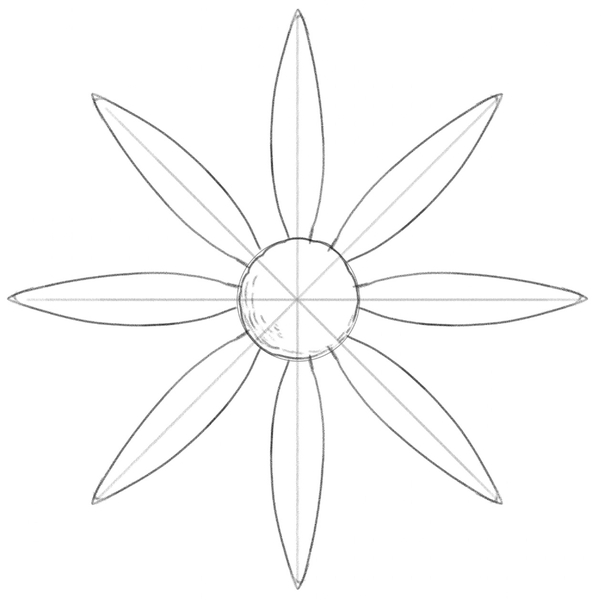
3. Remove The Guidelines
Recommended tools: kneaded eraser
Before we continue drawing a daisy, let’s grab an eraser (a kneaded one if you have it) and get rid of the guidelines we used to draw the petals:
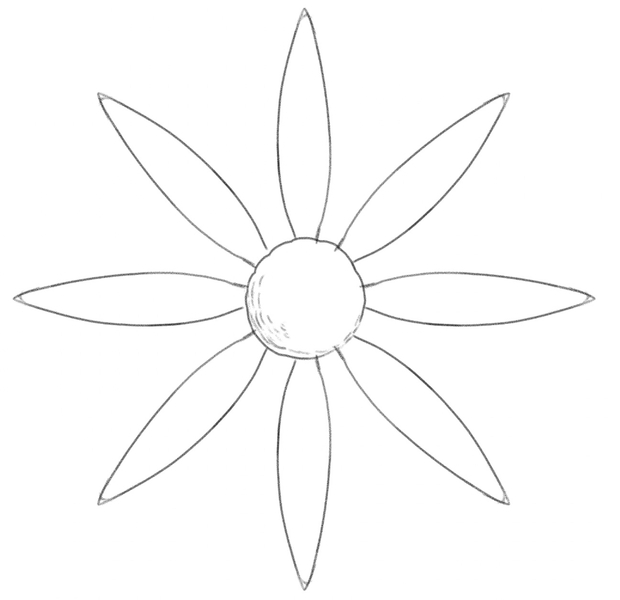
4. Draw More Petals
Recommended tool: HB pencil
Once the guidelines are removed, let’s continue adding details to the sketch to make the daisy all pretty and nice.
Daisies usually have between 15 and 30 petals, so let’s keep drawing more of them.
Sketch smaller petals between the larger ones you drew earlier, like this:
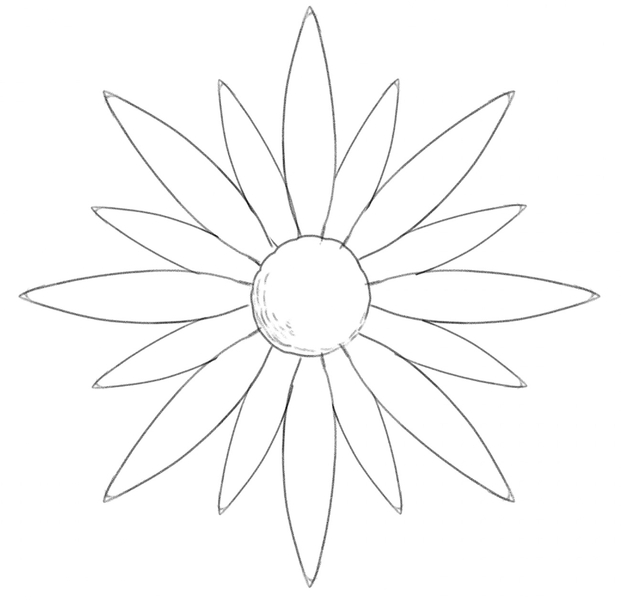
To make the flower look really rich, you can continue to add even more petals.
You can squeeze bits of petals between the tops of larger and smaller florets, like so:
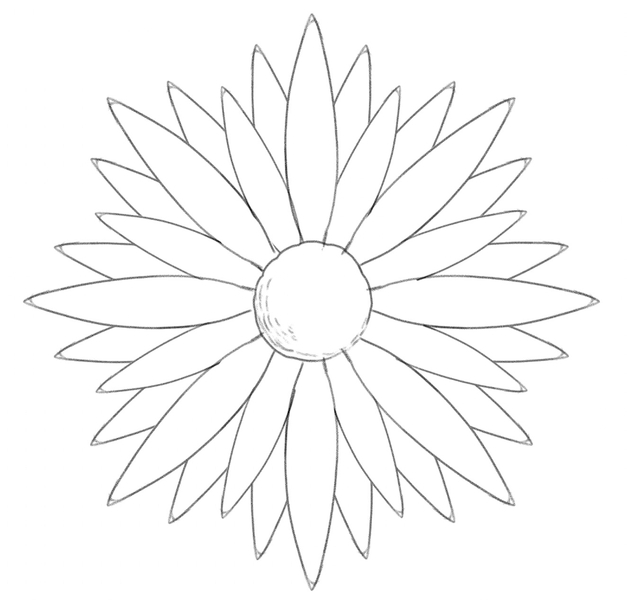
5. Add The Details And Finalize Your Daisy Drawing
Recommended tool: HB pencil
We’ll now add some finishing touches to the sketch to complement the daisy’s beauty and make it look richer.
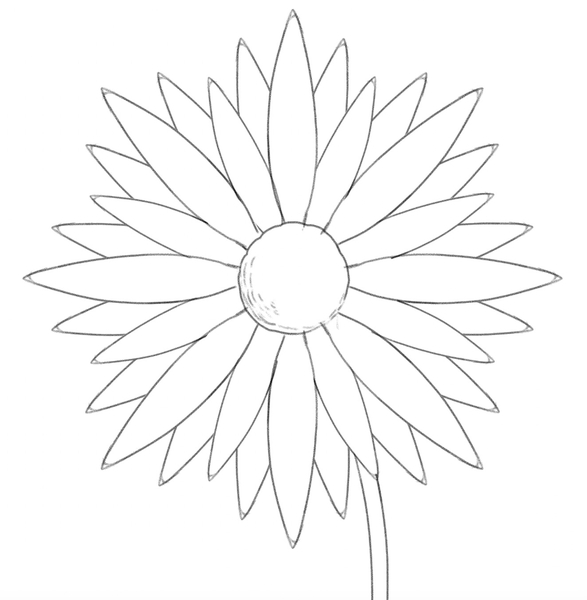
Let’s start off with a flower stem:
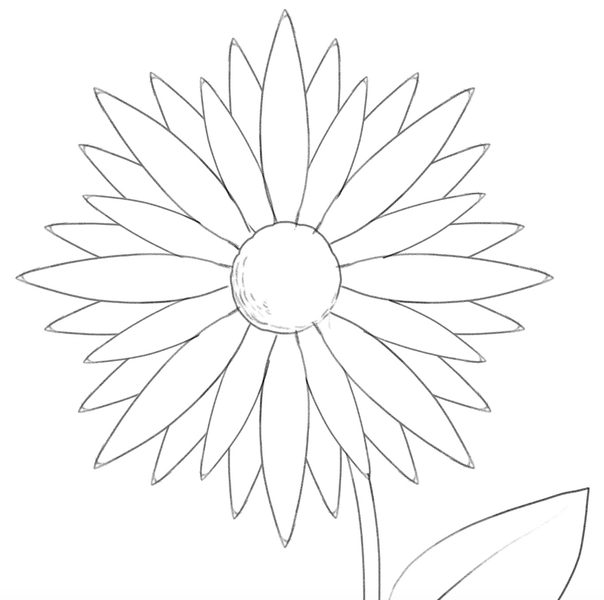
After the stem, why don’t we also add a leaf:
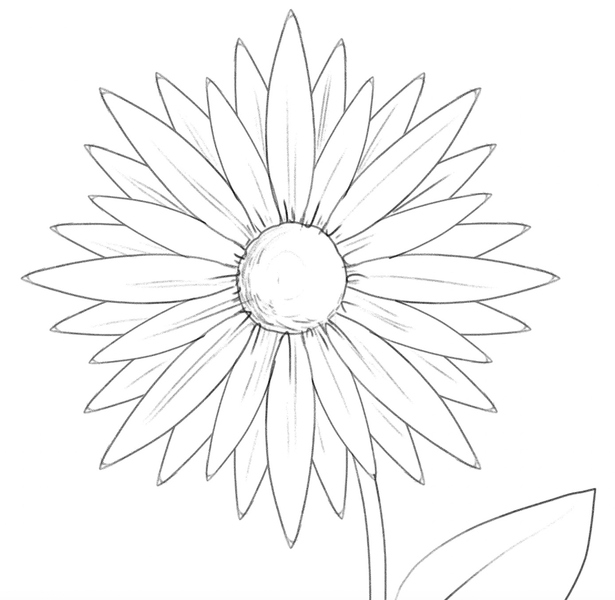
To finalize the sketch, add thin, straight lines of various sizes to each petal, near the flower’s center, like this:
Finished Your Flower Drawing? Draw These Next!
Flowers are admired for their beauty, colors, shapes and smells, and they’re fun to draw.
Once you master drawing sunflowers and daisies, we encourage you to also explore our guide on rose drawing.
We have an extensive collection of simple how-to-draw guides you can use to continue improving your drawing skills.
You can learn:
- How to draw a lotus flower
- How to draw a pumpkin
- How to draw flowers
- How to draw a strawberry
- How to draw a forest
- How to draw a tree
- How to draw a mushroom
- How to draw a desert
- How to draw a unicorn
- How to draw a dragon
- How to draw a face
And so much more!
A Recap On Flower Drawing Step-By-Step
When learning how to draw flowers, the most important thing is to break the process into steps and draw one part of the flower at a time.
A circle and several straight lines will help you define the flower core and set up a scene for the petals.
As for petals, add one layer at a time, and then draw the stem and the leaves to enhance the flowers’ appearance and make it more complete.
Embrace imperfection and the pure joy of flower drawing, and enjoy the process!

FAQs
1. How do I start drawing a flower?
Start by sketching the basic shape of the flower’s head using a circle and then use straight lines (vertical, horizontal and diagonal) to position the petals. Then, work on details such as stems and leaves.
2. What are some basic tips for drawing flowers?
When drawing flowers, be it sunflowers, daisies, or any other flower you like, we advise you to pay attention to proportions. Use geometrical shapes to create outlines and position all flower parts, and then gradually build up details.
3. What’s the easiest way to draw flower petals?
We recommend using vertical, horizontal and diagonal lines to mark the position of the petals and define their length. Add one petal layer at a time, and then work on details, such as veins and folds.
4. How do I draw flowers with delicate features, such as daisies?
Use light, airy strokes and focus on detailing to highlight the flowers’ softness.
5. Are there any specific drawing exercises to improve my flower drawing skills?
The best practice is to draw as much as possible. Sunflowers, daisies, roses… don’t stop practicing!

![Finished sunflower and daisy drawings. Image used in the “Flower Drawing For Beginners [Sunflowers & Daisies]” blog post.](https://www.biowars.com/wp-content/uploads/2024/05/flower-drawing-hero-image.jpg)


