Related Resources
Did you know that strawberries belong to the same family as roses?
While the two look completely different, they share a common ancestry.
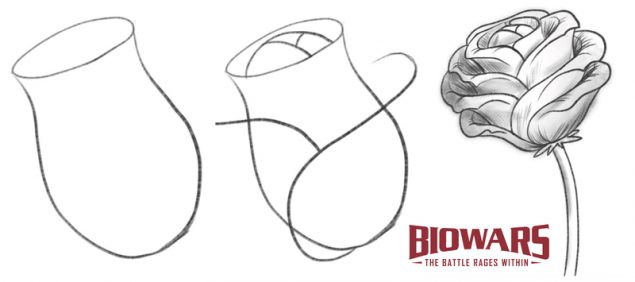
In one of our earlier guides, we shared with you the steps to easy rose drawing.
Now’s the time to show you the tricks to simple strawberry drawing, so grab your art supplies and let’s start!
The Tools You Need For Easy Strawberry Drawing
When drawing a strawberry, you can use different tools to create specific effects and details. Here are the tools we recommend:
- H Pencil: An H pencil has a hard lead that produces light, fine lines, making it ideal for the outlining stage. Its light marks are easy to erase and adjust, and that’s just what you need while sketching a strawberry.
- HB Pencil: The HB pencil, with its medium hardness, is perfect for refining the edges and adding the first layer of texture to the strawberry’s surface. It’s also a great choice for softly shading a strawberry.
- 4B Pencil: A 4B pencil has a soft lead that creates darker, richer lines — it’s just what you need for shading. You can use this pencil to deepen shadows and create contrast. The softer lead helps you give more depth to your drawing.
- Blending Stump: A blending stump is essential for smoothing out pencil strokes and creating gradients. When shading the strawberry, this tool helps you blend the transitions between the lighter and darker areas, soften the texture and make the strawberry appear more lifelike.
- Kneaded Eraser: A kneaded eraser is pliable and you can shape it however you like, depending on the size of the lines you need to erase. This type of eraser is also an excellent choice for creating highlights on the strawberry
- Lightly Textured Paper: The slight roughness of lightly textured paper helps the graphite glide more evenly, which leads to smoother drawing and shading.
If you don’t have these tools — don’t worry!
Any pencil and paper will do.
What matters the most is your desire to learn how to draw a strawberry and your willingness to practice.
By the way, you can also use a digital drawing tool of your choice if you prefer going digital to using pen and paper.
How To Draw A Strawberry In 5 Steps
The easiest way to learn how to draw a strawberry (and pretty much everything else) is to break down the process into smaller and simpler steps.
We’ll show you how to draw a strawberry in just five beginner-friendly steps.
Step 1: Draw The Base
Recommended tool: H pencil
If you have an H pencil, now’s the time to grab it.
If not — that’s okay, just make sure not to apply too much pressure to the pencil of your choice since you need to create light lines.
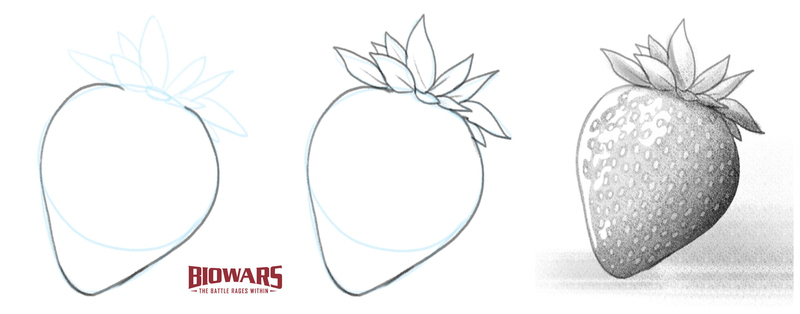
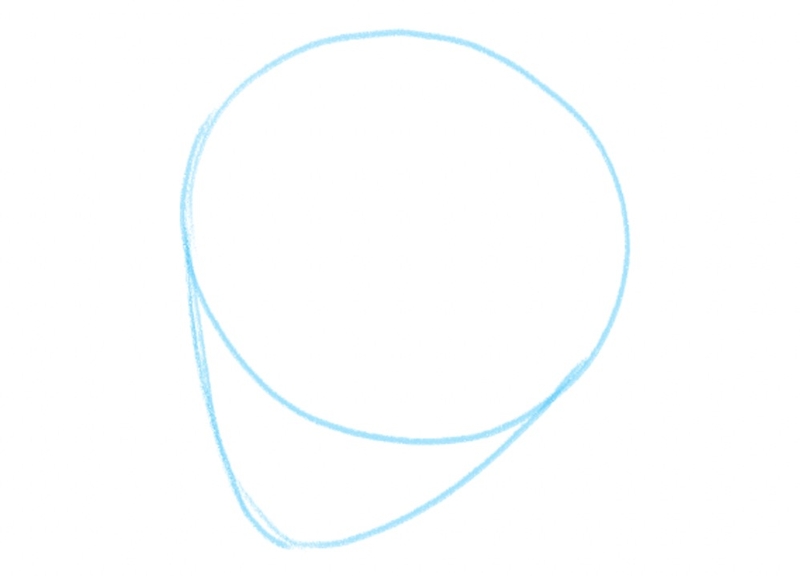
The first thing we’re going to draw is a circle.
You don’t have to draw a perfect circular shape — ours isn’t ideal either, and that’s okay!
This is the outlining stage, and if you mess something up, you can always fix it!

The next thing we’ll do is connect the left and right sides of the circle with a curved line, like this:
Step 2: Draw The Calyx
Recommended tool: H pencil
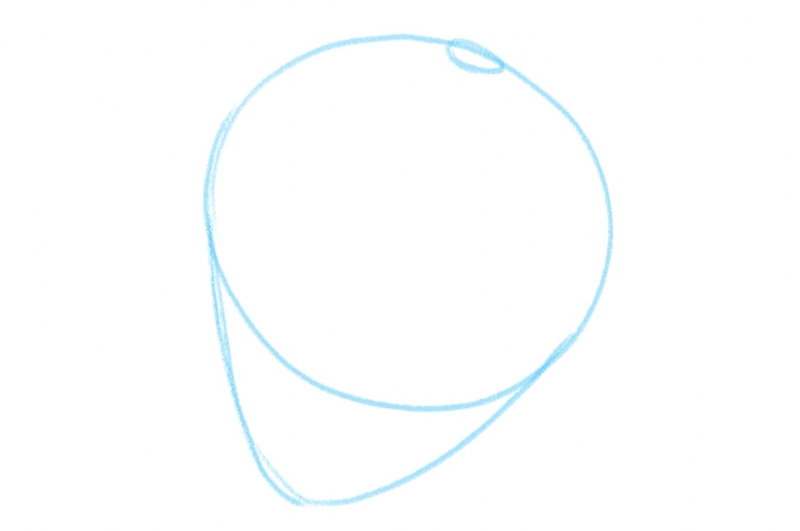
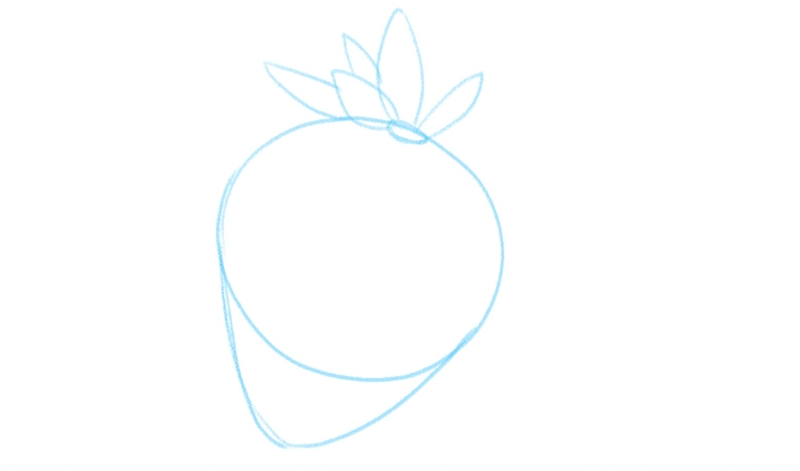
Next, let’s draw the calyx — the green, leafy part at the top of a strawberry.
First, let’s draw an oval shape to mark where the calyx will be:
Now, add a few leaves at the top.
Vary them in size, like so:
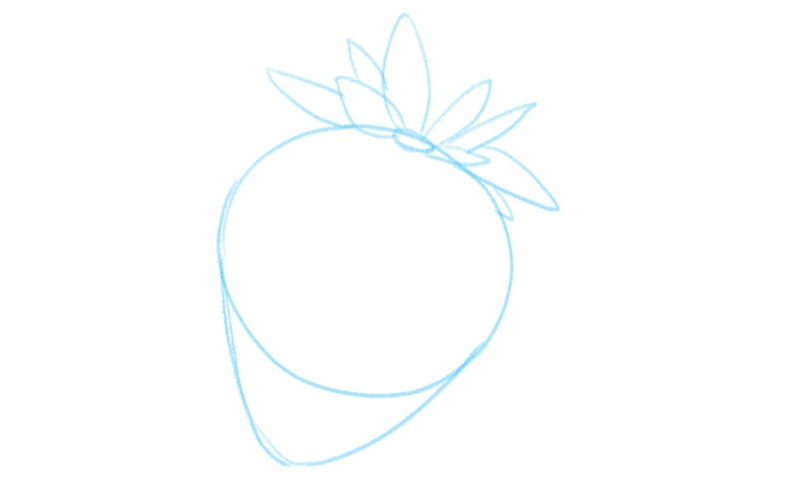
Then, add a few more leaves on the other side, like this:
Step 3: Enhance The Lines
Recommended tool: HB pencil
Once you finish outlining your sketch, it’s time to change pencils and use the HB lead.
Alternatively, you can continue using the same pencil as before, but apply more pressure to create darker lines.
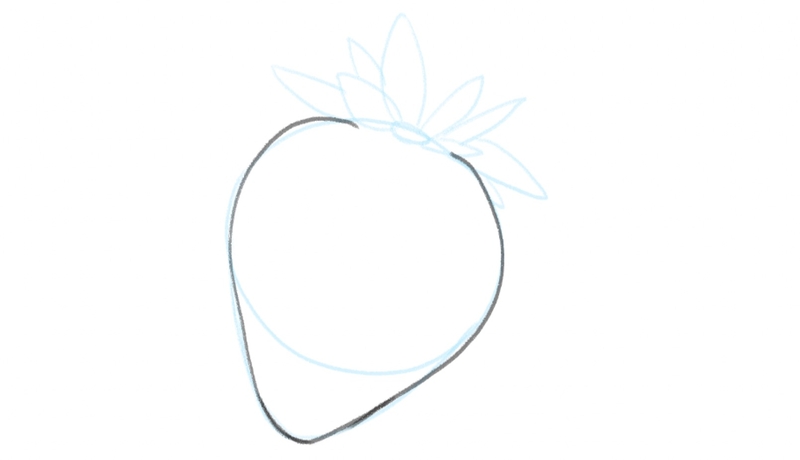
We’ll now go over the guidelines starting at the base.
To create the recognizable strawberry shape, go over the lines starting at the bottom of the base and go toward the calyx, like so:
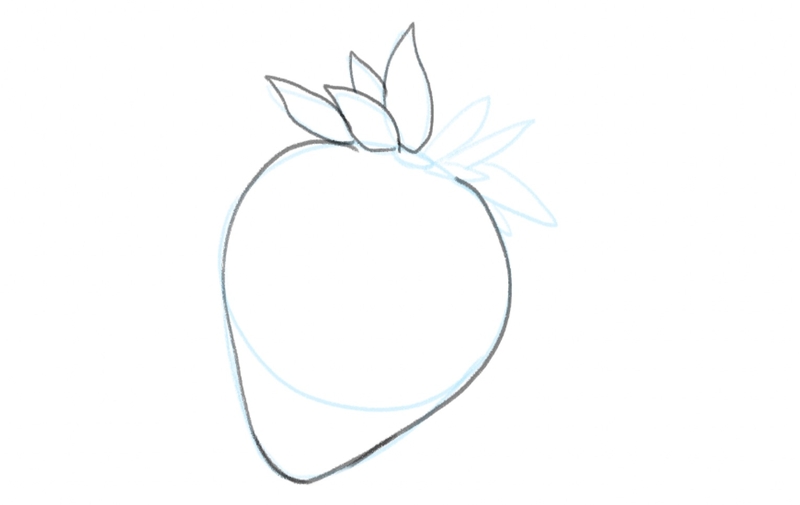
Next, go over the calyx, to make it stand out:
Finish drawing the leaves and sketch the leaf veins, to add more structure to your strawberry drawing:
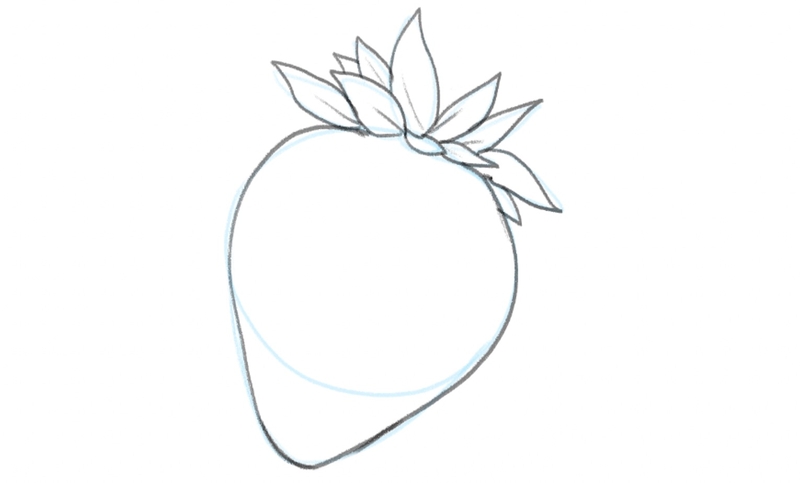
Step 4: Add The Details And Shade The Drawing
Recommended tool: HB and 4B pencils, kneaded eraser
Did you know that those little dots all over strawberry’s body aren’t seeds?
Those are actually achenes, i.e., fruit, and the seeds are inside them!
Strawberries have around 200 achenes, so we better start drawing them.
Just kidding — we won’t draw all of them, but we do need to cover the strawberry’s surface.
But first, grab your eraser and remove the bottom of the circle since you no longer need the guidelines.
Then, go over the body of the strawberry with an HB pencil to shade it.
Before you start, decide where you want the light to come from.
We want it to be on the strawberry’s left side, so we’ll color the center of the fruit in a lighter shade of grey and the area close to its right edge in darker hues — a 4B pencil is great for darker areas.
(Feel free to change the light direction in your sketch!)
For the achenes, use your eraser to create tiny, oval shapes all over the strawberry.
At first, your achenes might look like this:
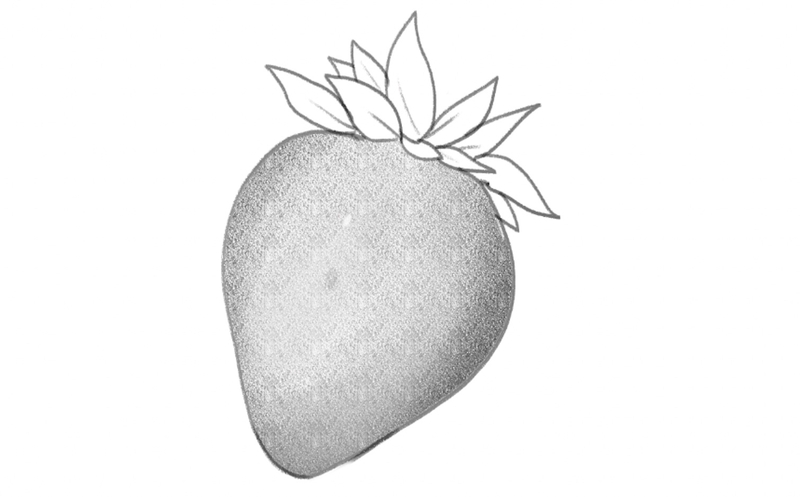
Apply more pressure to your eraser and go over the white parts again to make them more visible.
Then, use a 4B pencil to go around each achene to make it pronounced and to give it dimension, like so:
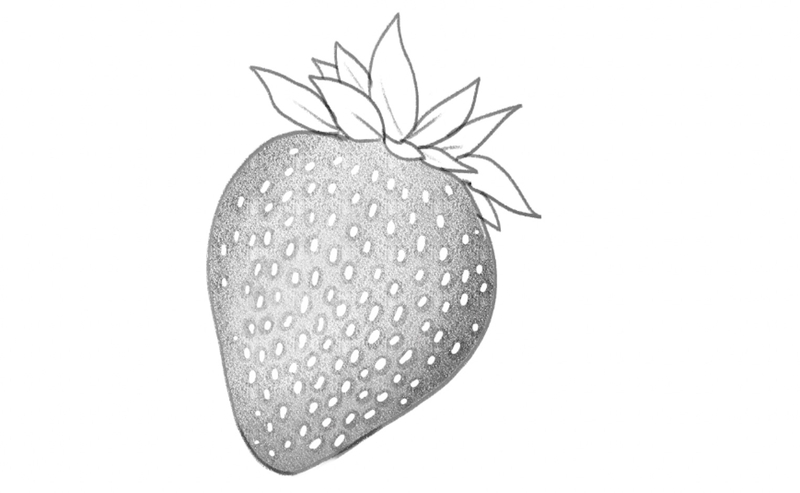
Now, let’s shade the leaves:
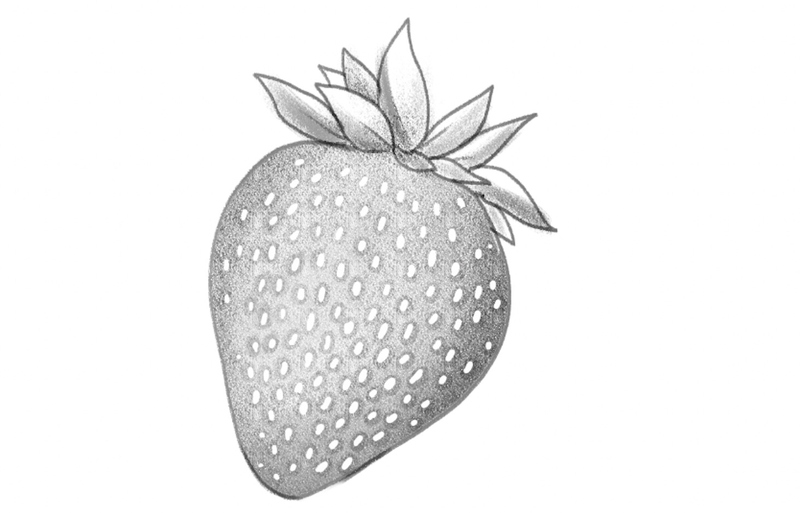
Step 5: Finalize Your Strawberry Drawing
Recommended tools: kneaded eraser, blending stump
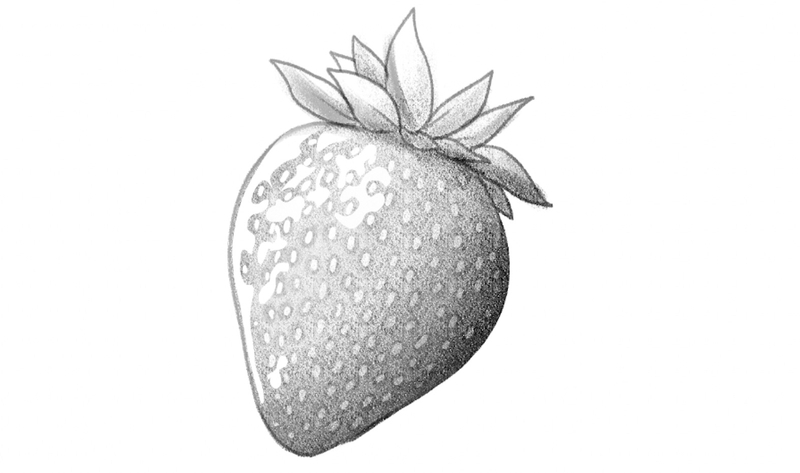
To make your drawing come to life, use an eraser to make the left side of the fruit lighter than the rest of the strawberry (the area that will be the lightest depends on where you want the light to come from).
Erase the grey areas but make sure to leave the darker bits around the achenes.
You can also use a blending stump to make the transition from lighter to darker areas smooth and subtle:
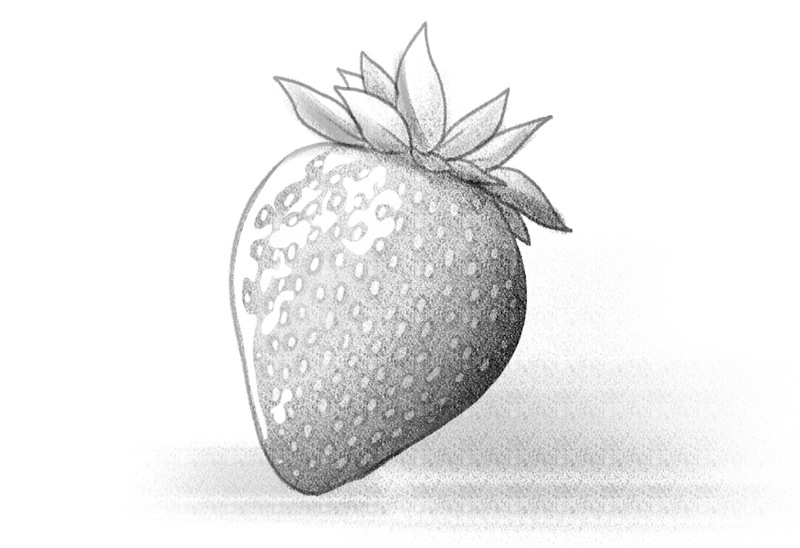
The final step in strawberry drawing is to shade the area below the fruit, for more depth:
Finished Your Strawberry Drawing? Try These Next!
Now that you know how to draw a strawberry, why stop here?
Continue your creative journey and explore more of our step-by-step art guides.
If you feel like learning how to draw elements from nature, check these out:
- How to draw a forest
- How to draw flowers
- How to draw a mushroom
- How to draw a tree
- How to draw a pumpkin
In case you’d like to learn how to draw animals, these guides are for you:
- How to draw a deer
- How to draw a fish
- How to draw a horse
- How to draw a cat
- How to draw a dog
- How to draw a penguin
- How to draw a bat
- How to draw a wolf
We also have step-by-step tutorials on how to draw people:
- How to draw a mouth
- How to draw hands
- How to draw ears
- How to draw a face
- How to draw eyes
- How to draw a person
- How to draw a nose
All of our video guides are uploaded to our YouTube channel, so give them a look and keep drawing!
Meet The Artist
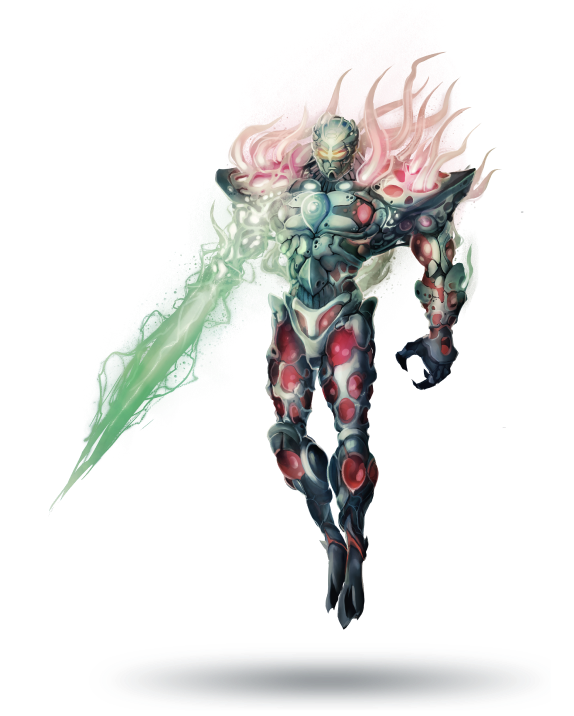
All of our how-to-draw tutorials are created by Goncalo Lopes — a talented artist with years of professional experience in the world of comics, games, TV series and films.
He has collaborated on some pretty well-known projects, including Transformers, GI-Joe, TMNT, Adventure Time, Godzilla and many others.
His studio has also created the BIOWARS video game!
Have some fun and play it now!
A Recap On Simple Strawberry Drawing
Drawing a strawberry can be fun and easy when you do it step by step.
There’s no need to rush the process and draw the strawberry shape at once.
Instead — start by drawing a circle, and then connect its sides with a downward-facing curved line.
Next comes adding the leaves, to finalize the outline.
After that, you can color the entire body of the strawberry in a light grey shade.
Using your eraser, create tiny, oval shapes for the achenes on the strawberry’s surface.
Decide where the source of light should be, and then make the areas exposed to light brighter than the rest of the fruit.
