Related Resources
Time to learn how to draw a man’s best friend!
Adorable as they are, dogs can be challenging to draw.
If you can’t get the shape of their head and the size of their body right, we get you. And we can help!
In our previous tutorials, we showed you how to draw a cat and how to draw a horse. Now, let’s expand your animal kingdom, or give your comic book character a new sidekick! We’ll show you how to draw a dog in a few, simple steps:
Now, let’s break the video tutorial into several steps so that you can explore them at your own pace!
The Tools You’ll Need When Learning How To Draw A Dog Step By Step
When drawing a dog, we recommend you use the following tools:
- An H pencil: It’s the best choice when drawing the basic shape of the dog’s body.
- A 4B pencil: A softer lead is the best for shading.
- A kneaded eraser: This type of eraser is perfect for erasing sketch marks.
- Sketch paper: Make sure to use sketch paper with micro-perforations because that way you can easily apply corrections if need be.
Of course, if you prefer to use a drawing tablet when making art, go for it!
How To Draw A Dog In 12 Steps
To help you learn how to draw a dog the easy way, we’ll break down the process into 12 easy-to-follow steps.
So, grab your drawing supplies and let’s get started!
1. Draw The Base Of The Dog’s Body
When drawing a dog, many people tend to start from the head. However, if you’re a beginner, you might find it difficult to get the shape of the head right from the get-go.
That’s why we’re going to simplify the process, and that means no sketching the head yet!
Before you start, let’s decide on the angle from which we’re going to draw the dog.
We recommend you opt for the side angle like Gonçalo, since it’s the easiest to master for beginners.
Now, the first step to drawing a dog is to sketch the base for its body.
And that’s two circles, like this:
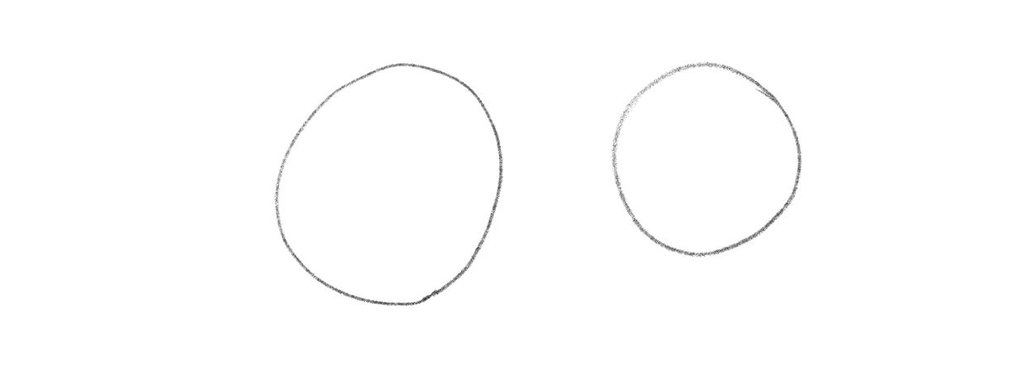
The dog we’re illustrating is turned to the left, so the circle on the left-hand side is bigger.
That’s where the dog’s chest will be.
The circle on the right should be smaller, but the tops of both circles should align.
2. Connect The Circles To Create The Torso
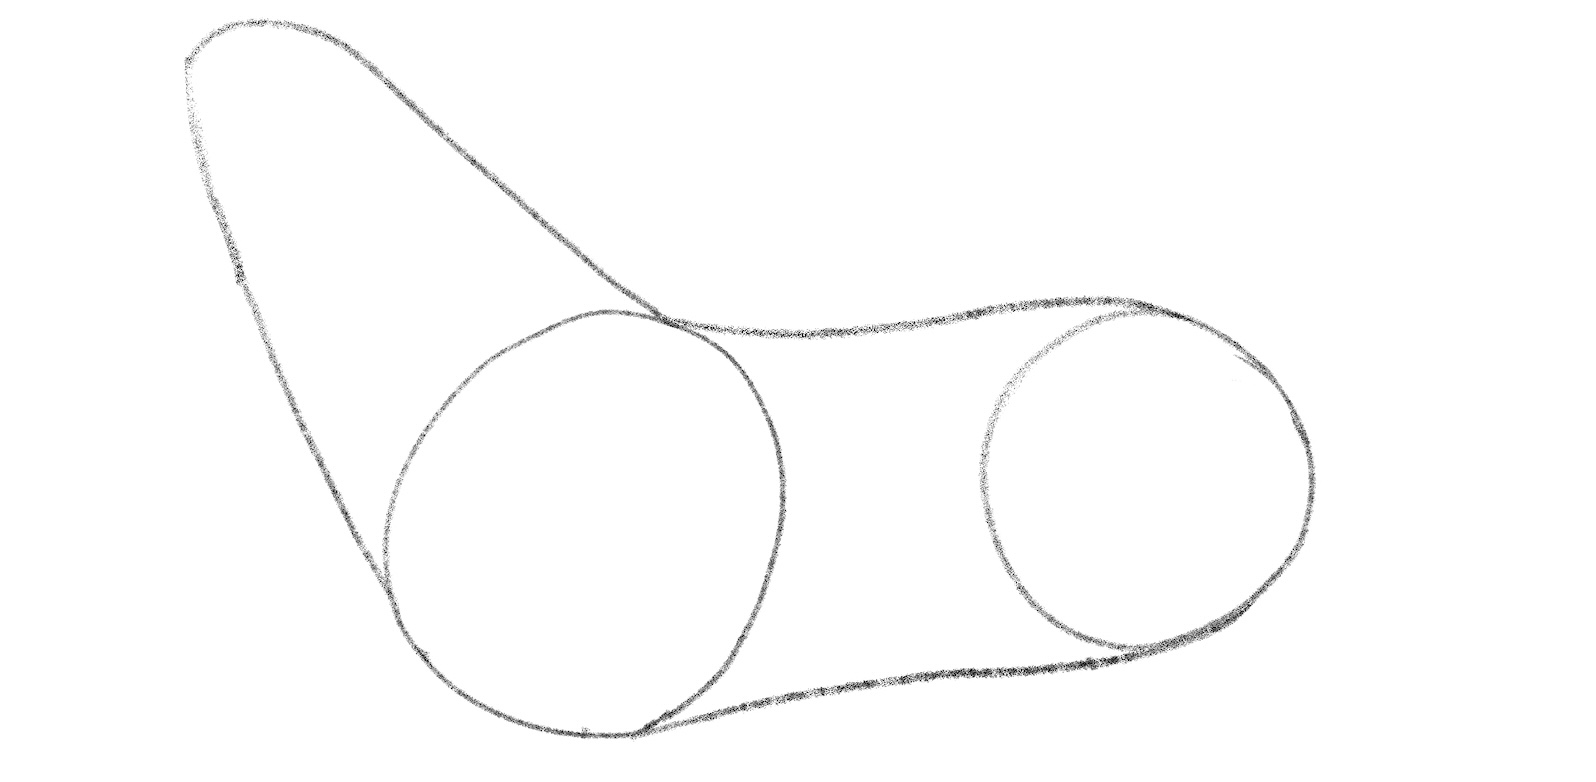
Let’s now connect the two circles you previously drew.
The line that connects their tops is where the dog’s back is.
By connecting the bottom one circle to another, you’ll get the dog’s belly:
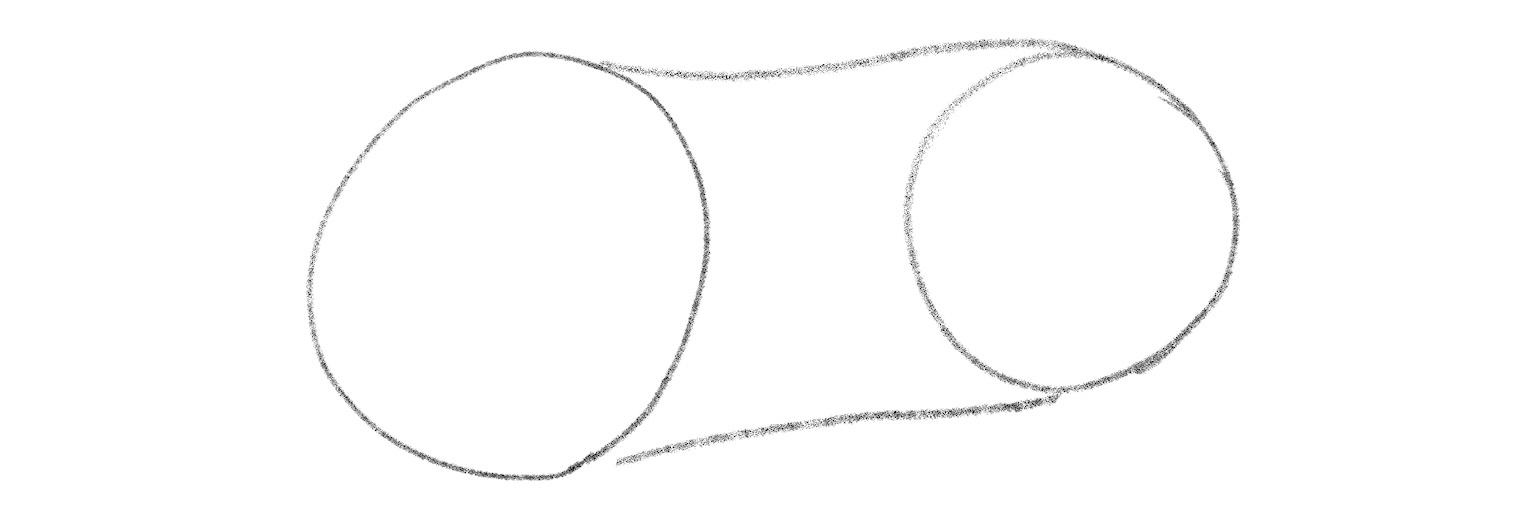
Just four simple lines later, you finished drawing the outline of the dog’s torso!
3. Draw The Neck
Once you finish drawing the dog’s torso, it’s time to illustrate its neck.
Draw a line from the dog’s chest upwards and then it lowers it toward the dog’s back.
When illustrating this step, pay attention to the length of the dog’s neck.
To ensure it isn’t too long or too short, observe the size of the dog’s torso — the neck should be slightly shorter, like this:
4. Outline The Upper Arm And Upper Thigh
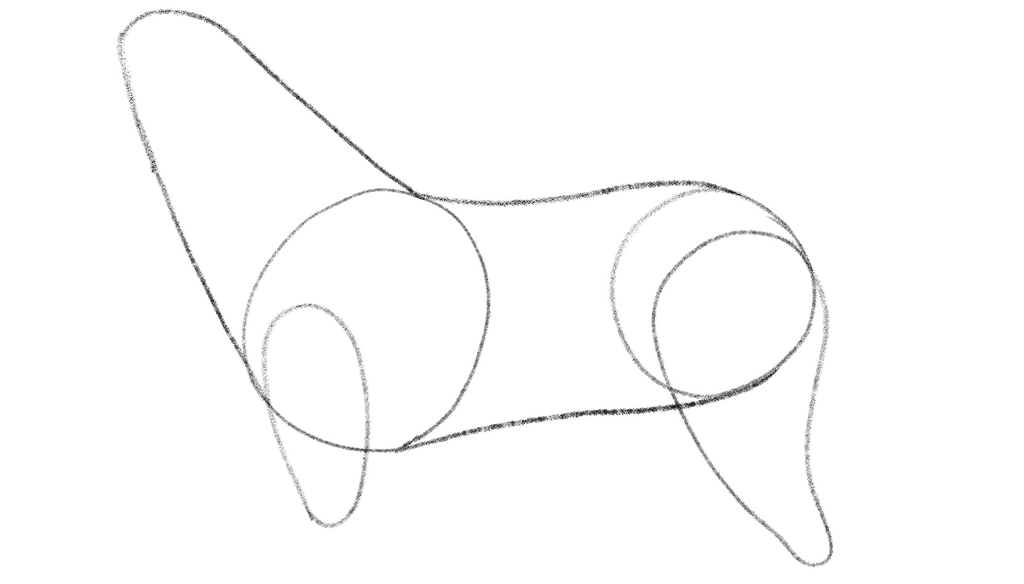
The outline of the dog’s upper arm resembles a loaf of bread. So, go ahead and draw one cute loaf and make it cover about two-thirds of the front circle.
As for the upper thigh, its outline should cover the better part of the back circle. Again, don’t bother drawing the perfect shape because we’ll show you how to tweak it later and make it look like a proper dog leg:
5. Sketch The Head
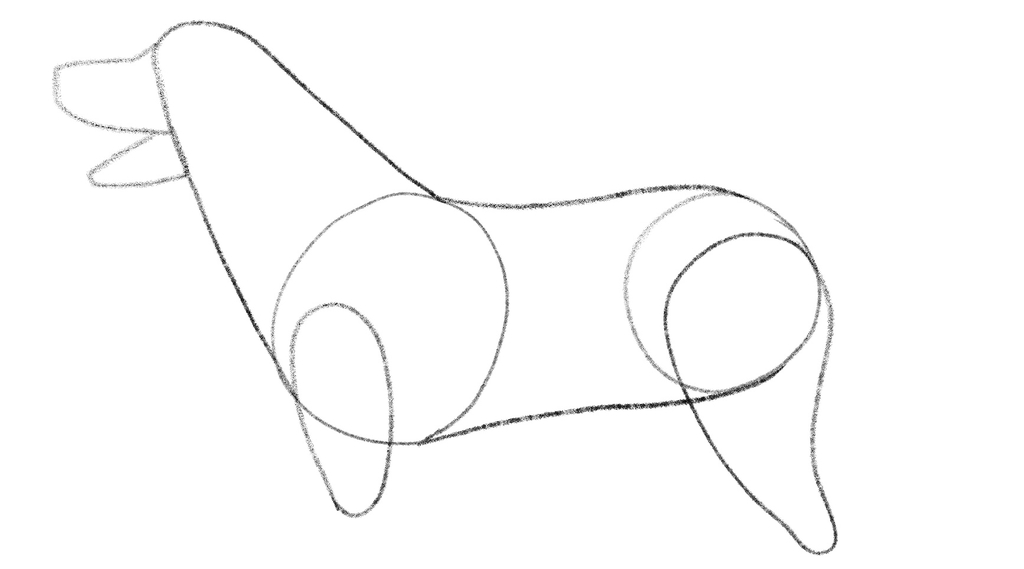
Now is time to illustrate the dog’s forehead, muzzle, lower lip and its flews (which is just a sophisticated word for the dog’s upper lip!).
Again, Gonçalo drew these body parts using simple lines and shapes. The jaw is open because that’s almost the default state for every dog while they adoringly look at you (orrr the food).
The lower lip’s outline looks like a triangle with a soft apex.
When drawing the muzzle and the upper lip, sketch the forehead first and then extend that line towards the lips.
6. Add The Dog’s Ear
Since you’re drawing a dog from the side, only one of its ears is visible.
A lot of dogs have triangle-shaped ears, but of course, that varies depending on the breed and the dog’s stance. For example, if a dog is in a protective mode, it usually perks up its ears, so they’re pointier and more threatening than usual.
Gonçalo is drawing a happy, good pup, so the dog’s ear is hanging:
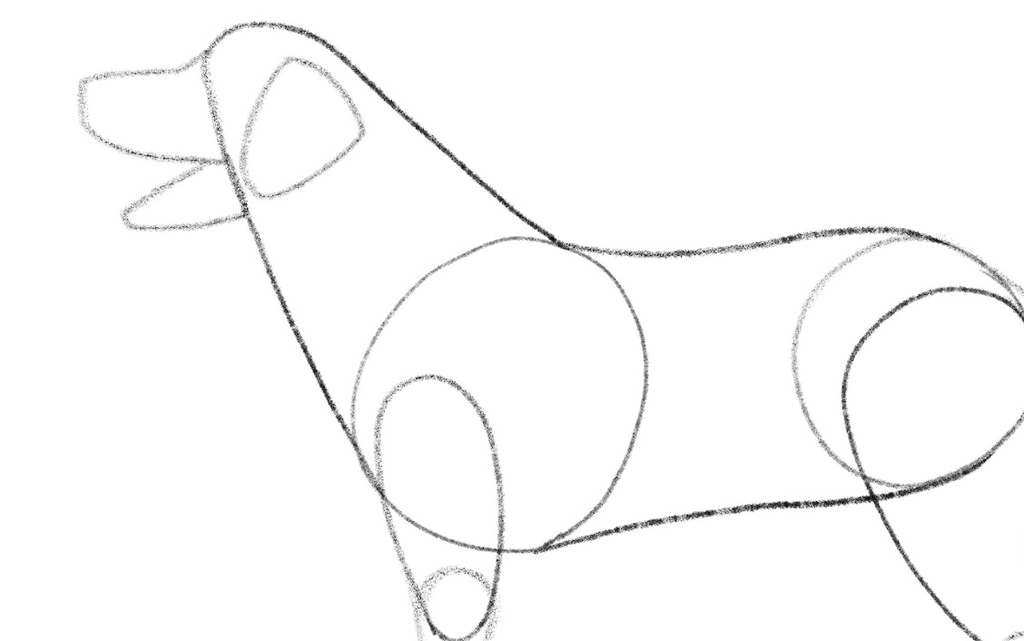
This ear isn’t exactly a triangle, but it does resemble one, with a rounded tip.
7. Outline The Forearm, Lower Thigh and Tail
Gonçalo drew the forearm and the lower slightly over the dog’s upper arm and upper thigh. That’s because the place where the two parts of the dog’s leg overlap is where its joint is, like this:
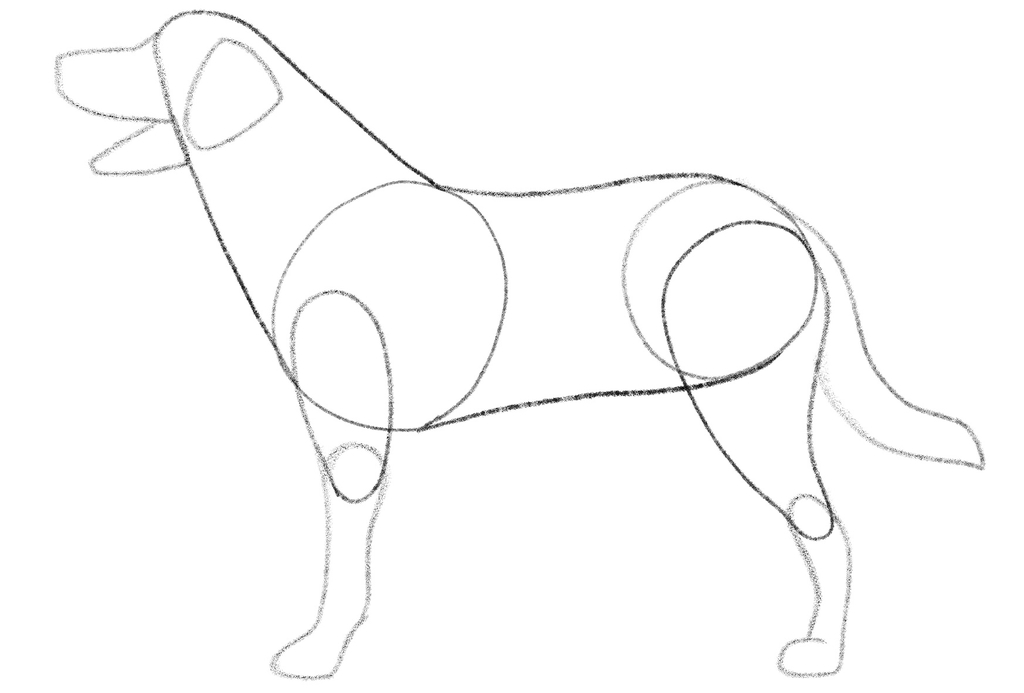
Now, let’s give this doggy a tail!
Again, the shape and the size of a dog’s tail depend on the breed, but we opted for a slightly longer tail, Labrador style.
And that’s it, the basic outline for a dog drawing is now finished!
No, let’s add some details to the dog’s head.
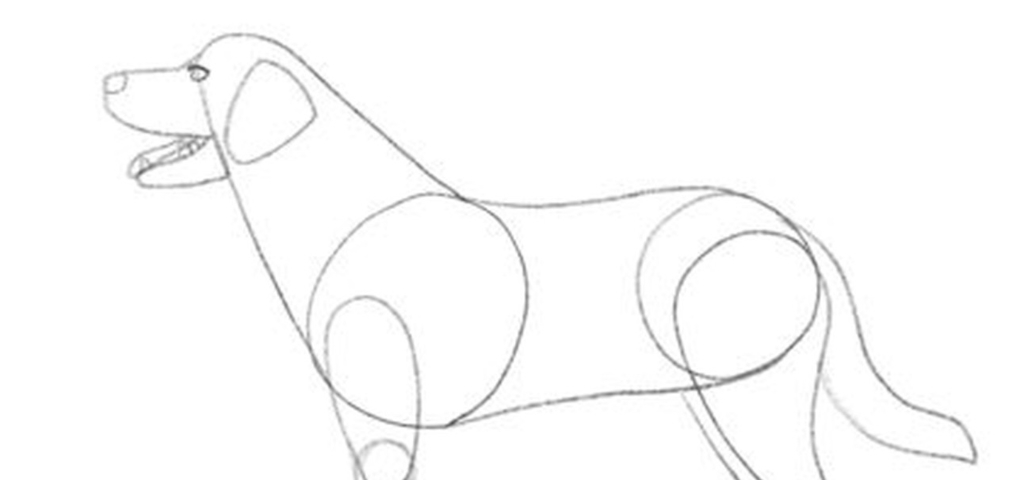
8. Outline The Dog’s Eyes, Nose And Teeth
To bring this good doggy to life, it’s time we added its eyes, nose and teeth.
By the way, did you know that dogs have three eyelids? The extra eyelid is located underneath the two eyelids we all know are there, and it helps protect the dogs’ eyes and keep them moist.
When drawing an eye, sketch an oval shape first, but add more angle to the dog’s lower eyelid, to soften the eye’s sharpness.
As for the dog’s boop-y nose, you can sketch it as a circle.
You can also add a few teeth. For example, you can make the canines visible and several premolars and molars.
Oh, and don’t forget to draw the tongue!
Dogs almost always have theirs slightly out, and the one Gonçalo illustrated is no different!
9. Draw The Forearm And The Thighs On The Other Side
Now’s the time you added the other pair of dog’s legs.
Since we’re drawing a dog turned to the left, only a small section of its legs on the right shows.
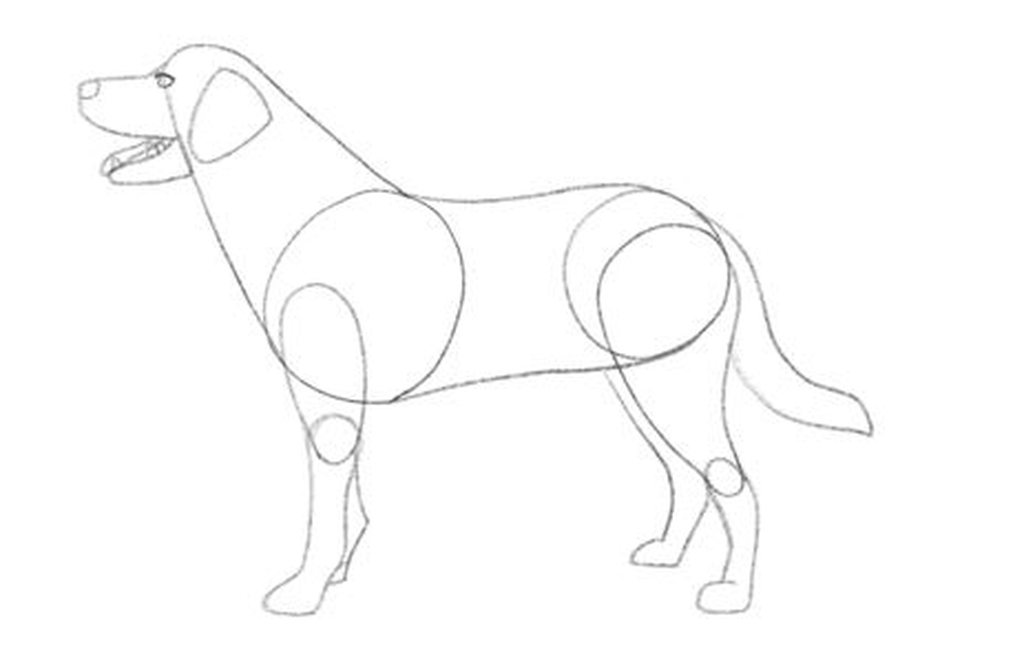
The right forearm just slightly peaks in the back, while the left thigh is slightly more visible, as Gonçalo’s sketch illustrates.
10. Start Shading
You’re getting closer to finishing your drawing!
Since the outline is finished and all the details are in, it’s time to slightly shade the illustration and add some finishing touches to it.
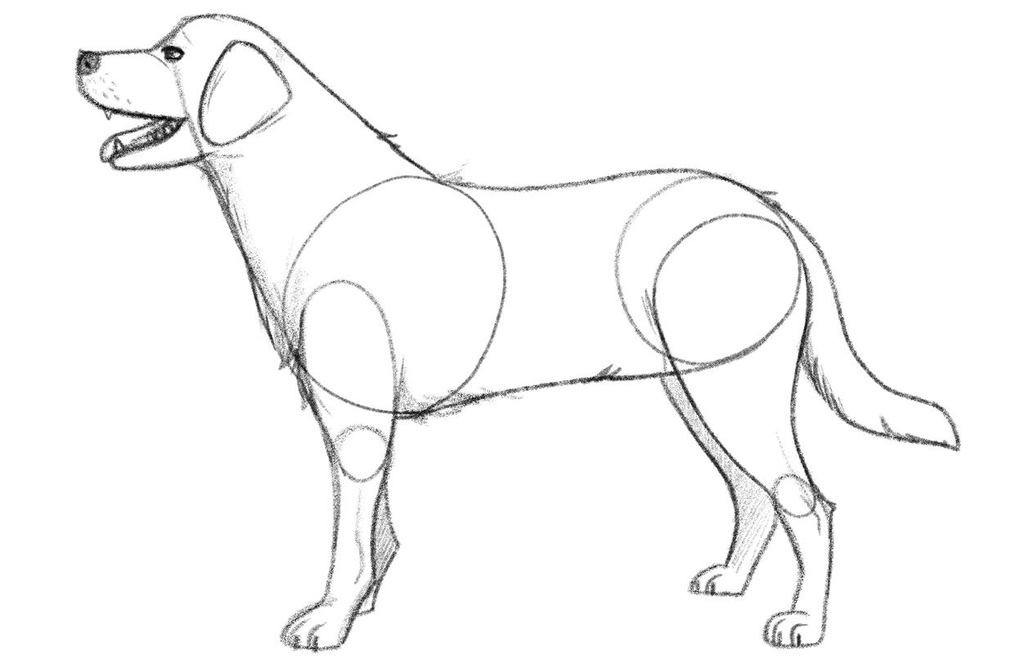
You can grab a 4B pencil and apply pressure to it to make the outline of the dog’s body darker and more pronounced.
The shade is mostly falling on the dog’s right forearm and thigh, but don’t forget to also shade its chest and belly!
11. Add The Dog’s Hair
To make your drawing of a dog more realistic, how about you add hair to it?
Feel free to draw short zigzag lines across the dog’s belly, back and neck.
Then, add the pupil, the nostril and a few dotted lines to sketch the whiskers.
By the way, don’t forget to add two lines to illustrate the dog’s wrist and hock!
That way, its arms and legs will look real!
Also, draw the fingers on the doggy’s paws by sketching two short lines on each paw. Then, add even shorter and darker lines for the nails!
12. Erase Unnecessary Details
The final step to drawing a dog is to delete the elements we no longer need.
Take your kneaded eraser and slowly remove all sketch marks, so that the end result looks like this:
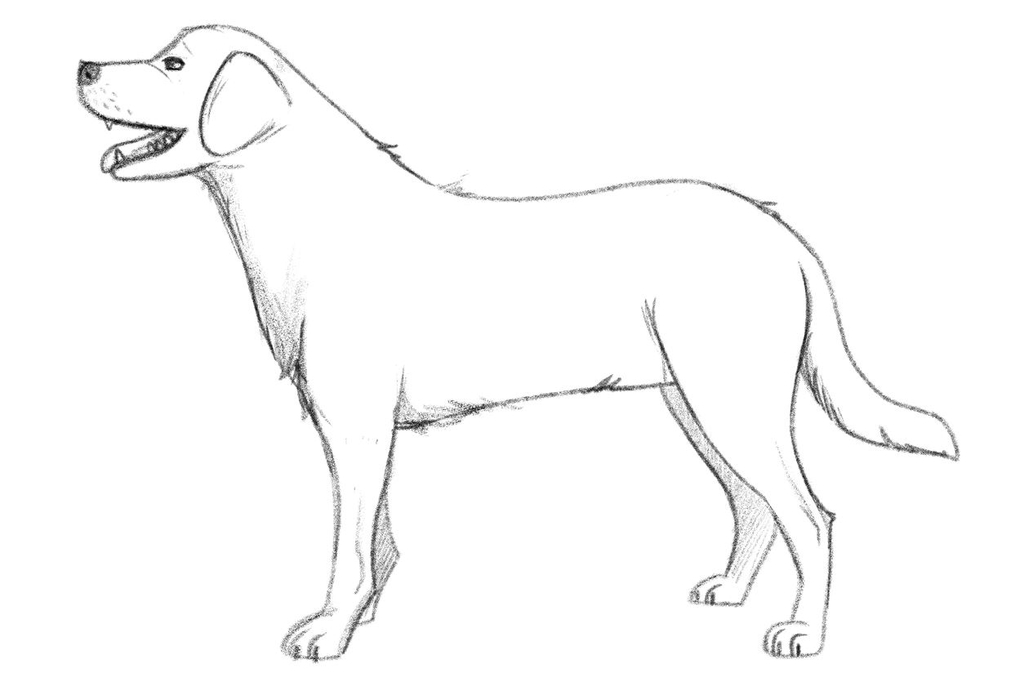
Finished Your Dog Drawing? Draw These Next!
Once you finish exploring our guide on how to draw a dog, we encourage you to continue honing your skills and explore more of our simple guides, including:
- How to draw a cat
- How to draw a dragon
- How to draw a rose
- How to draw anime hair
- How to draw a horse
- How to draw a wolf
- How to draw a bird
- How to draw a fish
And many more!
Meet The Artist
Goncalo Lopes is the artist behind this tutorial on simple dog drawing.
He’s been a part of the Biowars team for a number of years and has designed all of the Biowars characters.
Throughout his career, Goncalo has worked on numerous well-known projects, including Transformers, GI-Joe, TMNT, Adventure Time and Godzilla.
Recap On How To Draw A Dog Easy
We hope you had fun learning how to draw a dog.
As you could see, the important thing is to start small and draw the base of the dog’s body first.
That way, you’ll establish what its size should be at the very beginning, so you can then proportionately draw the rest of its body.
