Related Resources
Time to learn how to draw curly hair!
Did you know that Alabama has the highest percentage of curly-haired people?
Curly hair looks fun and cute, but when it’s time to draw it, many beginners struggle to get the shape of the curls right.
That’s why we’re here.
In this guide, we’ll show you how to draw curly hair, including three different types:
- Curly
- Wavy
- Coily
The steps are simple, so even if you’re new to drawing or you don’t think you’re particularly good at it, you’ll be able to easily follow the guide.
With enough practice and perseverance, there’s no limit to the art you’ll be able to create.
Sketching Tools To Draw Curly Hair
To learn how to draw curly hair, these tools might come in handy:
- An H pencil: During the sketching, it’s best to use a pencil with a hard lead. This type of lead leaves a light trace on paper, so it’s easier to erase mistakes and guidelines.
- An HB pencil: The golden mean of pencils, a medium hard lead is neither too hard nor too soft. You can use it to add details to curly hair and when shading it.
- A B pencil: Soft lead is the best choice for shading because of its dark grey, almost black color.
- A blending stump: This is a pencil-like tool you can use for blending the lines when shading. A blending stump has two pointed ends and is made up of tightly rolled paper.
- A kneaded eraser: Soft kneaded erasers are true shape shifters, and you can change their length and shape depending on what you want to erase. You can also use this eraser to highlight specific elements of your sketch.
- Lightly textured sketch paper: The lightly textured paper has a smooth surface, which means that it’s easier to draw on it and erase unwanted lines from its surface.
These are just recommendations — you can use whatever pencil and paper you’re most comfortable with!
Now, let’s start learning how to draw curly hair!

Curly Hair Drawing In 4 Steps
First up, let us show you how to draw curly hair.
1. Draw The Hairline
Recommended tool: H pencil
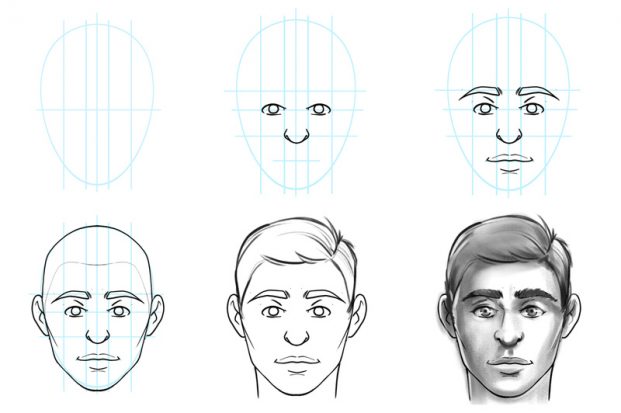
Before you start drawing curls, you’d want to sketch a male or female face first.
You can check out our step-by-step guide on face drawing if you need help in that regard.
Now, back to curls.
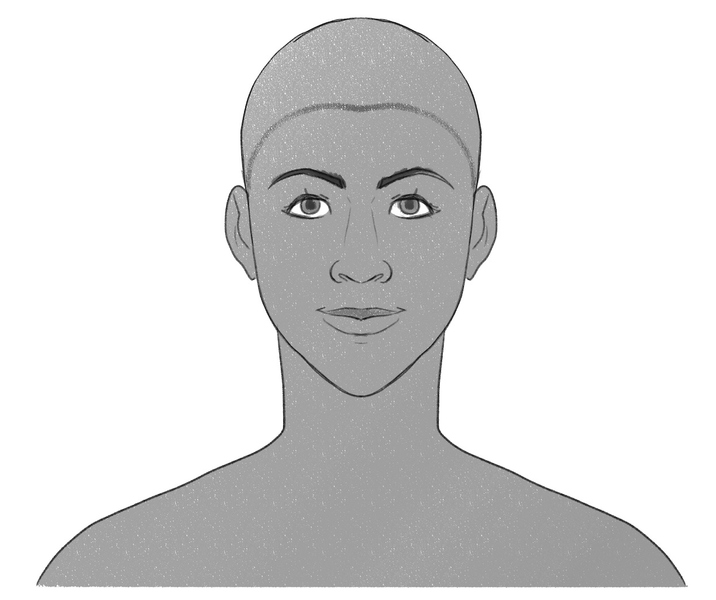
Once the face is in place, let’s draw a hairline to mark the edge of the hair.
To sketch it, simply connect the top of one ear to the other with a curved line, but when you reach the middle of the forehead, gently point the line toward the nose, like so:
2. Add The Hair At The Front
Recommended tool: H pencil
When drawing the hair, avoid making the mistake of outlining the entire hairstyle at once. The best way to learn how to draw something new is to draw it piece by piece; that way you avoid drawing disproportional elements.
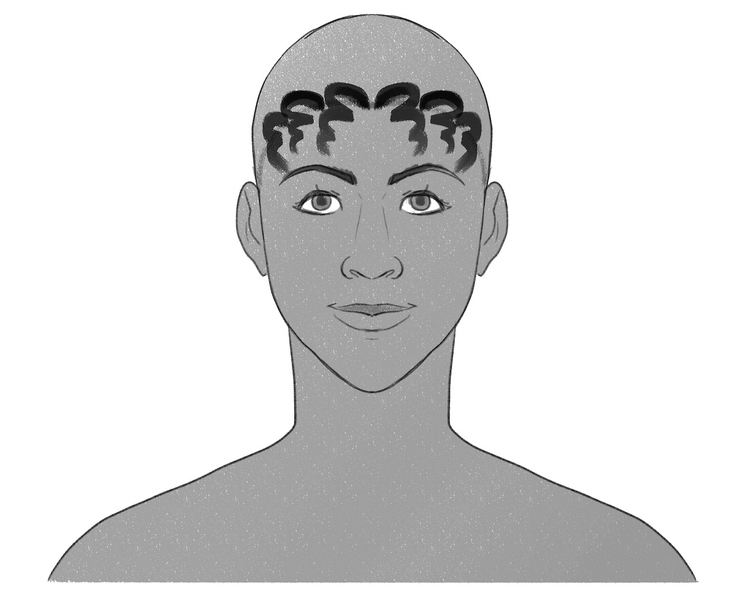
Now, let’s draw some curls right along the hairline. You can add three on the left and right from the slight curve in the hairline.
The difference is in the way the curls are rotated; those on the left are facing right and those on the right-hand side are facing left.
We want to draw a short curly hairstyle, so we’re keeping the curls short, above the eyebrows:
3. Continue Adding The Hair
Recommended tool: H pencil
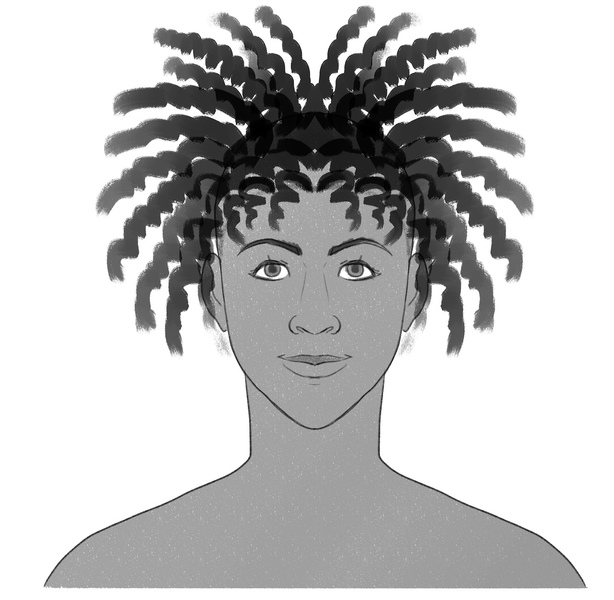
Continue adding the curls all over the girl’s head.
You can start on the left and then slowly move on to the top and the right side.
These curls should be longer than those at the front.
Ours are about three times the size of the hairline curls.
Don’t overdo it with the amount of hair you draw at this step.
Right now, it’s important to sketch the general shape of the girl’s hairstyle and the length of her hair:
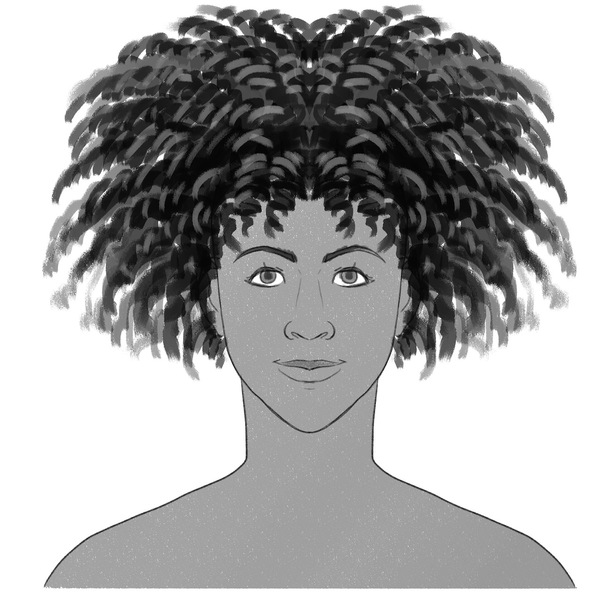
Now that you know what the hairstyle will look like, you can add the hair to the empty spots.
Start at the bottom on either side and work your way to the top of the head:
4. Shade Your Drawing
Recommended tools: HB and B pencils, blending stump
Your curly hair drawing is mainly finished; all that’s left to do is work on some details to add more dimension and texture to the hairstyle.
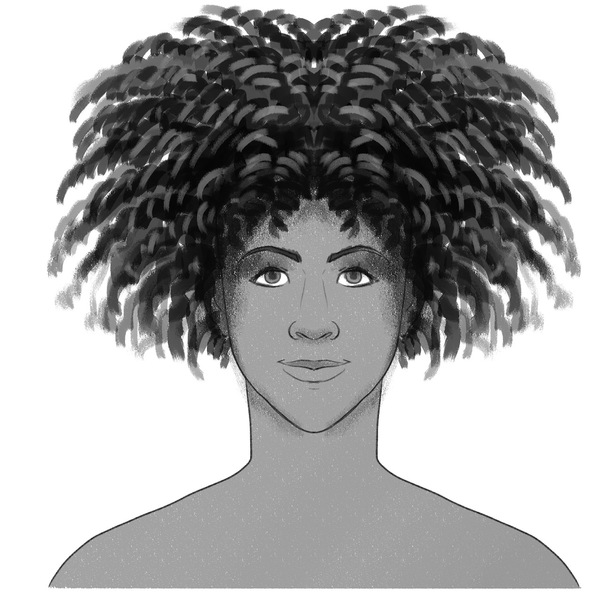
For instance, you can use an HB pencil to softly shade the forehead and the area around the eyes and the cheekbones.
The parts of the hair that are closest to the head should be darker than the rest and you can go over them with a B pencil or simply apply more pressure to your pencil of choice:
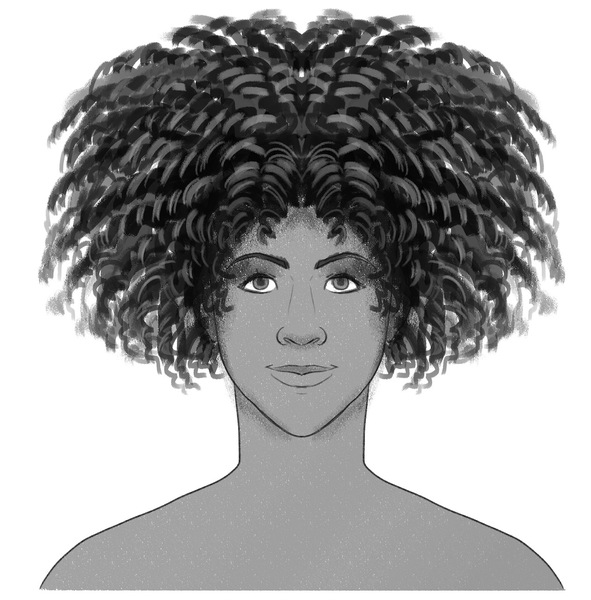
The last step to drawing curly hair is to soften the lines.
You can use a blending stump for it or simply go over the lines by angling the pencil a bit:
Wavy Hair Drawing In 4 Steps
Now, let’s explore the steps to drawing wavy hair.
1. Draw The Hairline
Recommended tool: H pencil
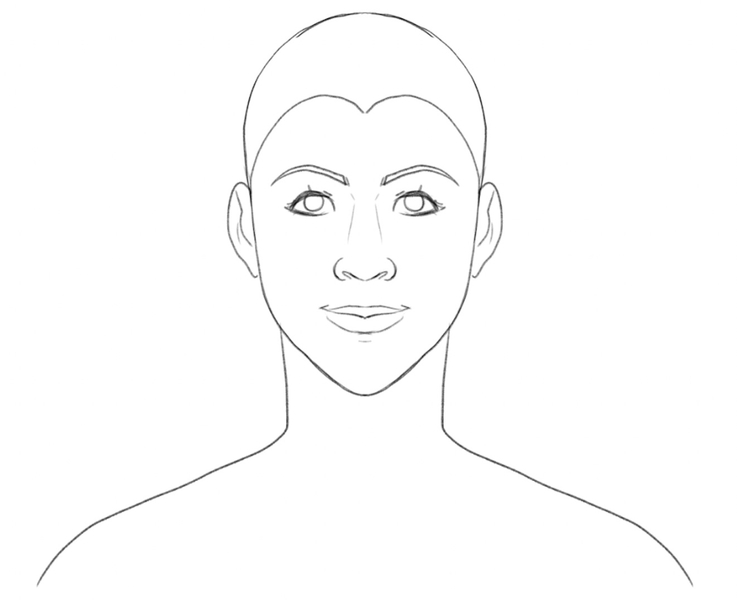
The first step to drawing any kind of hairstyle is to add the hairline on a person’s head.
This time, let’s draw it as a soft “M,” like this:
2. Add The Hair At The Front
Recommended tool: H pencil
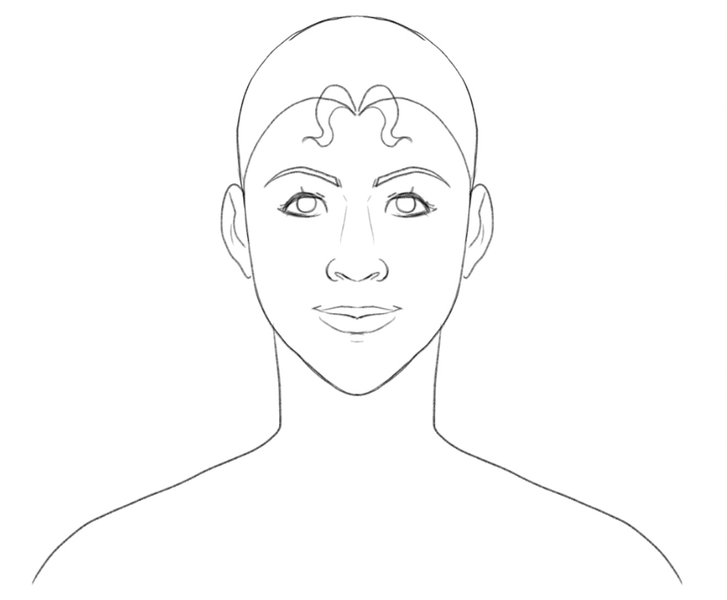
Now, draw two snake-like shapes starting at the middle of the hairline.
Make sure the shapes aren’t too curly or long.
These are going to be the bangs and we don’t want them to cover more than one-half of the girl’s forehead:
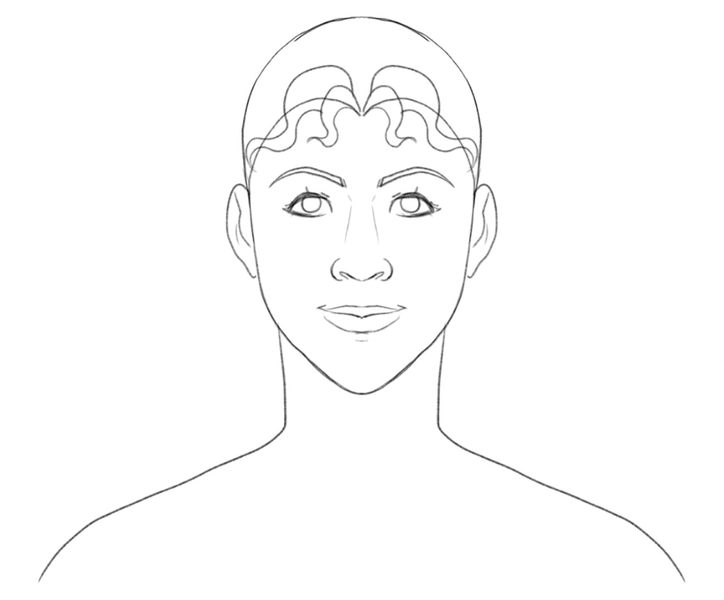
Next, sketch the same wavy shapes as earlier, but this time, make them longer so they reach the area above the girl’s ears.
When adding the second layer of wavy bangs, make sure you place their root at the top of the lower layer:
3. Continue Adding The Hair
Recommended tool: H pencil
Now, let’s finish drawing the waves at the front of the girl’s head.
Draw two more wavy snake-like shapes to cover the rest of the forehead and have them reach the middle of the ears.
Then, it’s time to add the hair to the rest of the girl’s head.
Let’s start from the middle.
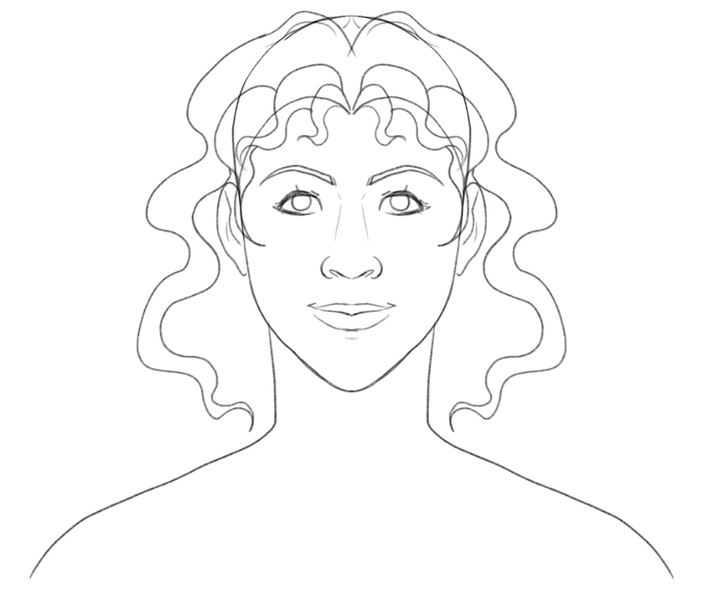
Draw wavy shapes like you did at the front but make them longer than before.
We want to draw a shoulder-length hairstyle, so we want these waves to end just above the shoulders, like so:
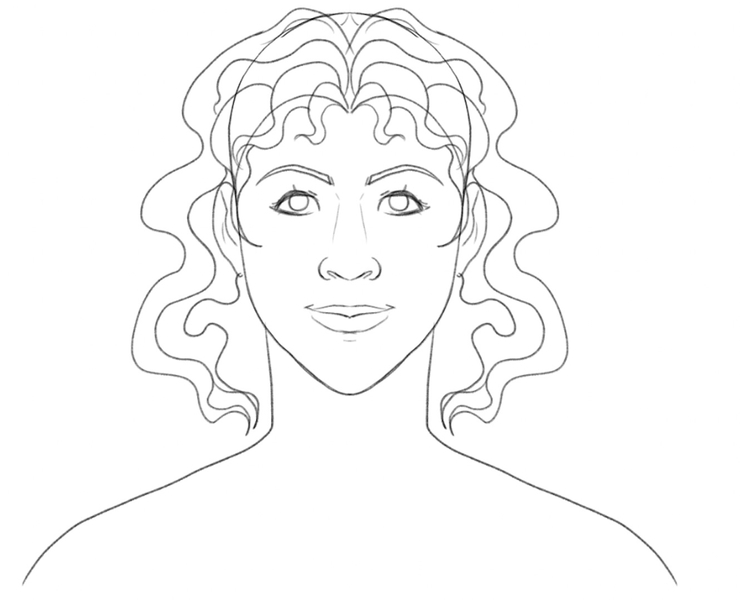
Now, sketch short two waves starting at the middle of the head and have them touch the inside of the long waves you drew in the previous step. You’ll want to do this to add volume to the hair and to fill the gaps.
Then, draw irregularly-shaped, wavy lines from the bottom of both ears and connect them to the inner side of the long waves from before:
Continue adding the wavy shapes all around the girl’s head.
Loosen up your arm and don’t worry too much about the shape of the lines. What matters is that the curls aren’t small; instead, keep drawing the waves and point them toward the girl’s shoulders.
Oh, and add stray hair here and there since the waves are bouncy and can stick out from the rest of the carefully styled hair.
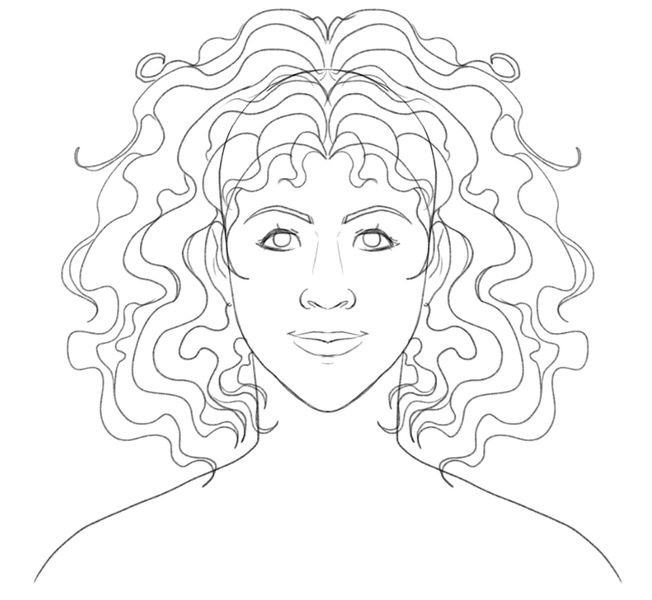
To finalize the outline of the wavy hairstyle, add some more short strands of hair at the front, to frame the face:
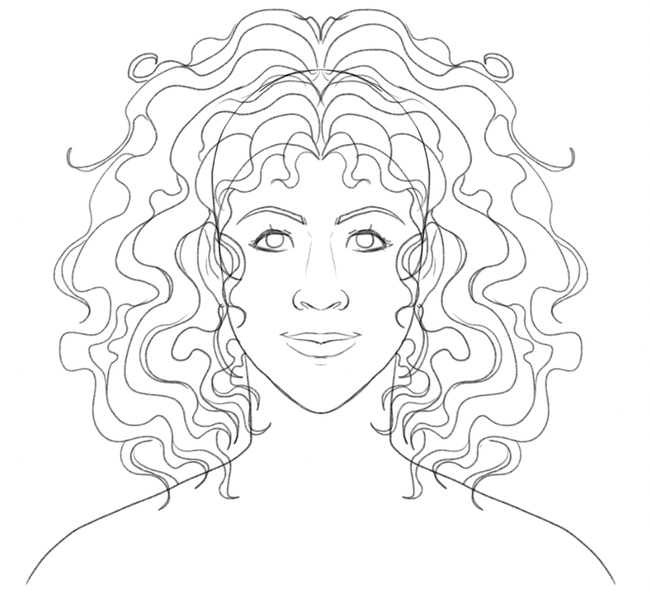
Remove The Unneeded Details And Shade The Drawing
Recommended tools: HB and B pencils, blending stump, kneaded eraser
Now, you can use your eraser to remove the lines that you no longer need.
For example, the outline of the head isn’t visible because of all the hair; so, using your kneaded eraser, carefully erase the line:
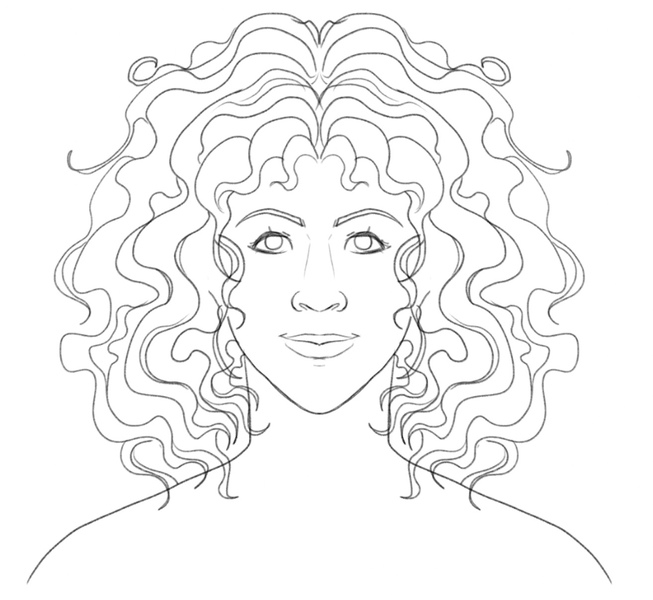
To shade your wavy hairstyle, you can first go over the entire hair with an HB pencil and color it in a light grey shade:
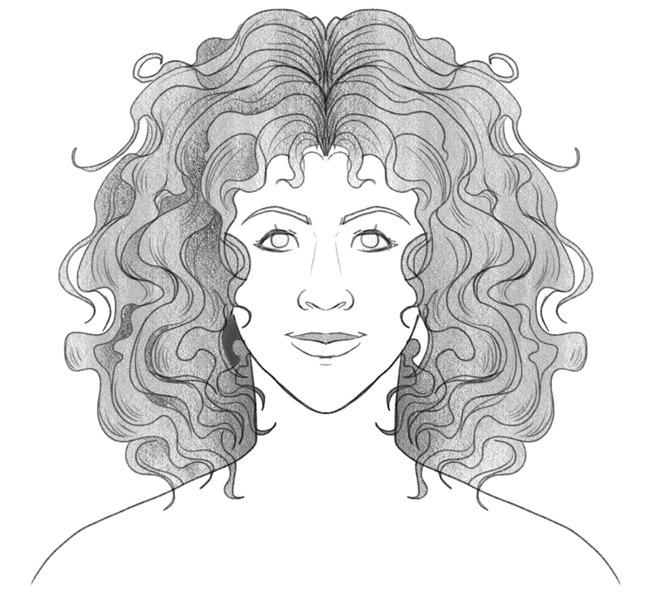
Now, use your kneaded eraser to add some highlights to the top of the hair.
The parts of the hair on the inside should be darker than the rest.
Oh, and pay attention to the hair parting in the middle; go over it with soft strokes to make it slightly darker than the hair around it:
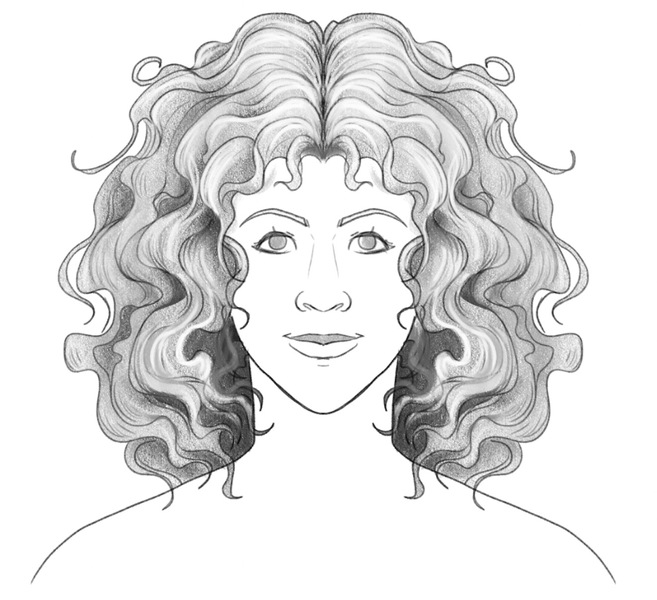
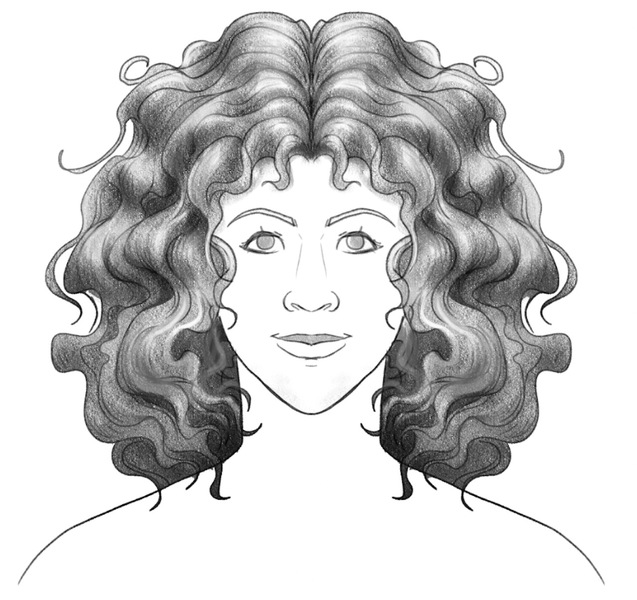
To make the lines softer and the drawing more cohesive, don’t hesitate to use the blending stump.
Play with your HB and B pencils or simply apply different levels of pressure on your pencil to depict voluminous waves, like so:
How To Draw Coily Hair In 3 Steps
Last but not least, let’s explore the steps to drawing coily hair!
1. Draw The Hairline
Recommended tool: H pencil
You know the drill by now.
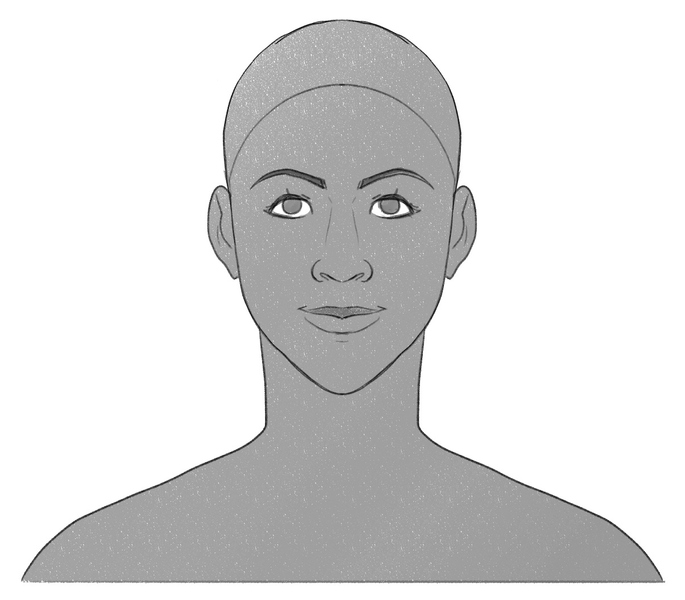
The first thing to draw when sketching any hairstyle is the hairline.
This time, let’s draw a curved line from one ear to the other, like so:
2. Sketch The Hair
Recommended tool: H pencil
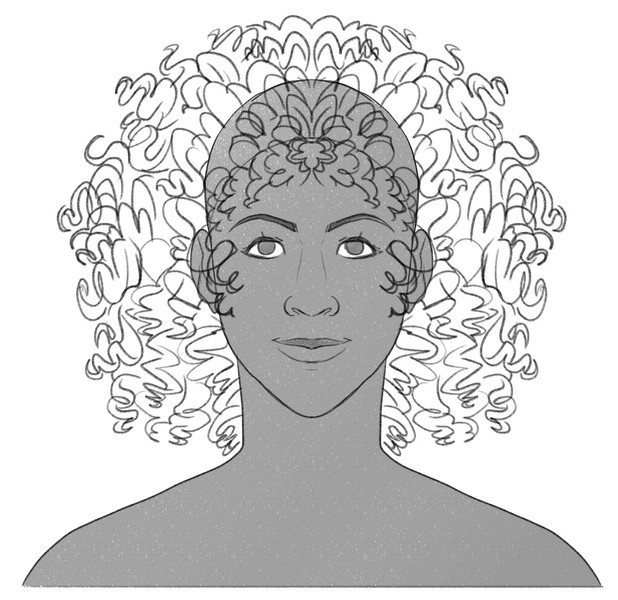
When drawing coily hair, the trick is to sketch tight curls from the scalp.
Start at the front, where the hair is shorter.
Continue to draw scribbly lines all over the head and point them outward, like this:
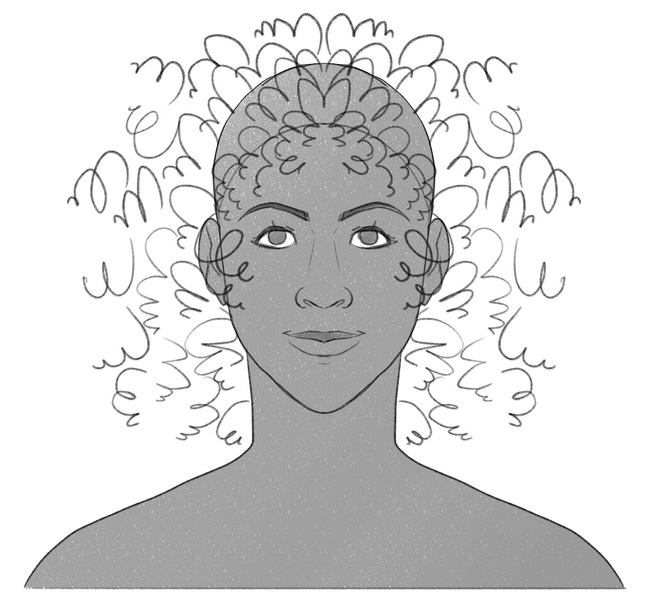
Continue to add the tight curls around the scalp to form the hair’s outline:
3. Shade Your Drawing
Recommended tools: HB and B pencils, blending stump, kneaded eraser
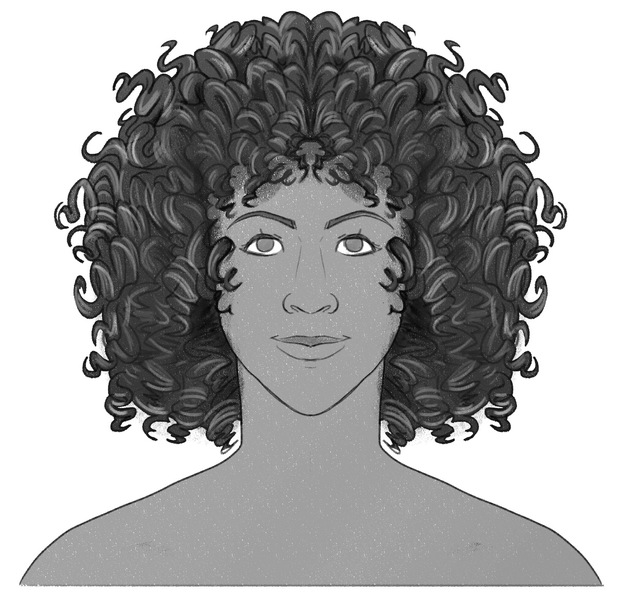
Now’s the time to shade your coily hair drawing!
Use a B pencil to make parts of the hair that are closest to the scalp dark.
Let’s also shade parts of the forehead that are right below the curls; you can use your HB pencil for this.
A kneaded eraser can help you add highlights to the hair, and you can use a blending stump to make the hair look more cohesive, like this:
Finished Learning How To Draw Curly Hair? Try These Next!
Are you up for some more drawing tutorials?
Continue improving your artistic skills with these guides:
- How to draw anime hair
- How to draw a person
- How to draw hands
- How to draw ears
- How to draw a nose
- How to draw eyes
- How to draw a mouth
Wrapping Up On How To Draw Curly Hair
When drawing curly hair, be it wavy, coily, or with medium-tight curls, the most important thing is to sketch one part of hair by one.
Always start by sketching a hairline and then add the hair at the front. Continue to draw the hair at the top o the scalp and on the sides until you form the full hair outline.
When drawing the coily hair, you can add tight curls immediately all over the scalp, to outline the hairstyle and then slowly fill in the missing bits of hair.
