Related Resources
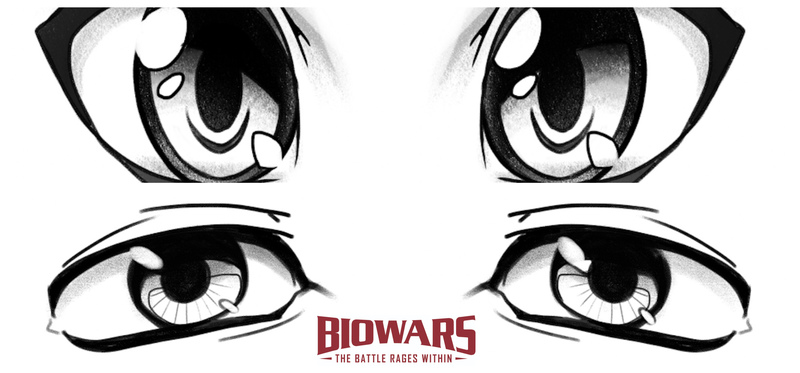
In anime and manga, characters are often depicted with big, expressive eyes.
Although no one can tell for certain what lies behind the large eyes trend, most people agree that the large eyes make the characters cuter (kawaii) and more youthful, but also reflect their thoughts and emotions.
However, large, round eyes aren’t the only style of anime eyes.
We’ll also show you how to draw a more rectangular eye shape that can be used to reflect more serious characters as well.
We’ve also created illustrations for each step; you’ll find the images below, for both big and square anime eyes, so keep reading!
Sketching Tools To Draw Anime Eyes
The right tools can make drawing anime eyes easier. Here’s what you’ll need:
- An H pencil to outline your sketch
- An HB pencil to add the details and softly shade your anime eyes drawing
- A 4B pencil to shade your drawing
- A ruler to create the guidelines
- A kneaded eraser to erase the guidelines and shapes you’re not happy with
- Sketch paper with micro-perforations to draw on — this paper is a good choice because your pencil (and eraser!) can easily glide over its surface
These are just recommendations — not even Gonçalo has them all. You can use whatever tools you’re most comfortable with!
How To Draw Big Anime Eyes In 5 Steps
Let’s kick the guide off with five steps to drawing large anime eyes.
1. Draw The Guidelines
Recommended tool: H pencil, ruler
The easiest way to draw anime eyes is to first create the guidelines and then use them to draw the eyes.
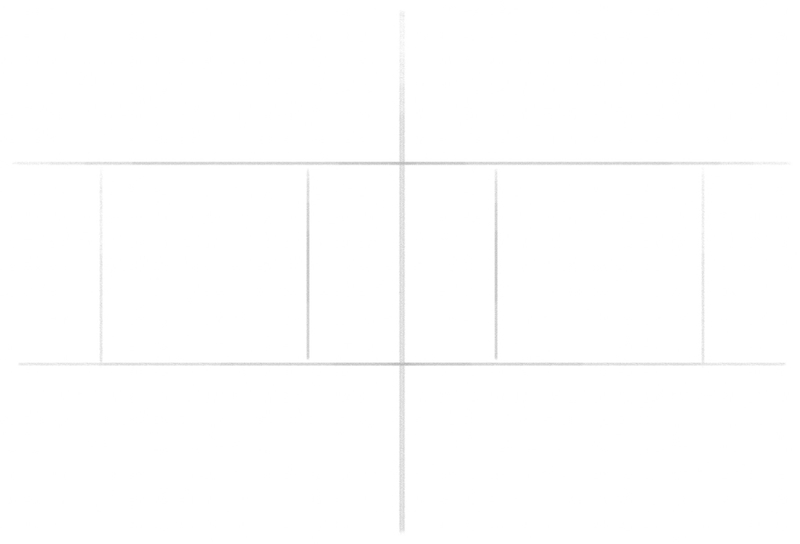
Grab your ruler and draw a vertical line in the middle of your paper.
Then, draw two parallel horizontal lines, but make sure you leave a lot of space between them.
The distance between these two lines marks the size of the eyes you’ll start drawing soon.
Next, draw two parallel horizontal lines on either side of the central horizontal line.
We want to draw two squares, so make sure they’re the same size and that the distance from the squares to the long horizontal line is equal:
2. Outline The Eyes
Recommended tool: H pencil
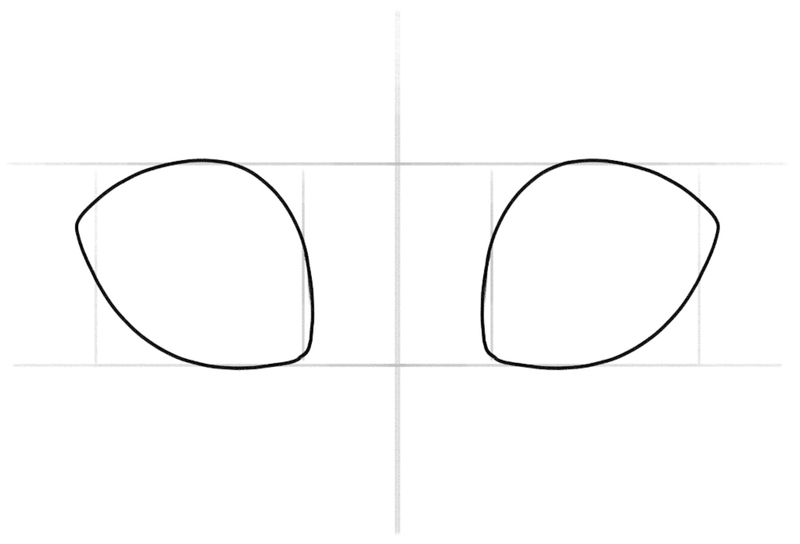
Now, let’s draw the basic shape of large anime eyes.
Start drawing a curved line at the lower inner corner of the left eye and point it upwards.
Don’t connect the line to the upper corner; instead, extend the line a bit outside the square and then curve it to the left.
Draw the line so that it touches the top of the square and circle it down, to connect it to the starting point.
Do the same on the right side:
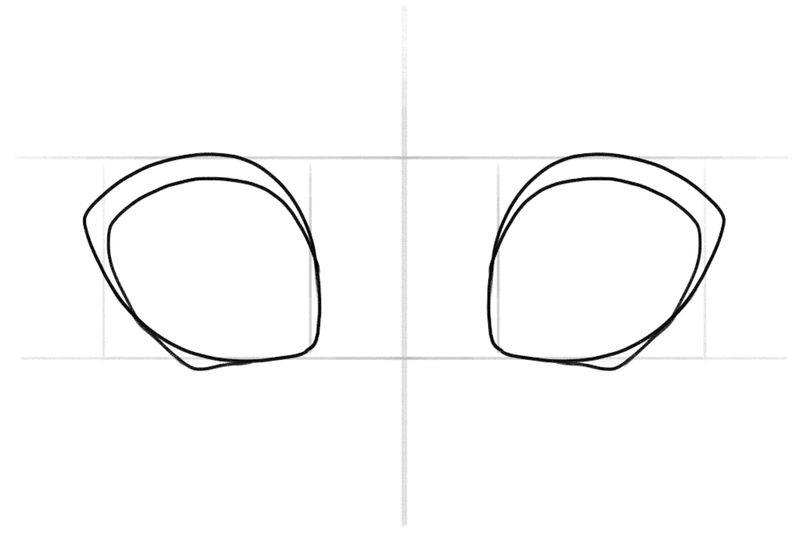
Next, let’s draw the lash line.
To do that, draw shapes similar to the outer outline of the eye.
Start again at the same corner as the previous step, but this time, have the corners of the upper lash line touch the edges of the squares, like this:
2. Draw The Irises And Pupils
Recommended tool: H pencil
Now that the basic eye shape is ready, we can start adding the details.
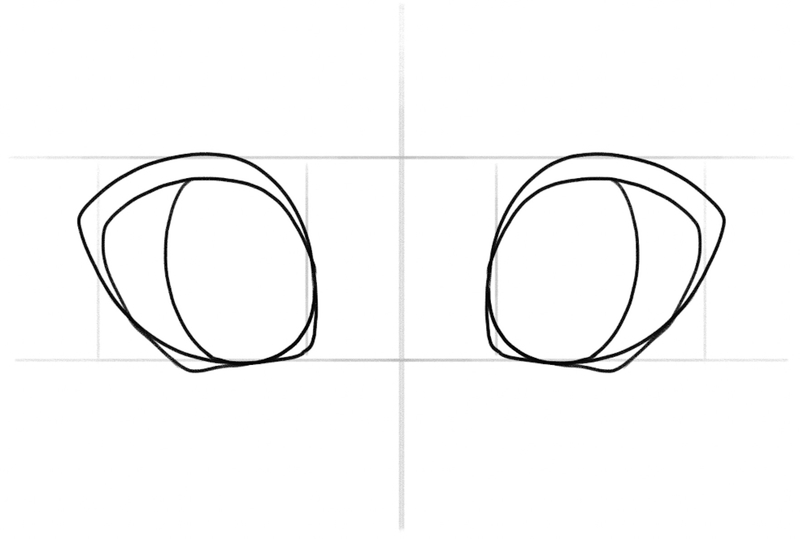
First, let’s draw the irises.
Large anime eyes have big irises, so they should cover about two-thirds of each eye, like this:
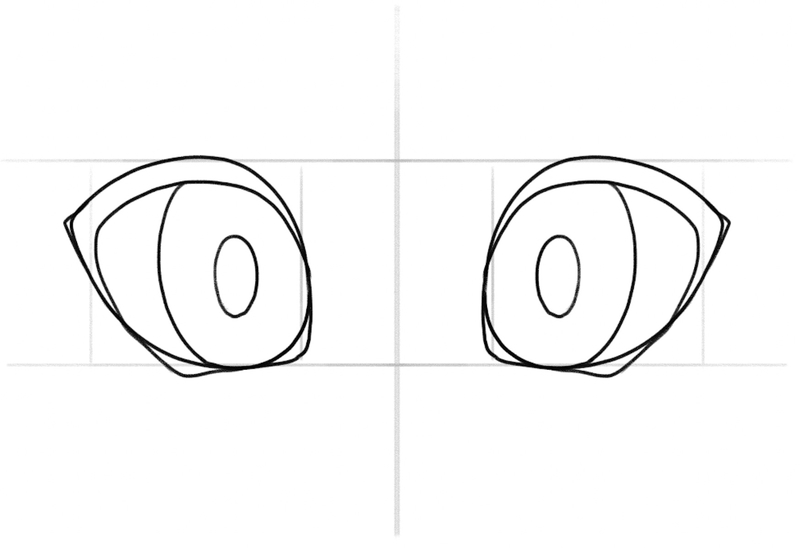
Next, it’s time to add the pupils.
Sketch two elongated oval shapes at the center of the irises, like so:
4. Add The Finishing Touches
Recommended tools: H and HB pencils, kneaded eraser
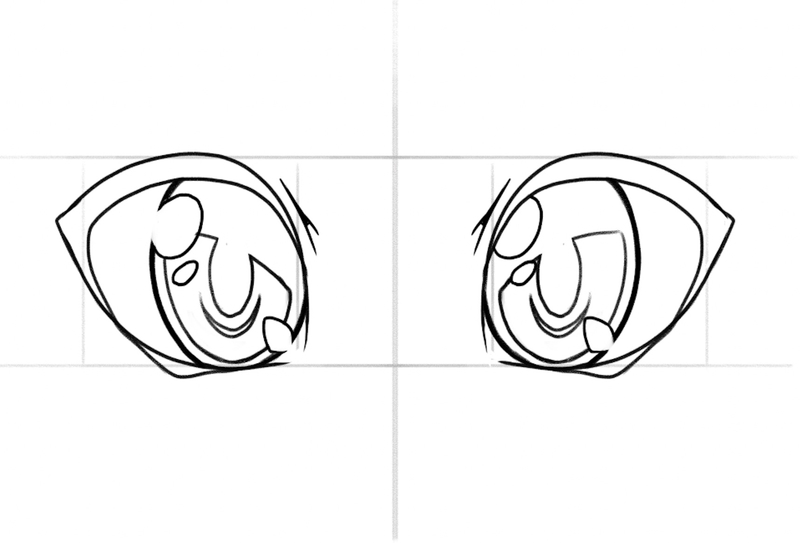
We’ll now draw quarter moons inside both irises. This will help us mark the eye areas we want to shade but also highlight.
Have their curve follow the shape of the irises and connect the ends with softly curved lines that cut through the pupils, like this:
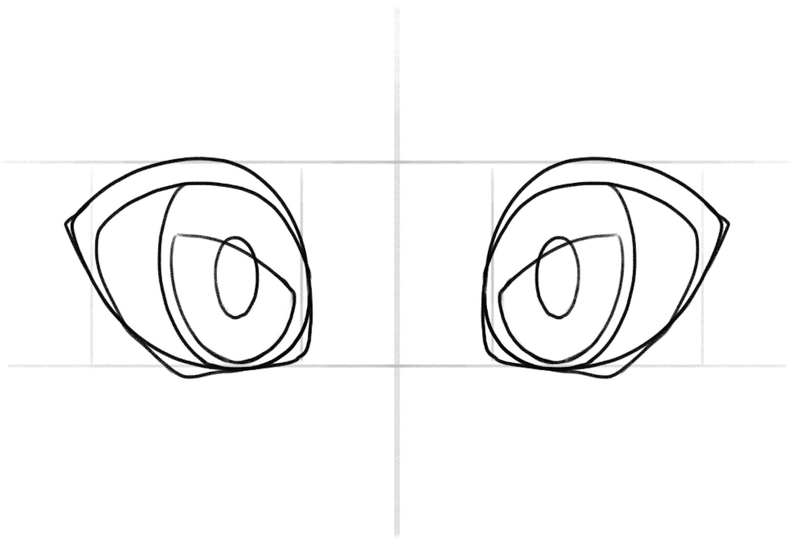
Next, using your eraser, remove the top of both irises (the bits that stay above the quarter moons).
Then, draw two tiny crescent-moon-like shapes below each pupil, like this:
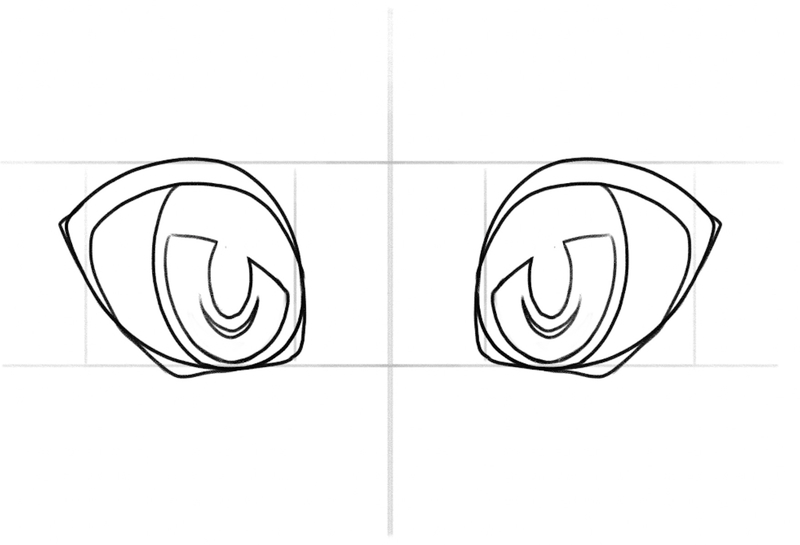
Now it’s time to mark the eye areas that we’ll highlight.
Draw oval shapes of various sizes around the eyes; for example, add a slightly bigger oval shape near the top left corners of the eyes. Then, add a smaller oval shape on the left side of the quarter moons.
And lastly, add an oval shape on the right side of both eyes:
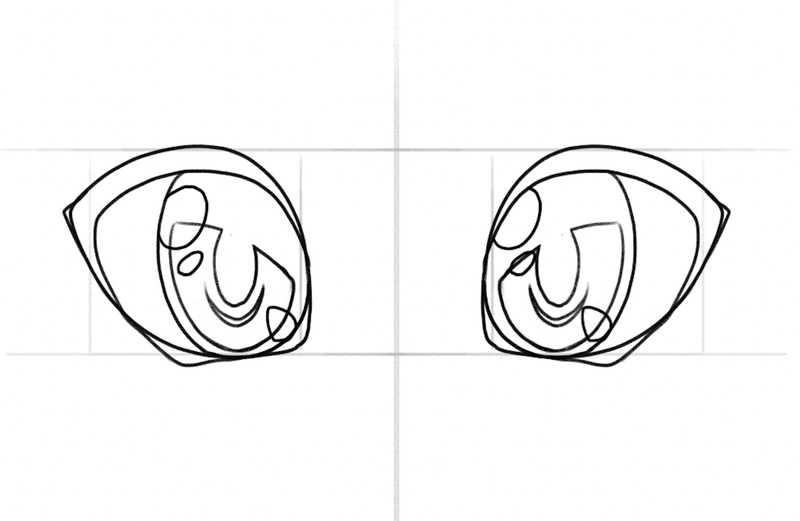
Now, get your eraser and remove the parts of the iris that go through the oval shapes near the top left corner of the right eye and the bottom right corner of the left eye:
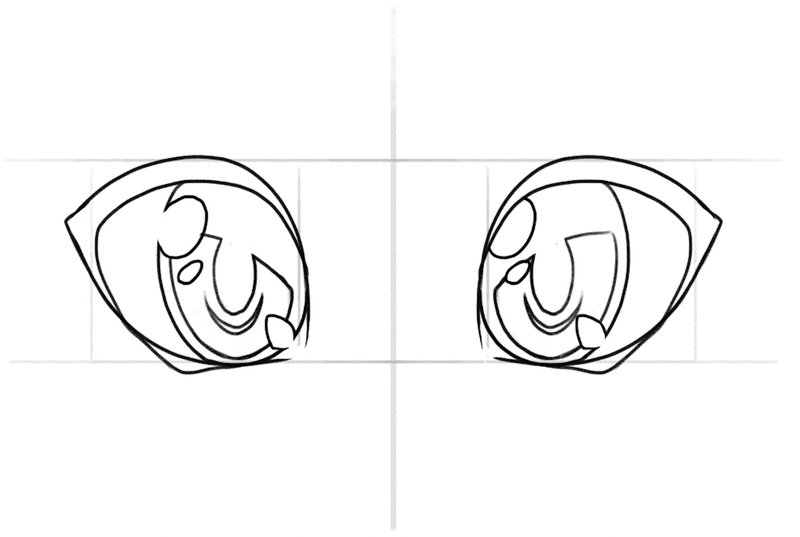
Get your HB pencil and go over the irises, to make them slightly thicker.
Let’s also add two short, slightly curved lines above the inner corners of the eyes, to add more depth to our drawing of anime eyes:
5. Remove The Guidelines And Shade Your Drawing Of Anime Eyes
Recommended tools: HB and 4B pencils, kneaded eraser
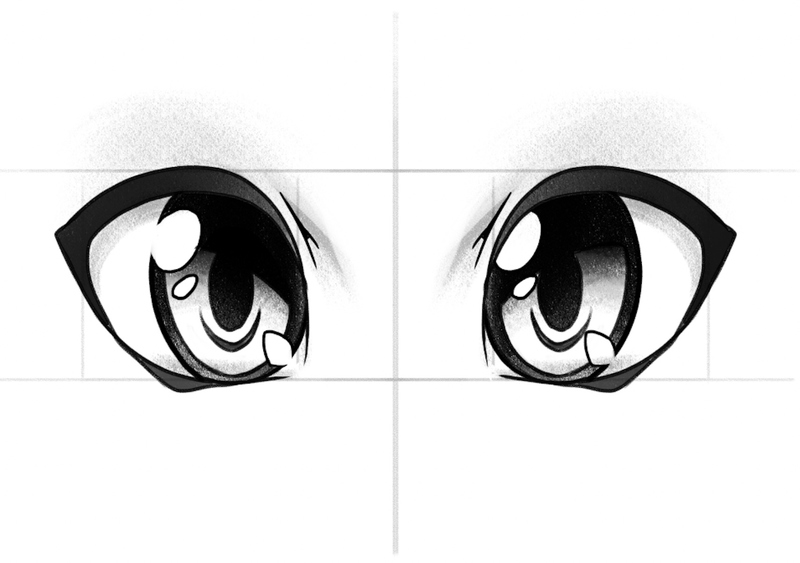
The final two steps to drawing anime eyes include shading the artwork and removing the guidelines.
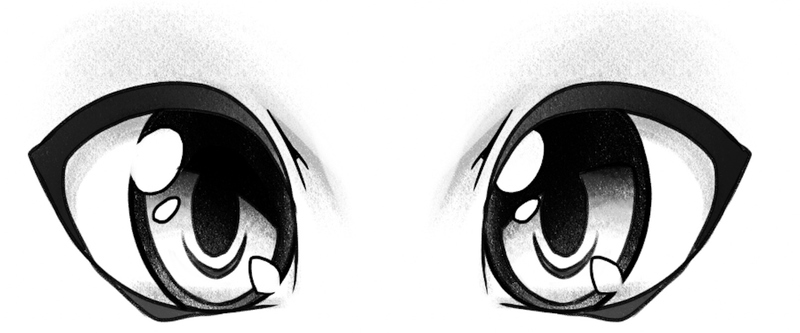
To shade the eyes, color the lash lines, top of the irises, pupils and the outline of the irises in dark grey or black. You can use a 4B pencil for that.
Then, use a lighter lead (an HB pencil) to shade the part of the irises below the quarter moons and the area around the eyes.
Last but not least, get rid of the guidelines, but be careful not to mess up your anime eyes drawing:
How To Draw Rectangular Anime Eyes In 5 Steps
Next, let’s explore the five steps to drawing rectangular anime eyes!
1. Draw The Guidelines
Recommended tools: H pencil, ruler
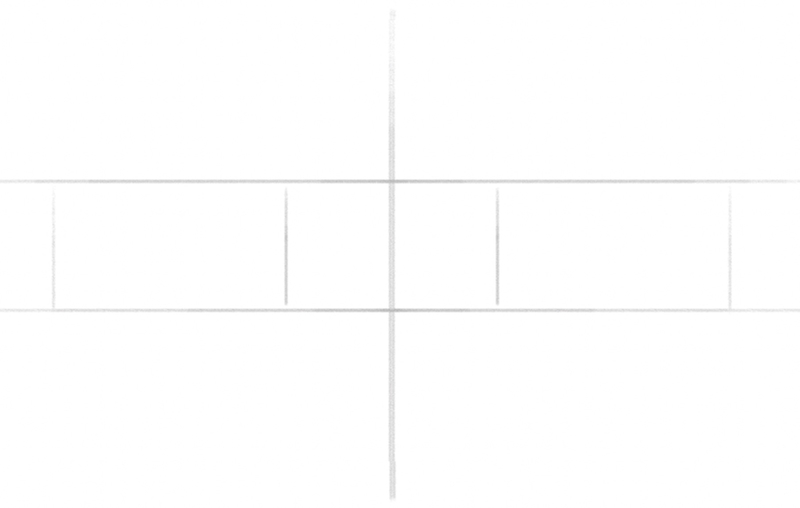
Before you start drawing the rectangular eyes, position the guidelines first, as you did for the big eyes.
This time, though, the distance between the parallel horizontal lines needs to be smaller.
Once more thing — instead of squares, we’re drawing rectangles this time, like this:
2. Outline The Eyes
Recommended tools: HB pencil
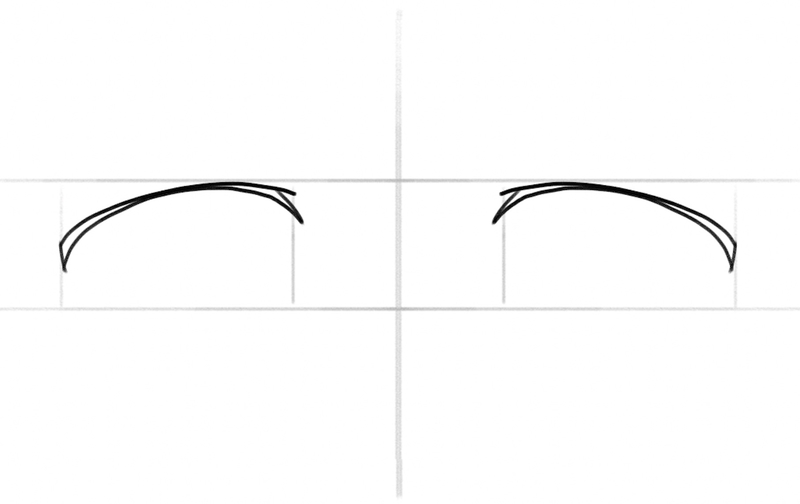
To outline the rectangular anime eyes, start by drawing a slightly curved line from the top left, i.e. top right corner of each rectangle.
Connect the lines to the other end of the rectangle (the line should touch the middle of the vertical line).
Then, turn the line you just drew into a 2D shape, like this:
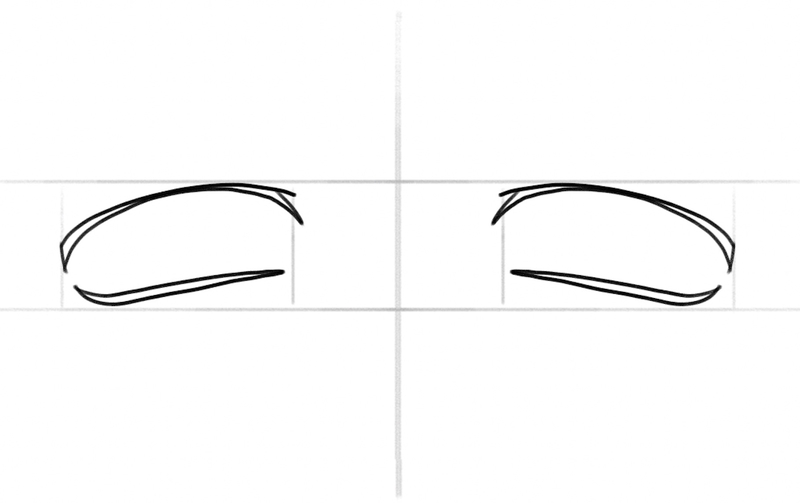
Next, add a thin 2D line near the bottom of each rectangle to define the lower lash line.
The lines can look like hockey sticks:
3. Draw The Irises And Pupils
Recommended tool: H pencil
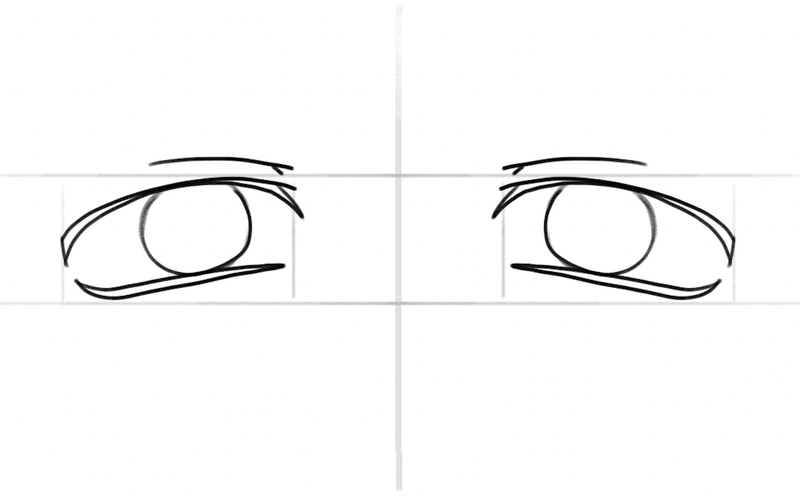
Next, let’s draw the irises.
To do this, sketch a circle inside both eyes.
Then, draw soft, horizontal lines above the eyes to depict the upper eyelids:
For the pupils, simply draw a smaller circle inside the irises, like this:
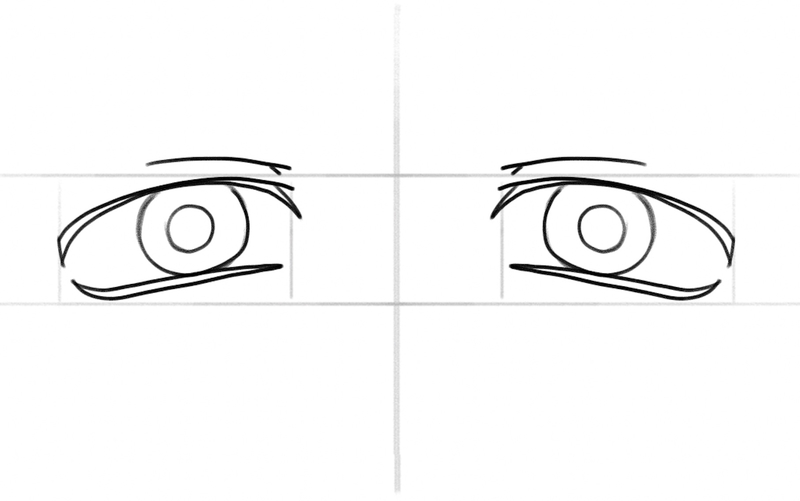
Now it’s time to add the highlights.
Draw one large oval shape between the pupil and the iris in the top left, i.e. top right corner of the eye, and another tiny oval shape in the lower right, i.e. lower left eye corner:
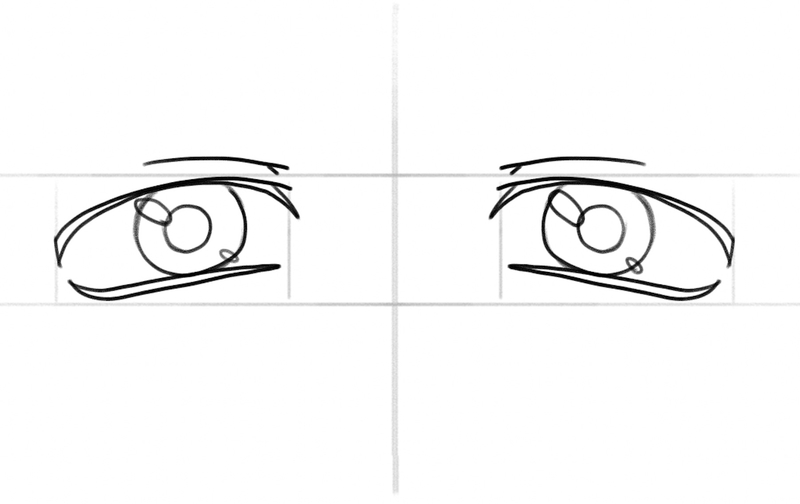
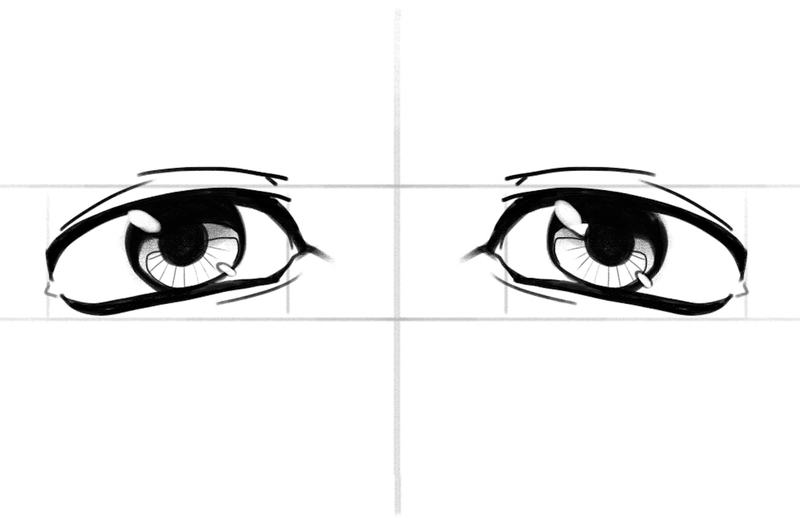
4. Shade Your Rectangular Anime Eyes Drawing
Recommended tools: HB and 4B pencils
Once the eye outline is finished, let’s start shading to bring these rectangular anime eyes to life!
Grab a 4B pencil and fill in the pupils and enhance the irises.
Color both the upper and lower lash lines in the same shade of grey or black:
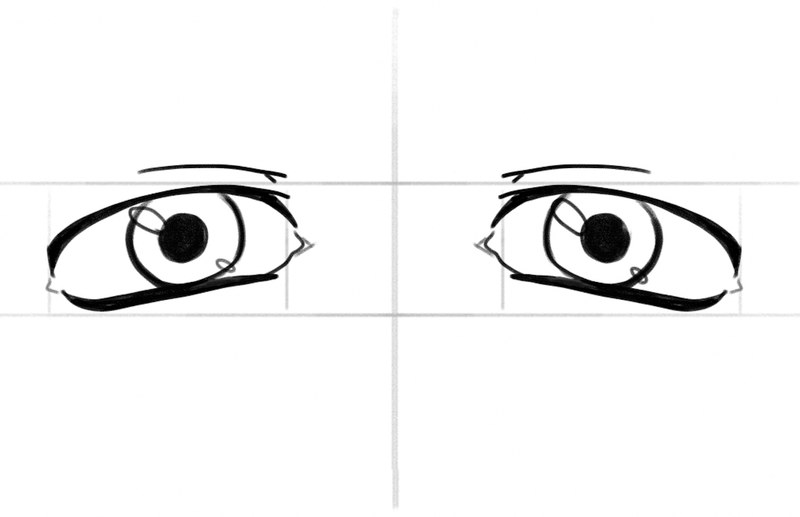
Feel free to make both lash lines even thicker.
You can also extend the upper eyelid a little bit toward the outer corners of the eyes.
Then, add short horizontal lines under the lower lash lines to depict the lower eyelids.
Next, start drawing thin lines all over the lower half of the irises, like this:
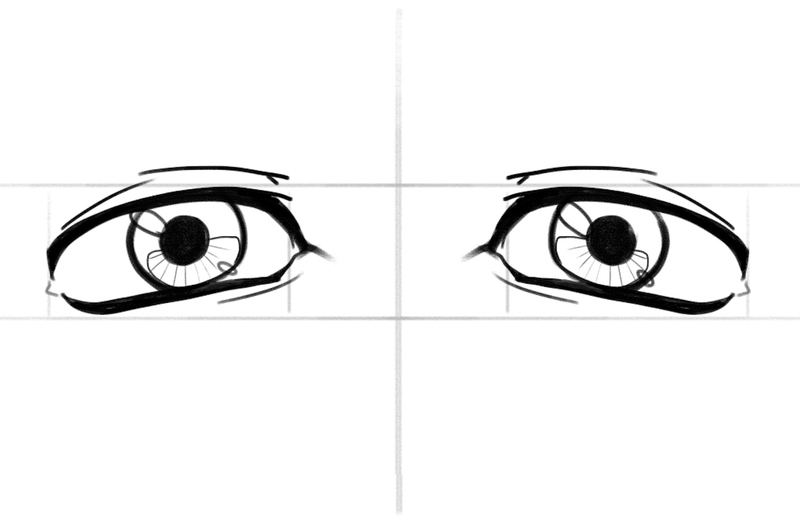
Combine 4B and HB pencils to create dark hues of various intensities.
Color the top area of both pupils dark, but leave the rest in a lighter shade of grey.
Don’t forget to leave the highlights clean:
5. Erase The Guidelines
Recommended tools: kneaded eraser
To finish your anime eyes drawing, grab your eraser and get rid of all the guidelines that you no longer need:

Finished Your Drawing Of Anime Eyes? Try These Next!
Once you finalize your drawing of anime eyes, it’s time to move to the next challenge! We have a bunch of beginner-friendly tutorials ready for you, such as:
- How to draw comic characters
- How to draw a person
- How to draw a face
- How to draw hands
- How to draw eyes
We also have many guides on drawing animals, including:
And more!
Meet The Artist
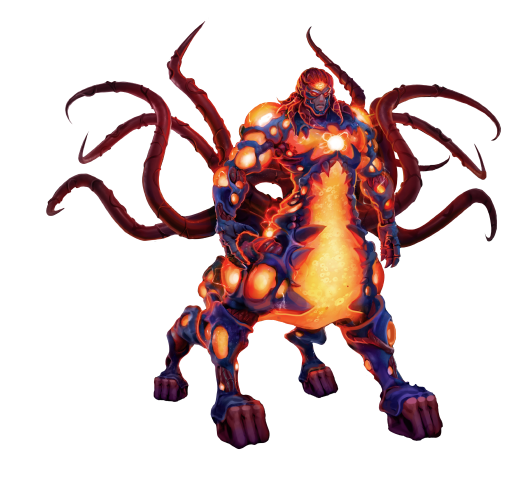
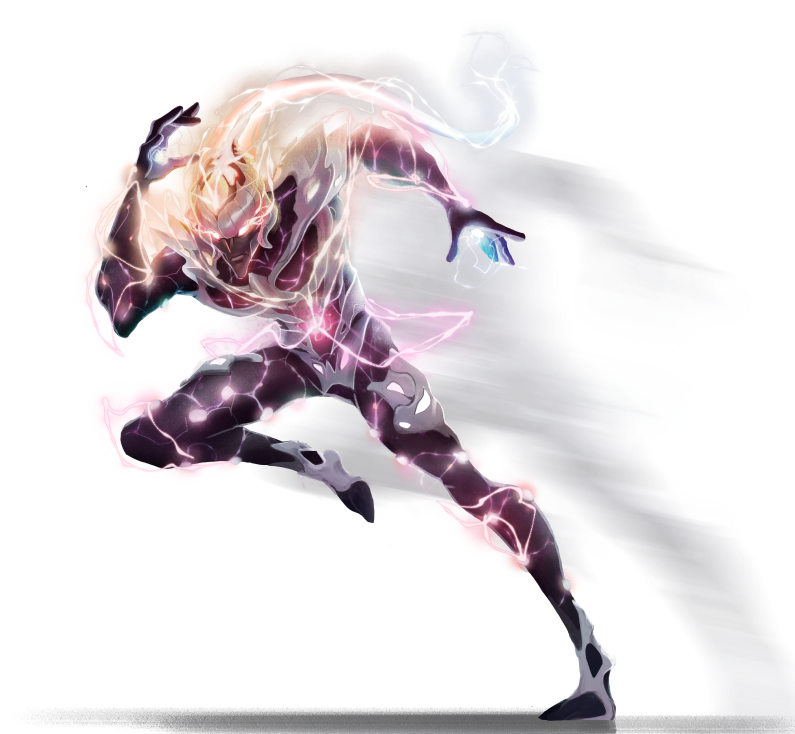
This guide was created by Goncalo Lopes — the lead BIOWARS artist who has designed all the BIOWARRIORS and their archenemies.
Aside from working on the BIOWARS comic book, Goncalo has also worked his magic on some of the most popular projects in the world, including Transformers, GI-Joe, TMNT, Adventure Time, Godzilla and more.
Need we say more? You’re in good hands, so get your creative juices flowing and keep drawing!

