Related Resources
Skulls carry deep symbolic significance across many cultures.
They’ve been captivating artists for centuries, serving as symbols of death, transience of life, mystery and power.
Skull drawing combines art and anatomy, and for beginners, it may be challenging to find the right balance between the two.
We’ve made a step-by-step guide to skull drawing to show you how to draw the underlying structure of a skull, but also help you infuse the drawing with your own style:
If illustrations work best for you instead, continue reading!
The Tools You Need For Skull Drawing
These tools could help make skull drawing easier:
- An H pencil: H pencils have a fine and sharp point, allowing you to achieve precise and clean lines — it’s just what you need during the outlining stage.
- An HB pencil: HB pencils are somewhere between hard and soft leads. This balance allows for great flexibility, so you can use an HB pencil to create both precise details and softly shade your skull sketch.
- A 4B pencil: 4B pencils have a soft and dark graphite core, so they’re perfect for the shading stage.
- A blending stump: A blending stump is great for softening harsh lines in drawings. You can use it to gently diffuse and blur edges, creating a softer sketch.
- A kneaded eraser: Kneaded erasers are malleable and you can shape them in different sizes and forms. That way, you can precisely erase small details on your drawing and even add highlights with the eraser.
You don’t have to use all of these tools — not even our artist has them all.
What matters is that you’re willing to practice and learn — any tools will do as long as you’re comfortable using them!
How To Draw A Skull In 5 Steps
To make the process of skull drawing as easy as possible, we’ll break it down into five steps.
1. Draw The Cranium
Recommended tool: H pencil
In the first phase of skull drawing, we’ll rely on geometrical shapes to create a base for our sketch.
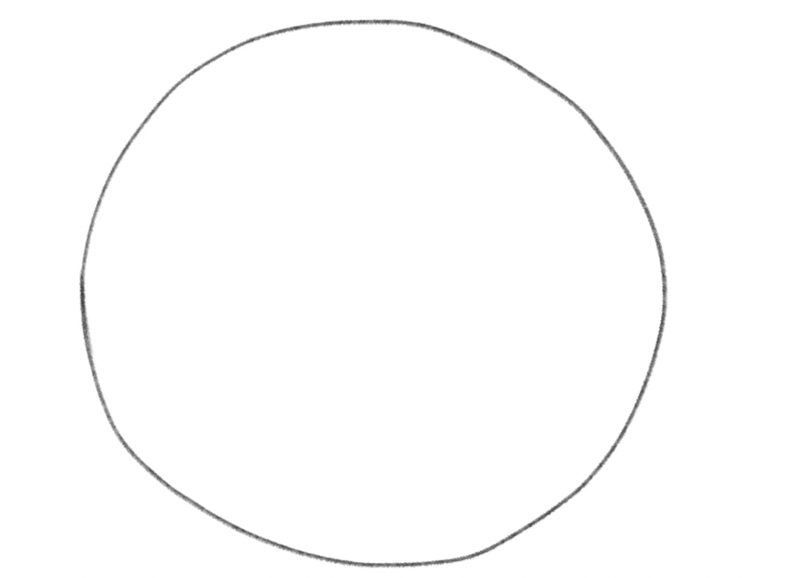
So, let’s begin with a circle.
This is where the cranium will be (the part of the skull that encloses the brain), so make sure the circle is big enough, as it will define the size of the entire skull:
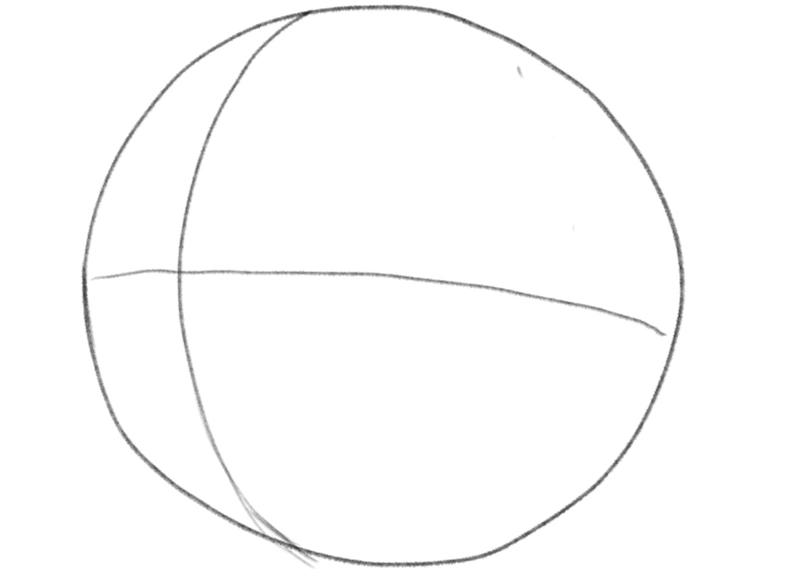
Now, we want to turn the circle into a sphere as we want to create a 3D skull drawing.
But first, let’s decide on the direction we want the skull to face.
We’ll draw ours facing left, which means that we’ll move the center of the circle to the left side.
Let’s add slightly curved horizontal and vertical lines to the sketch and draw them through the circle; but instead of having them intersect in the middle, place them closer to the left edge of the circle, like this:
2. Draw The Face Skeleton
Recommended tool: H pencil
The human skull normally has 22 bones — eight of which are part of the cranium.
The rest of them form the face skeleton, which we’re about to draw.
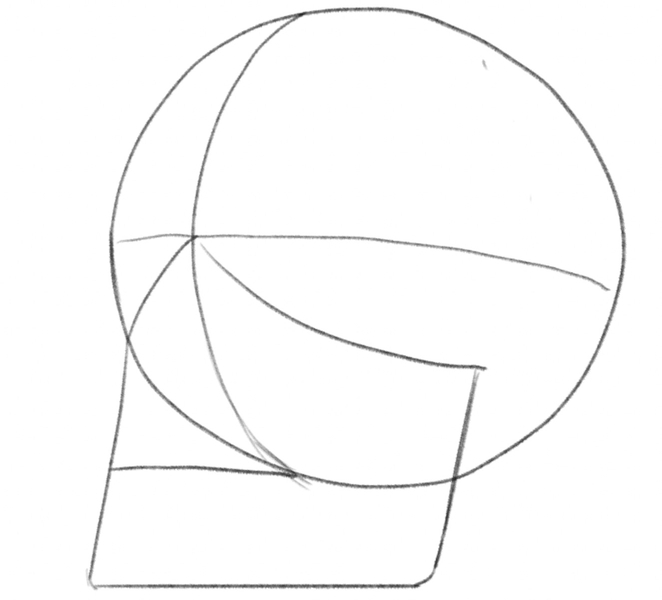
First up, add two curved lines starting at the point where the horizontal and vertical lines meet.
Point the curved lines toward the edges of the circle.
Then, bring them down and connect them below the cranium.
Next, at the point where the vertical curved line from earlier touches the bottom of the circle, draw a horizontal line and point it to the left so that it touches the left side of the jaw, like this:
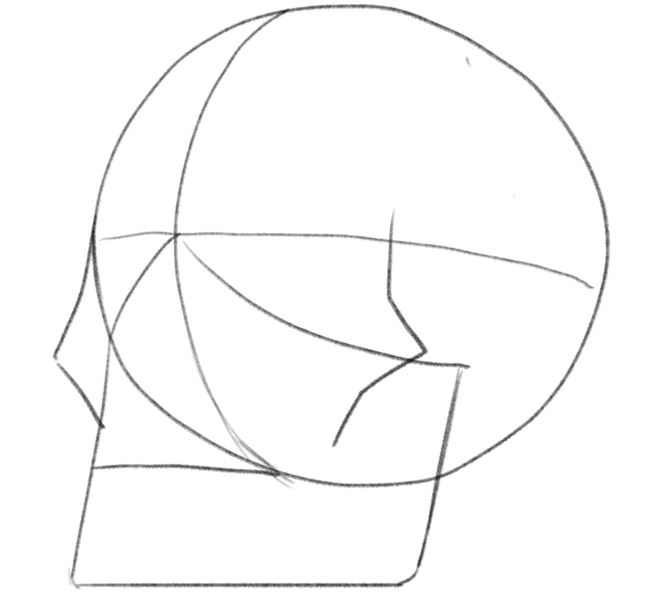
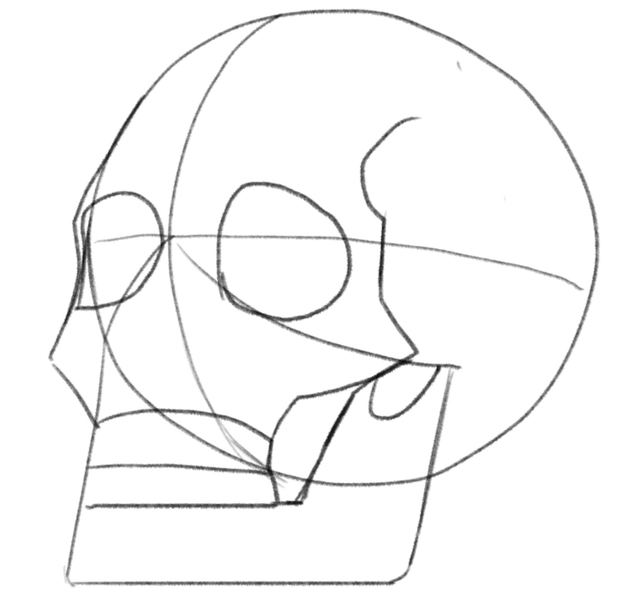
Now, let’s add the zygomatic bones, i.e., the cheekbones.
These bones bulge in the middle so you can draw small, triangular shapes, like so:
We’ll now draw eye sockets and mouth bones.
For eye sockets, simply draw two circles, but ensure to position the parts that are close to the nasal bone slightly higher than the rest of the eye.
To draw the mouth bones, connect the zygomatic bones first with three horizontal lines.
Then, extend the zygomatic bones upward, to make them longer and slightly curved at the top, above the eye sockets.
Oh, and since the bones are three-dimensional, let’s connect the left cheekbone with the bottom of the lower lip bone, like this:
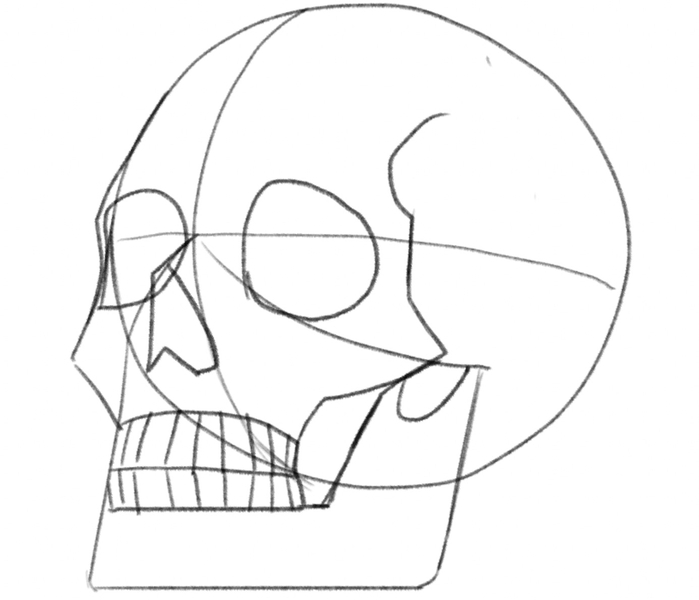
Next up, let’s draw the teeth.
To do so, simply add short vertical lines inside the mouth.
Then, we’ll draw the nasal bone.
You can draw it as a thick “V”, like so:
3. Finalize The Outline
Recommended tools: H pencil
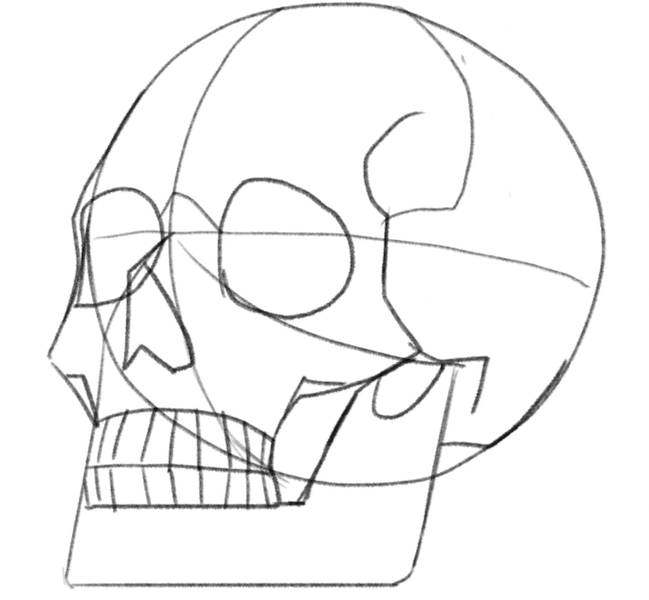
We’ll now add some finishing touches to the outline before we proceed to the final stages of the skull drawing.
The cranium is made up of several bones that are attached to each other, so we’ll connect the line behind the left eye socket with the top of the skull.
Then, let’s add some dimension to the line where the skull and the jaw meet, like this:
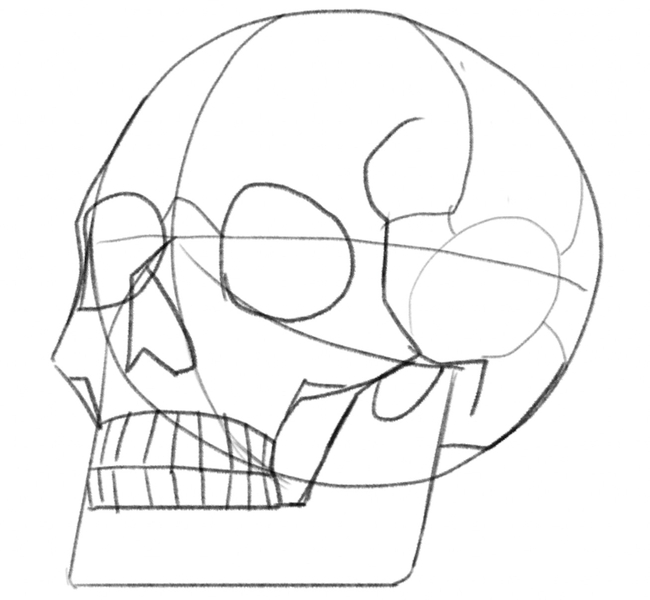
Lastly, let’s depict a few more cranium bones.
You can draw a circle behind the cheekbones and then connect it to other bones of the cranium and its edges, like so:
4. Enhance The Lines
Recommended tools: HB pencil, kneaded eraser
Once the outline is complete, it’s time to switch to a darker lead to enhance the lines.
You can use an HB pencil for this step or apply more pressure to your pencil of choice to create darker strokes.
For starters, go over the cranium and the cheekbones.
Then, enhance the nasal bone and the upper part of the upper teeth:
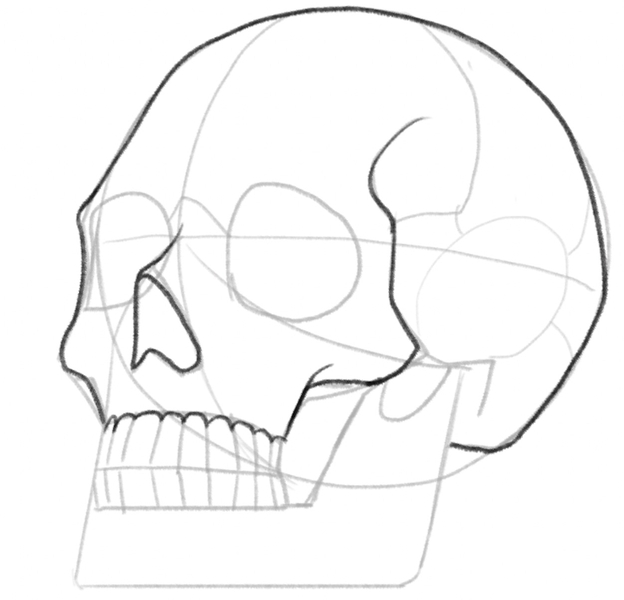
Continue to go over the lines so that they look more pronounced:
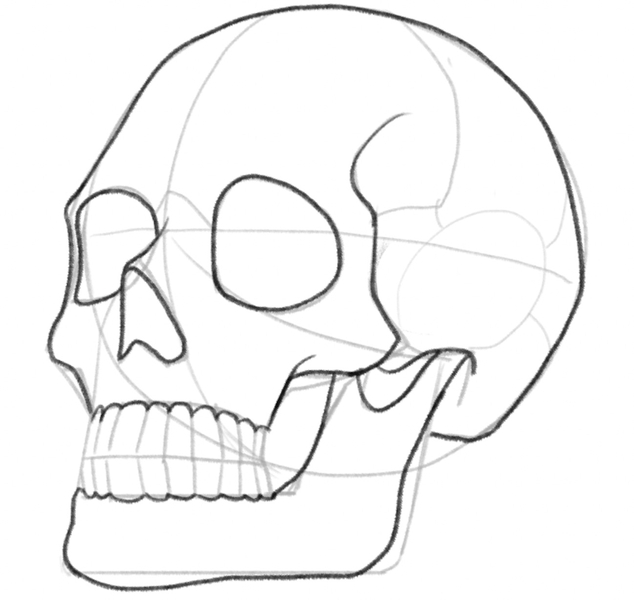
Finish enhancing the cranium lines and the teeth outlines.
Then, add a few irregularly-shaped forms around the front of the skull — these are going to be the cracks because we’re drawing an old skull that’s suffered a bit of damage:
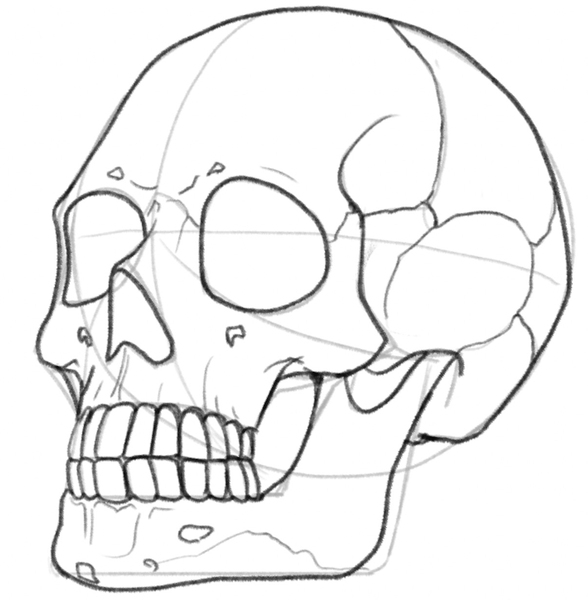
At this point, you should also get rid of the guidelines as you no longer need them.
5. Shade Your Drawing
Recommended tools: HB and 4B pencils, kneaded eraser, blending stump
To shade your skull drawing, we’ll show you how to combine leads of different strengths.
To shade the inside of the skull (behind the eye sockets, nose bone and inside the jaw), use the dark 4B pencil as this part needs to be pitch black.
Of course, depending on where you want the light to come from, some parts inside the skull should be slightly lighter than the rest, like this:
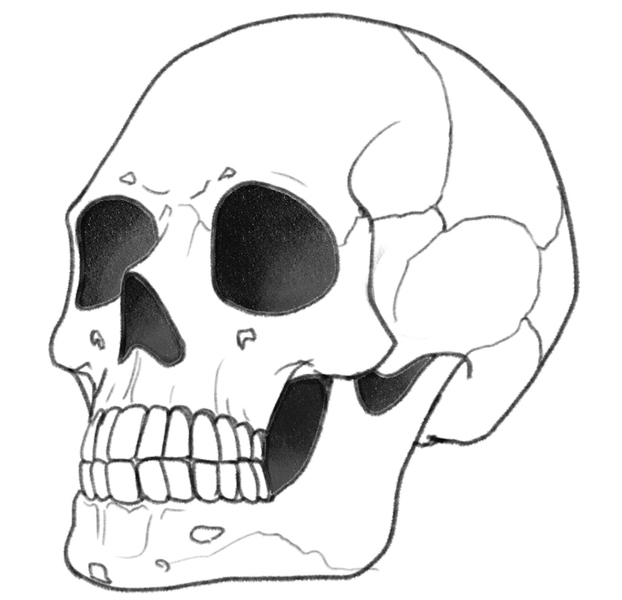
Next, use an HB pencil and go over the entire skull to add a soft grey shade to it.
Again, pay attention to the position of the light source.
Ours is in front of the skull, hence the bottom of the jaw and the back of the cranium are darker than the rest of the sketch:
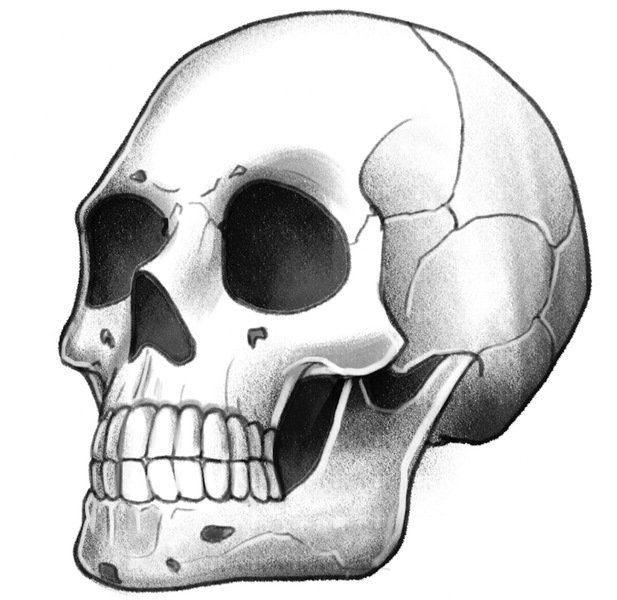
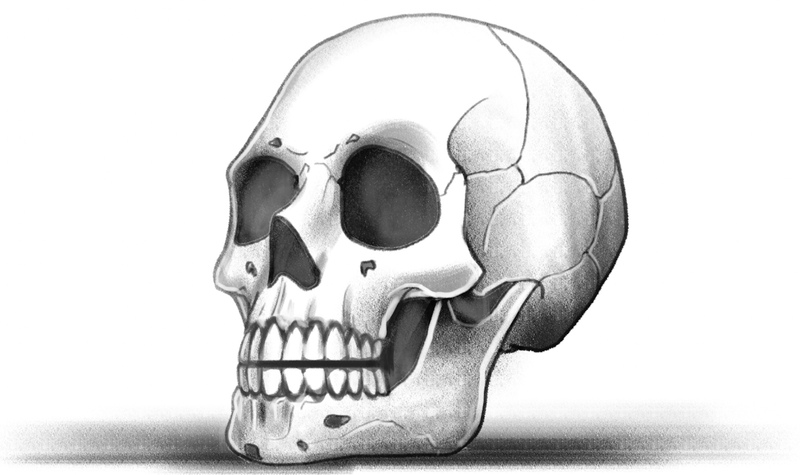
To finish your skull drawing, use a blending stump to make all the different shades of grey seamlessly blend with one another.
You can also use your eraser to highlight parts of the skull that are exposed to the light.
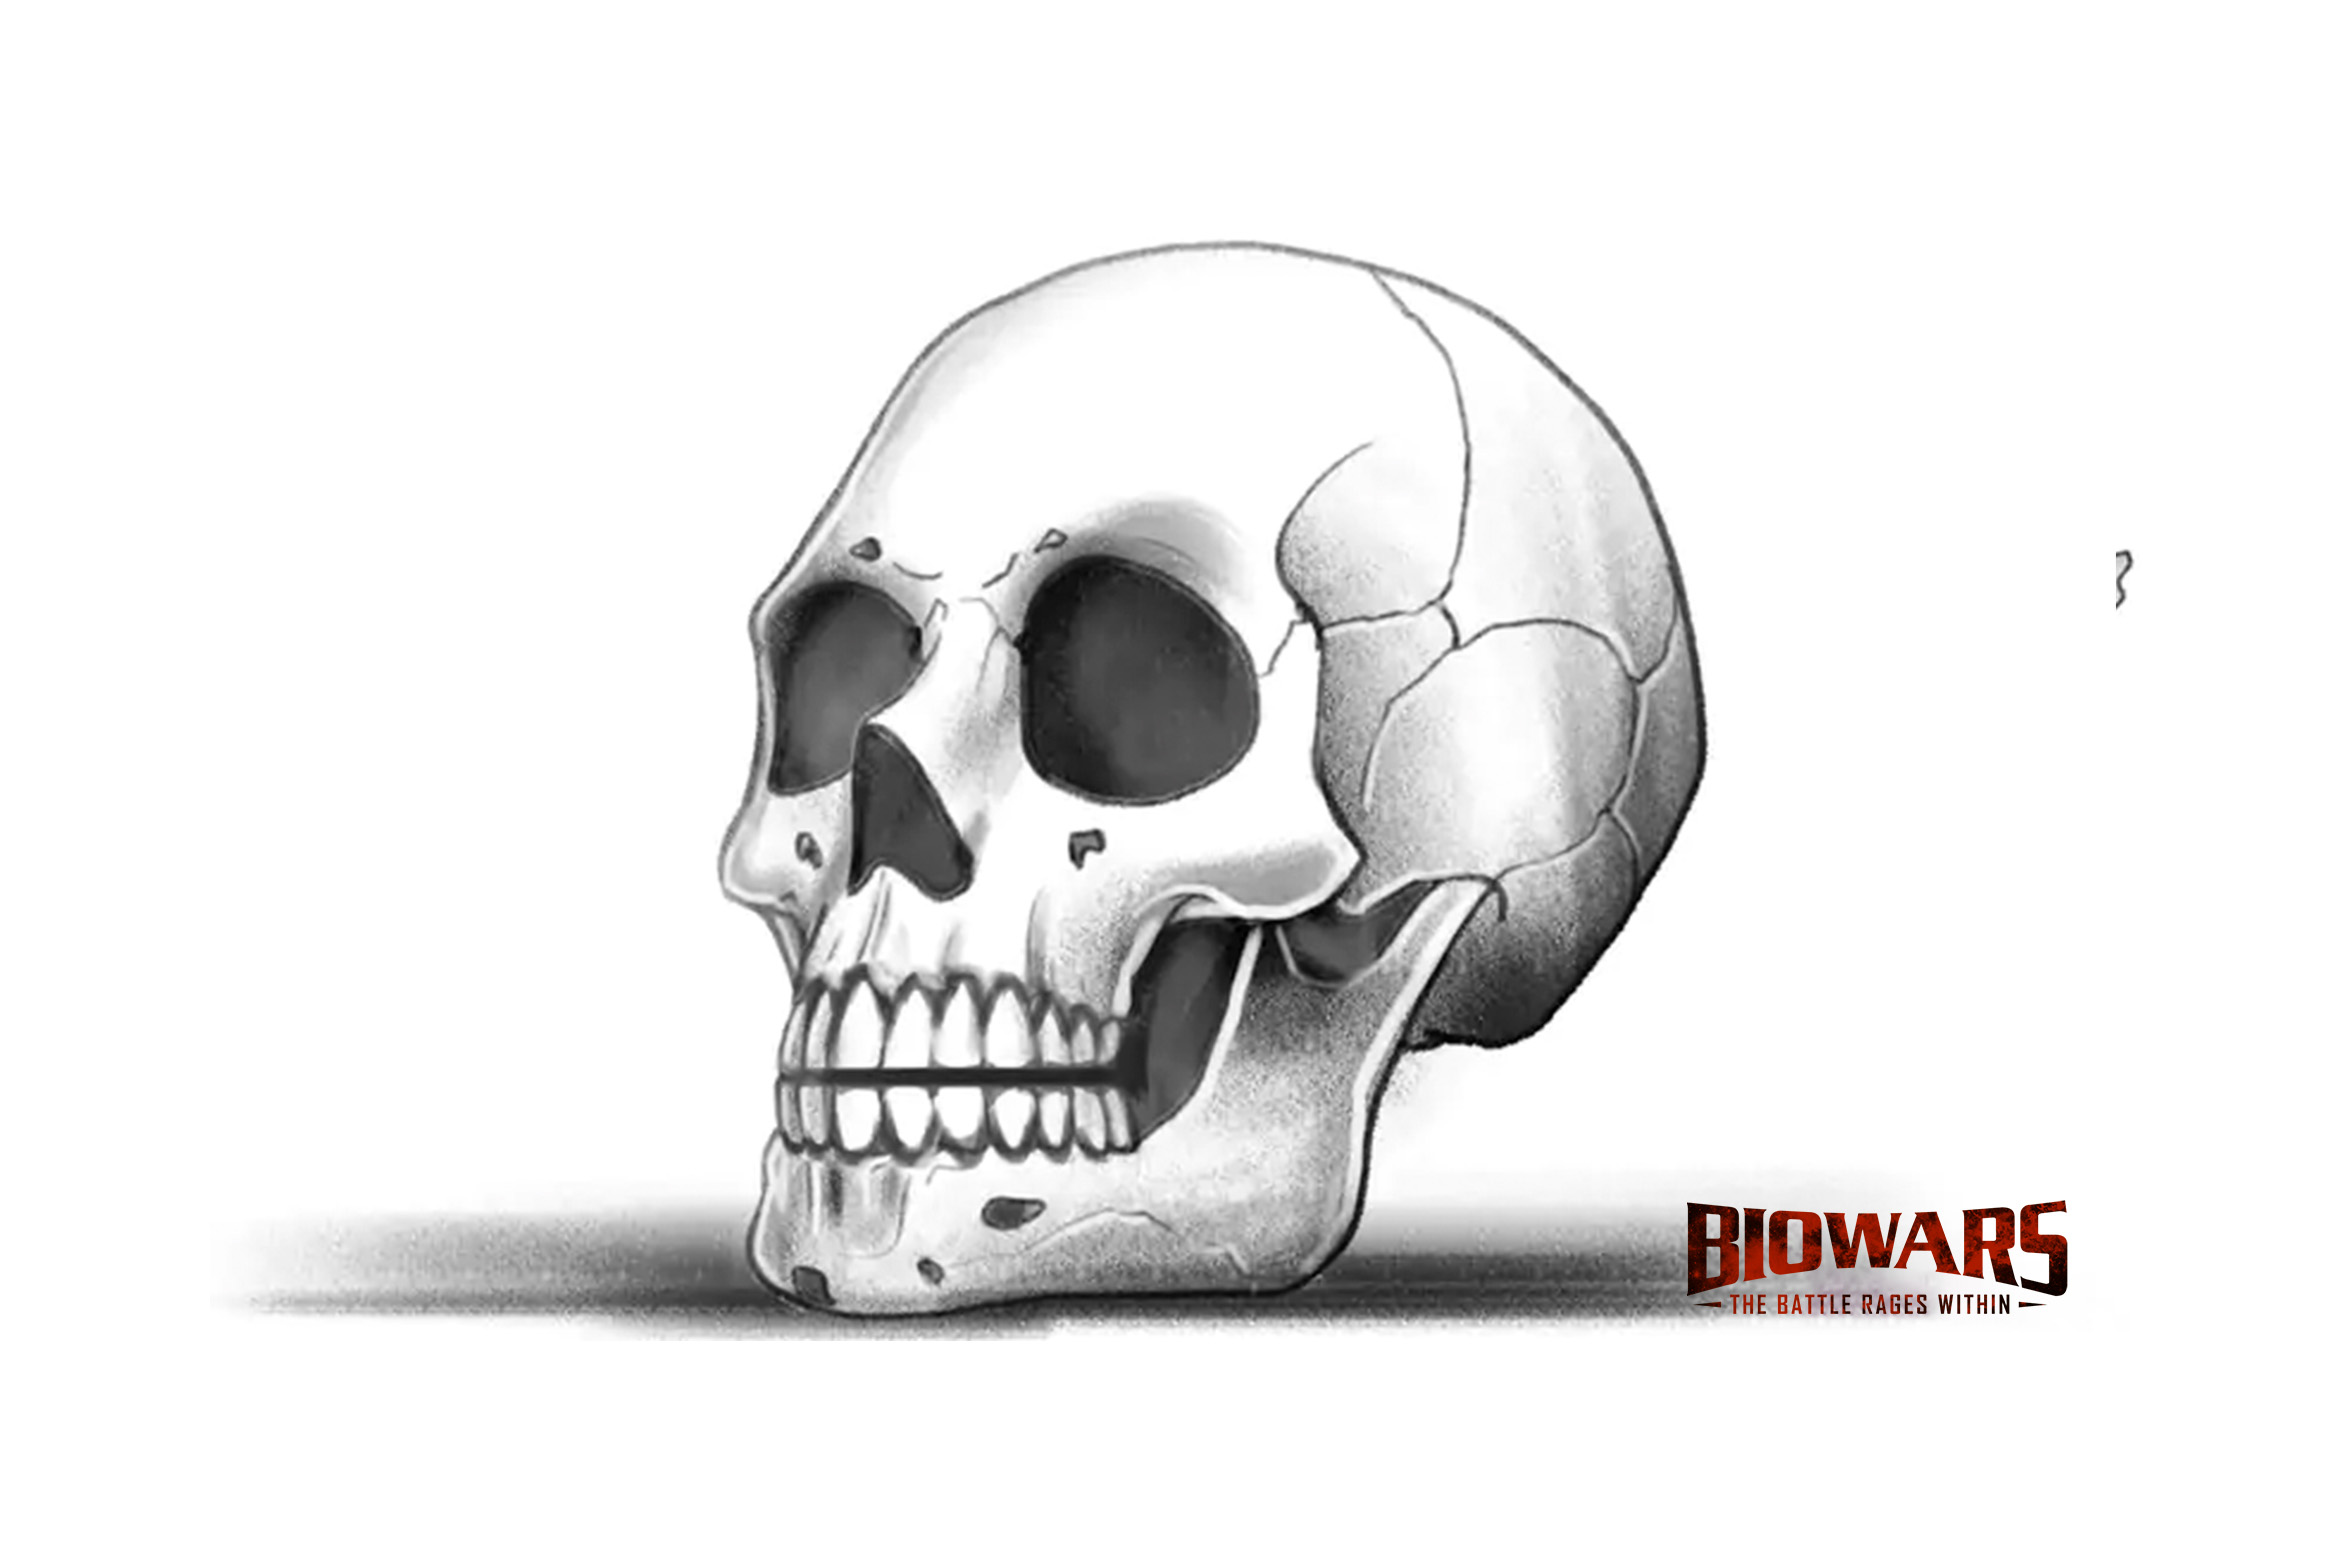
And lastly, don’t forget to shade the area under the skull so that it doesn’t look like it’s floating in the air:
Finished Your Skull Drawing? Try These Next!
How cool was exploring the steps to skull drawing? Now, you can infuse any drawing or comic book with a bit of mystery.
If you’d like to keep practicing and perfecting your drawing skills, we invite you to explore more of our how-to-draw guides, including:
We also have several guides on how to draw landscape images, such as:
And if you’d like to learn how to draw people, we have several tutorials that could be of help:
- How to draw a face
- How to draw eyes
- How to draw a person
- How to draw a nose
- How to draw a mouth
- How to draw hands
- How to draw ears
Check out more of our helpful art tutorials and keep practicing!
Meet The Artist
Goncalo Lopes is the lead BIOWARS illustrator with decades of experience as a professional artist.
He’s worked on some pretty impressive projects, including Transformers, GI-Joe, TMNT, Adventure Time, Godzilla, and more.
Trust us when we say this — you’re in good hands!
A Recap On How To Draw A Skull
Although learning how to draw a skull may seem difficult at first, we hope that this beginner-friendly guide helped you realize that the process isn’t nearly as hard when you break it into steps.
It’s best to always start with basic shapes, such as a circle and a sphere, to create the base for your sketch.
Then, you can start sketching bones, adding details and connecting them into a cohesive whole.
Lastly, shading the skull will help you make it more striking and eye-catching!
