Related Resources
Did you know that penguins have an oil gland that produces waterproofing oil?
That oil and their thick feathers keep them warm in harsh weather conditions.
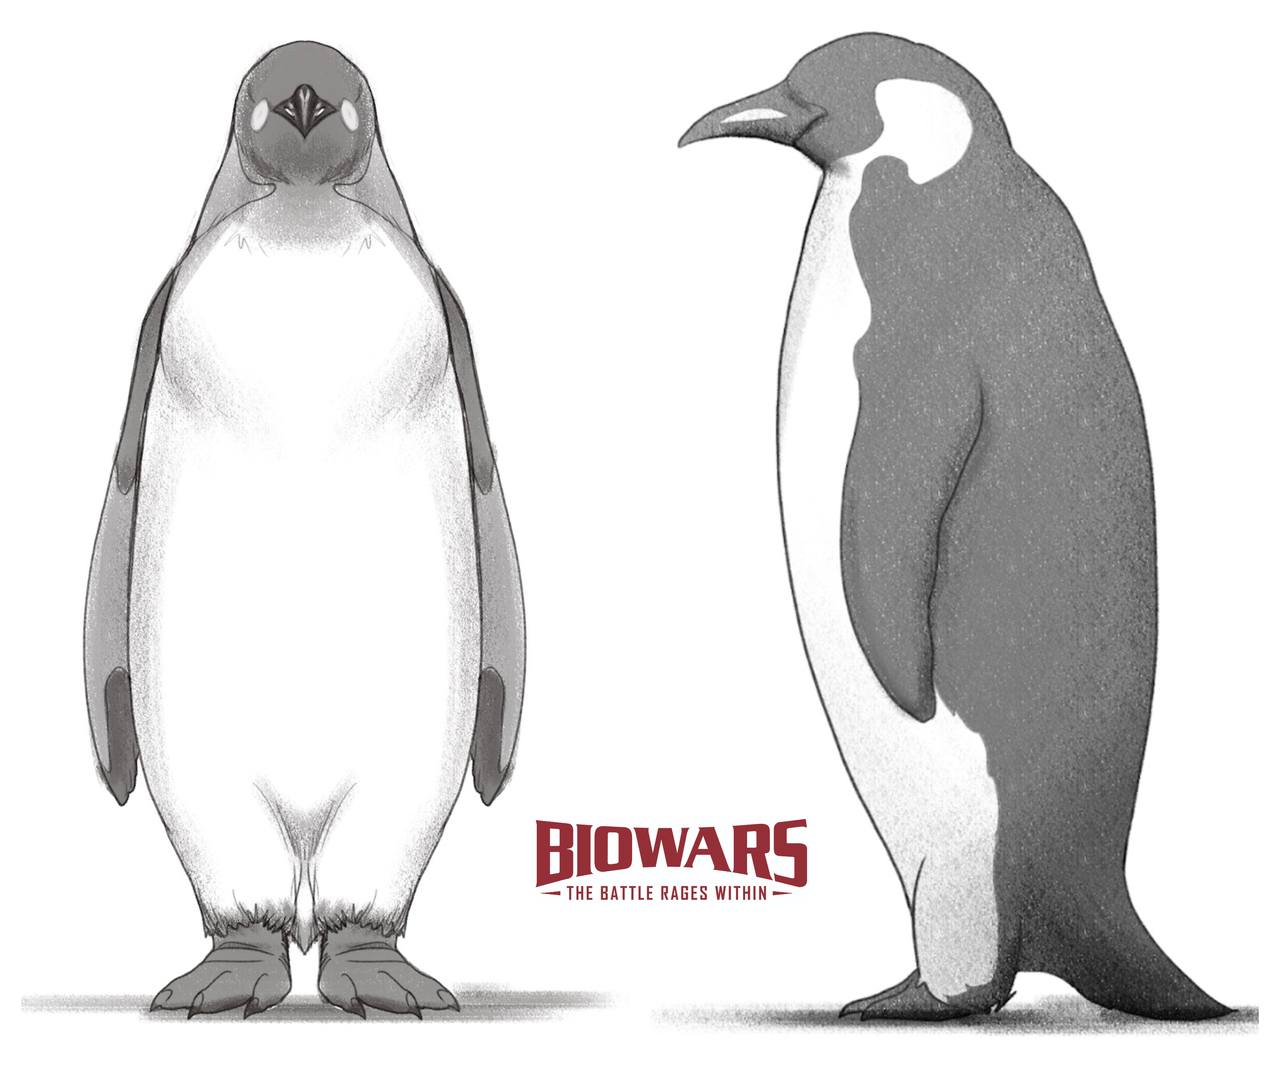
Although there are 19 different types of penguins, the Emperor Penguin is arguably the most famous species. And it’s the one we’ll show you how to draw from the front and the side:
If you’d rather look at images, read on to discover a set of illustrations for every step!
Now, let’s create a cute penguin drawing!
Sketching Tools To Draw A Penguin
To sketch a penguin, the following tools might come in handy:
- An H pencil: This type of pencil has a hard lead, so it leaves a light trace on the paper. That’s perfect when you’re learning how to draw and create basic outlines, since the light trace is easy to erase, but also easy to build.
- An HB pencil: The golden mean of pencils, an HB lead is medium hard, meaning it’s neither too hard nor too soft. You can use it when making the outline darker and softly shading your penguin drawing.
- A B pencil: Soft lead is ideal for shading since it creates dark grey, almost black hues.
- A kneaded eraser: This type of eraser is soft, so you can tweak its shape depending on what you want to erase. You can also use it to highlight parts of your sketch.
- Lightly textured sketch paper: Last but not least, lightly textured paper has a smooth surface, so it’s easier to draw on it and erase unwanted lines from its surface.
These are just recommendations — you can use whatever pencil and paper you’re most comfortable with!

How To Draw A Penguin From The Front In 8 Steps
Let’s kick this guide off with the steps on how to draw a penguin from the front.
1. Draw The Base
Recommended tool: H pencil
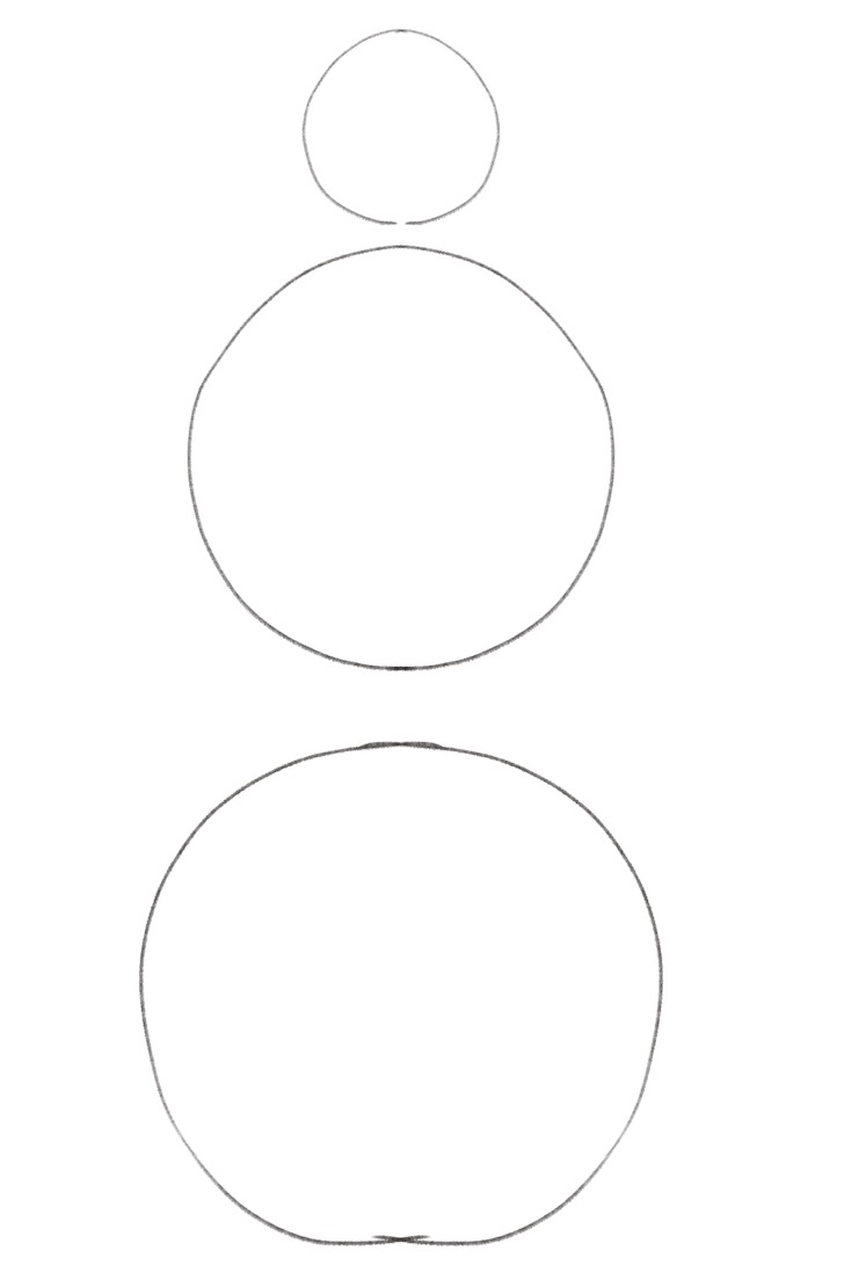
The best way to learn how to draw a penguin is to use geometrical shapes to form its body, sketching one body part at a time.
You’ll then connect the parts into one big, symmetrical Emperor Penguin!
For starters, we’ll create the foundation for the penguin’s body.
To do that, let’s draw three circles — the top one needs to be the smallest, the circle in the middle should be about four times larger than the top circle, and the third one needs to be the largest of the three.
Think of drawing these circles as if you were drawing a snowman!
2. Draw The Legs
Recommended tool: H pencil
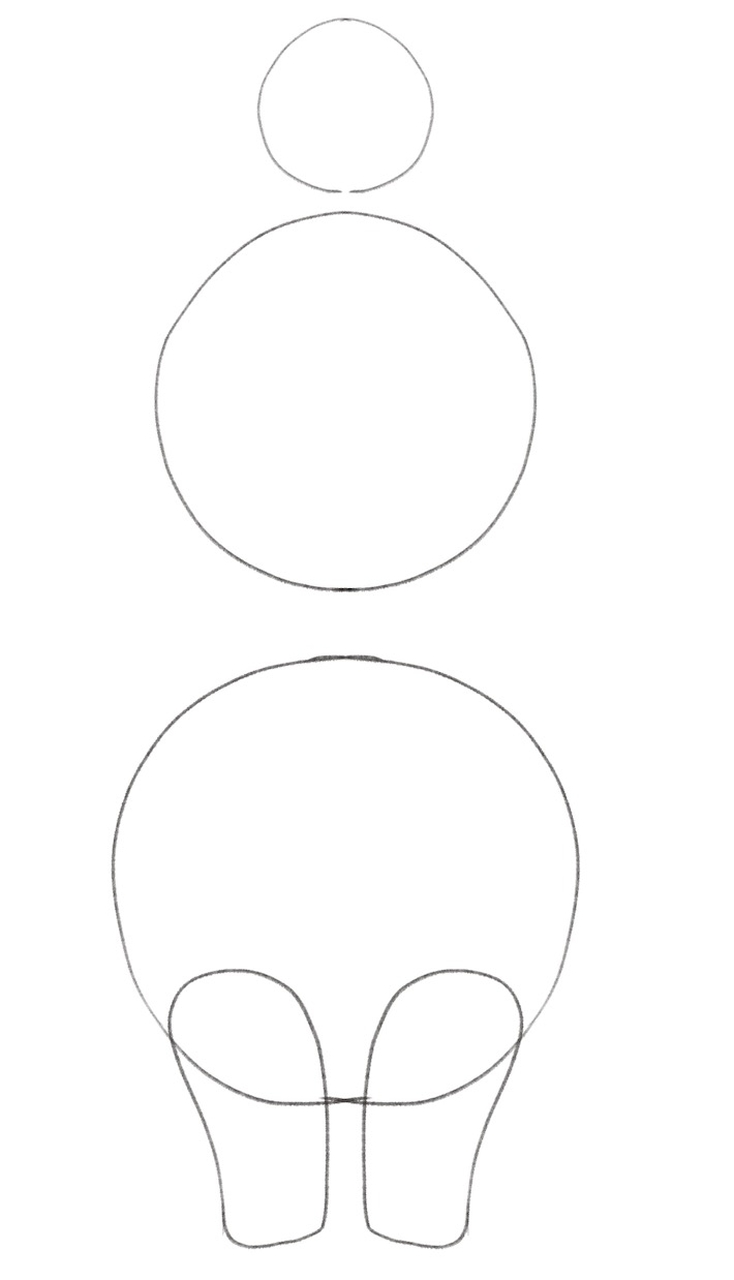
Next, let’s draw the legs.
The penguin’s legs are short compared to the size of its belly, hence the adorable wobble that occurs when penguins walk.
Draw the legs so that they cover approximately one-third of the bottom circle. As for the shape, you can draw them like the blades of a hockey stick, like so:
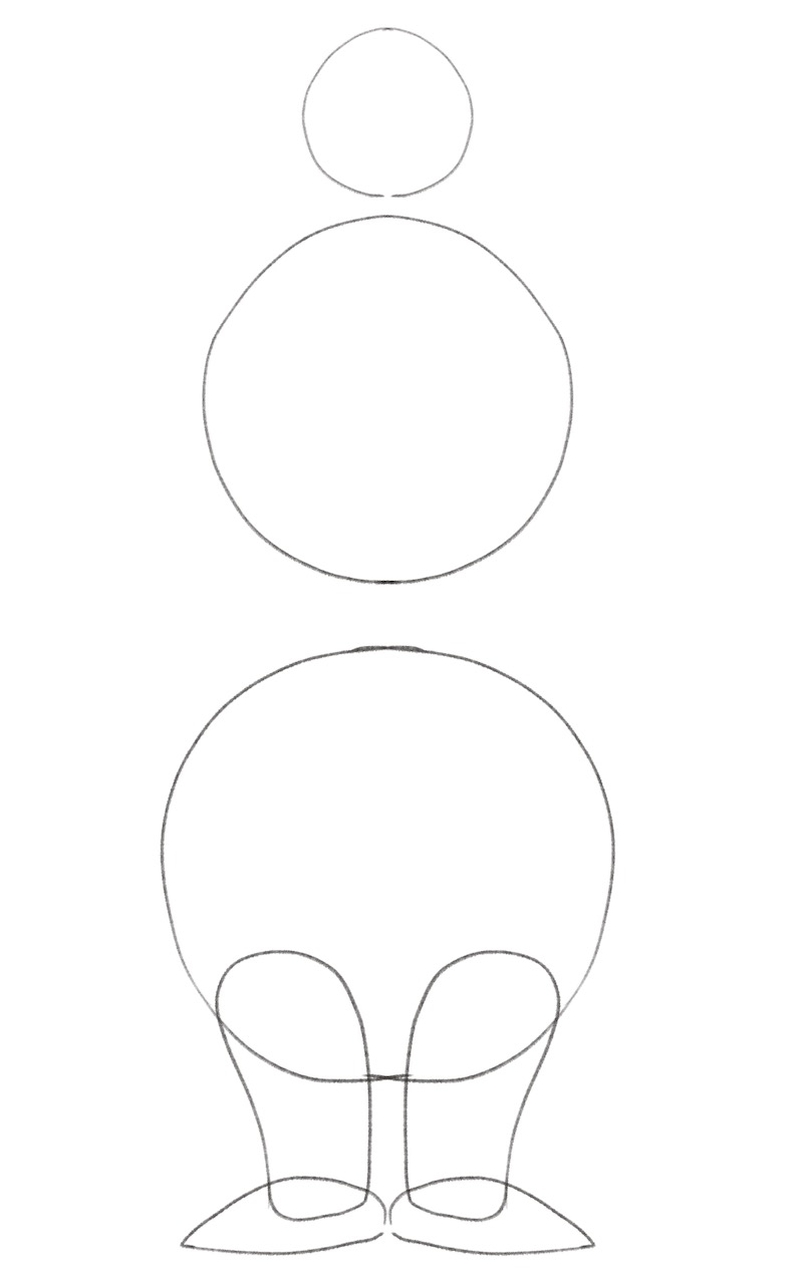
Now, let’s outline the penguin’s webbed feet.
Keep the shape simple and don’t worry about the sharp lines right now.
We’ll add the claws and the details later:
3. Draw The Wings, Tail And Beak
Recommended tool: H pencil
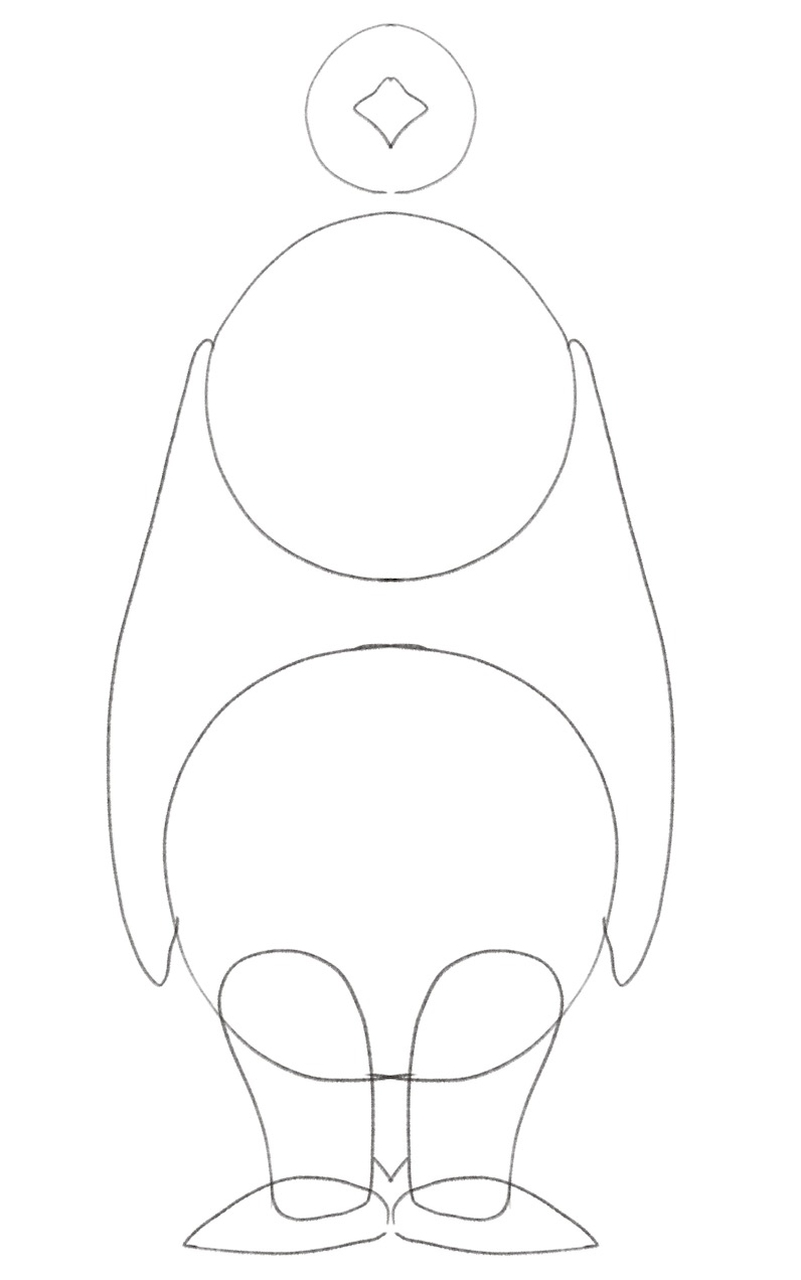
Since penguins have beaks, we’ll create the base for the beak now and add the details a bit later.
In the middle of the penguin’s head, draw a rhombus-like shape, but use slightly curved lines.
Then, draw the wings by connecting the second and third circles.
Start just above the middle of the second circle, point the lines on either side outward and immediately curve them down, toward the bottom circle.
Make sure the wings are gently curved, especially around the belly, since they’re snuggled against it and follow its shape.
Oh, and let’s draw a V-shaped line between the penguin’s legs, just above the feet. That’s where this fella’s tail is peeking through!
4. Draw The Toes And Outline The Body
Recommended tool: H pencil
Penguins have three toes on each foot.
To add the toes, draw three horn-like shapes on both feet.
Next, let’s connect the circles to form the penguin’s body.
Start from the head. Follow its shape and slowly widen the space between the lines as you reach the bottom of the head.
Penguins have short, wide necks, so make sure that shows on your drawing.
Attach the neck with the middle circle and extend the lines toward the third circle.
When you’re done, your penguin drawing should look like this:
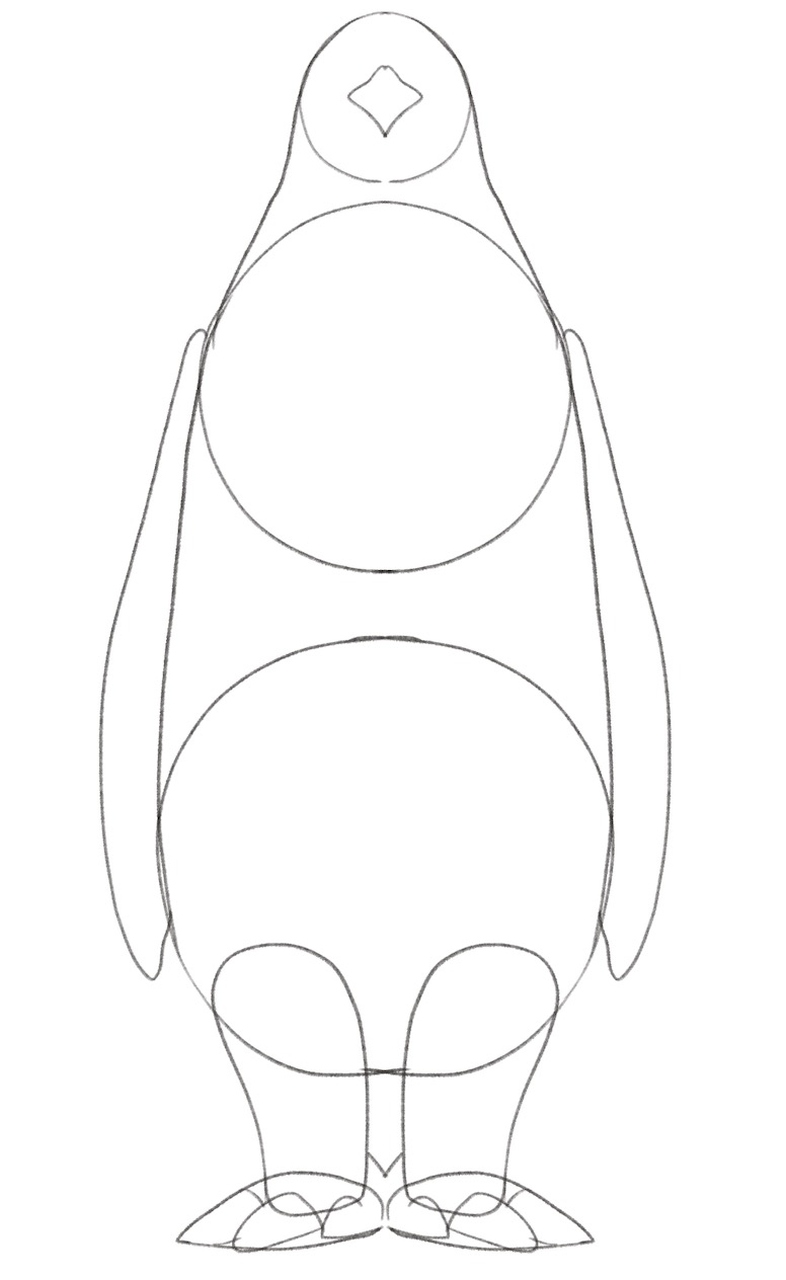
Adding the details brings your penguin drawing to life.
5. Draw The Feathers And Claws
Recommended tool: H pencil
Now that the basic sketch is finished, it’s time to start adding details to your penguin drawing.
For starters, add two tiny dots at the center of the rhomboid.
Then, add super short, angled lines around the points where the head and the neck meet.
Next, do the same on the sides of the second circle.
Then, draw zig-zag lines at the bottom of the penguin’s legs.
We’re adding these lines to depict the feathers:
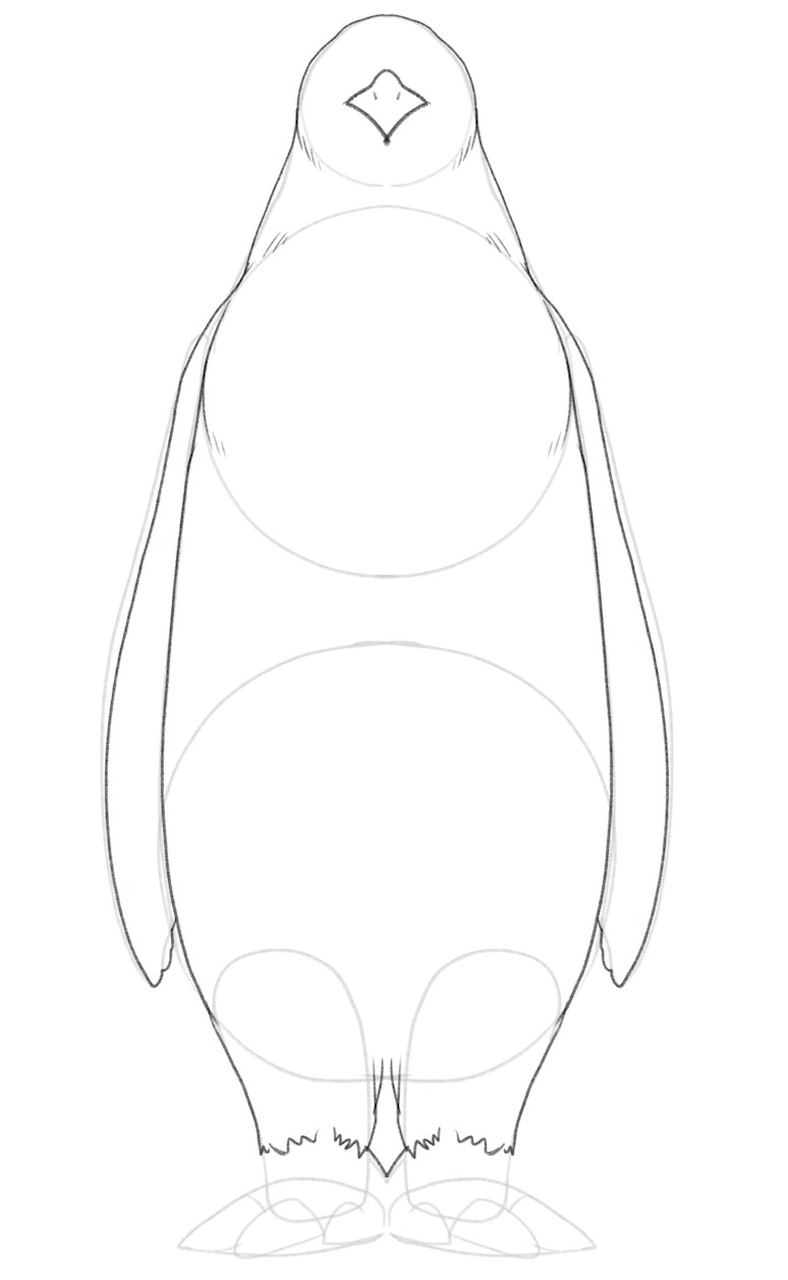
We mentioned earlier that penguins have claws, so let’s add them to the sketch.
Go over the toes and make the lines less straight and rigid.
At the end of each toe, add a pointy, sharp claw, like this:
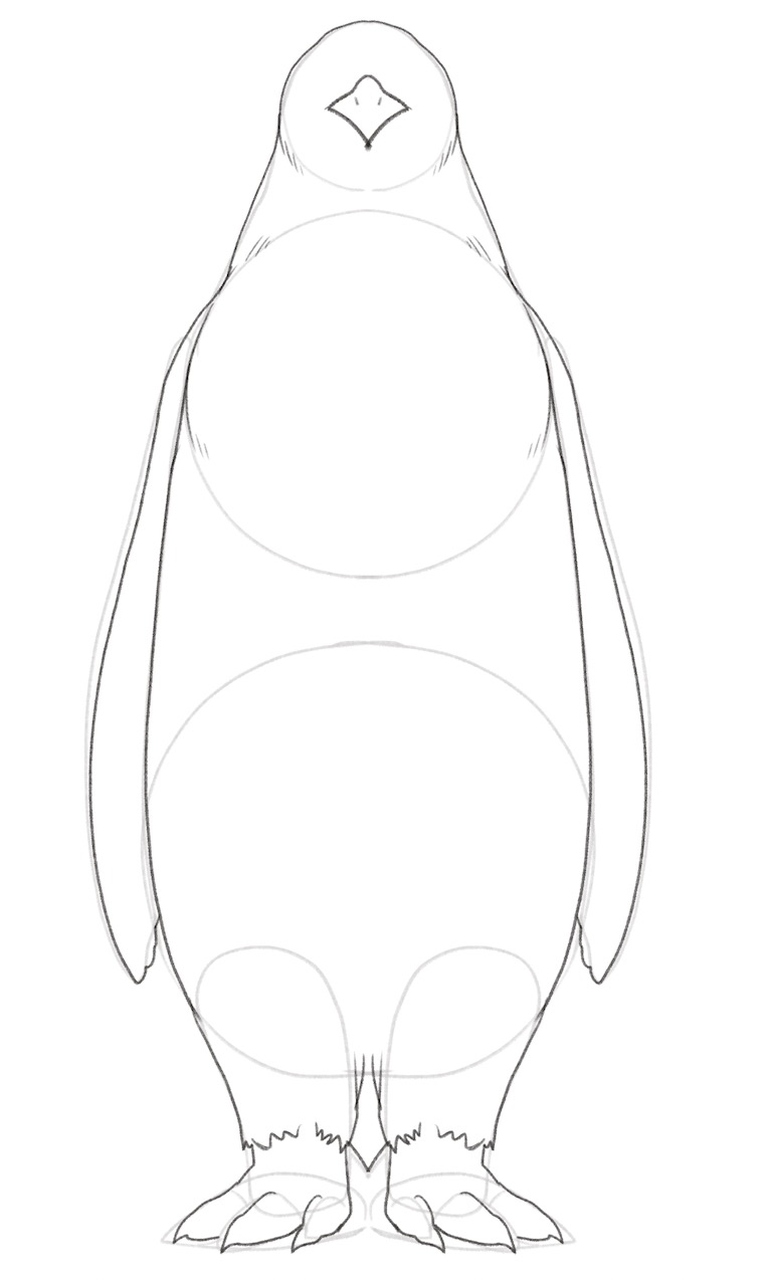
6. Draw The Eyes
Recommended tool: H pencil
Next up, it’s time to add the eyes.
Let’s draw two oval shapes and place them right next to the penguin’s beak.
Then, continue adding short lines over the penguin’s chest and on the inside of its legs, to depict more feathers.
As for the wings, divide them into three parts to mark the areas that you’ll shade differently later on.
The first part should stretch from the shoulders to above the middle. The third area should cover the bottom of the wings, like this:
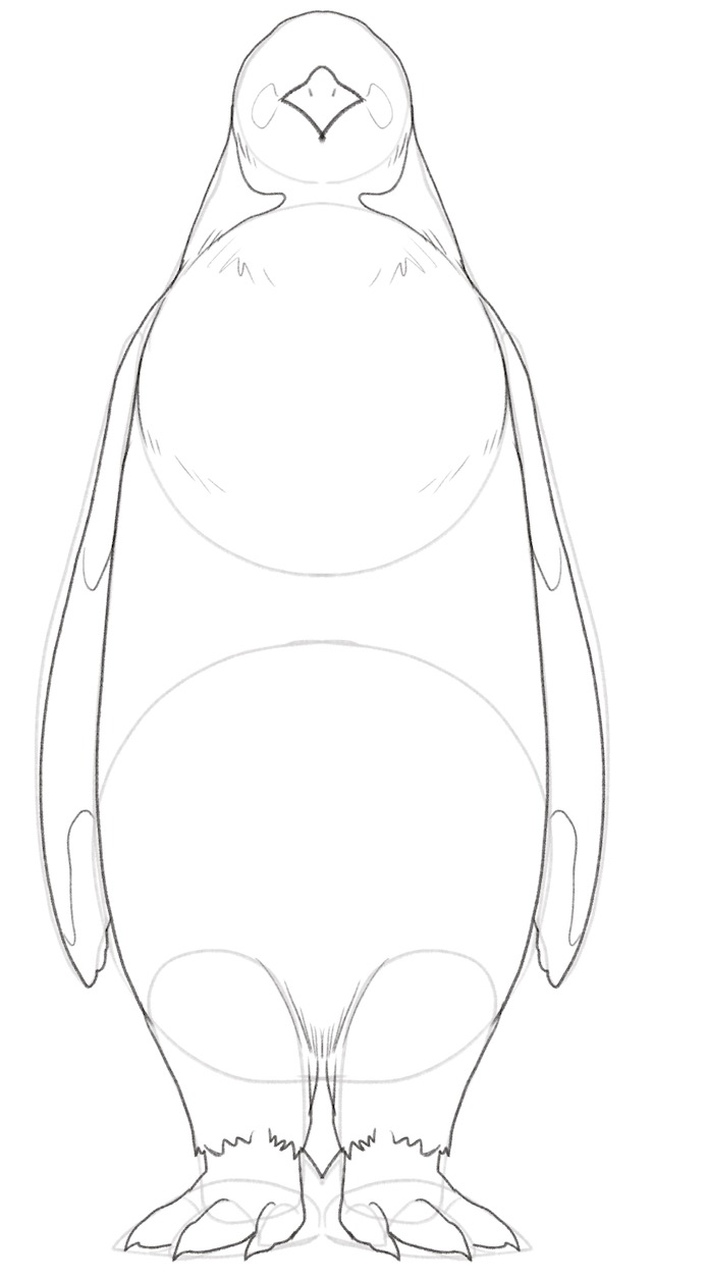
7. Add The Finishing Touches And Erase The Unneeded Lines
Recommended tool: HB pencil, kneaded eraser
At this point, you can use an HB pencil or apply more pressure to your pencil of choice.
First, go over the lines to make them slightly darker than before.
Then, add the nostrils and make the feathers around the legs thicker by drawing more short lines:
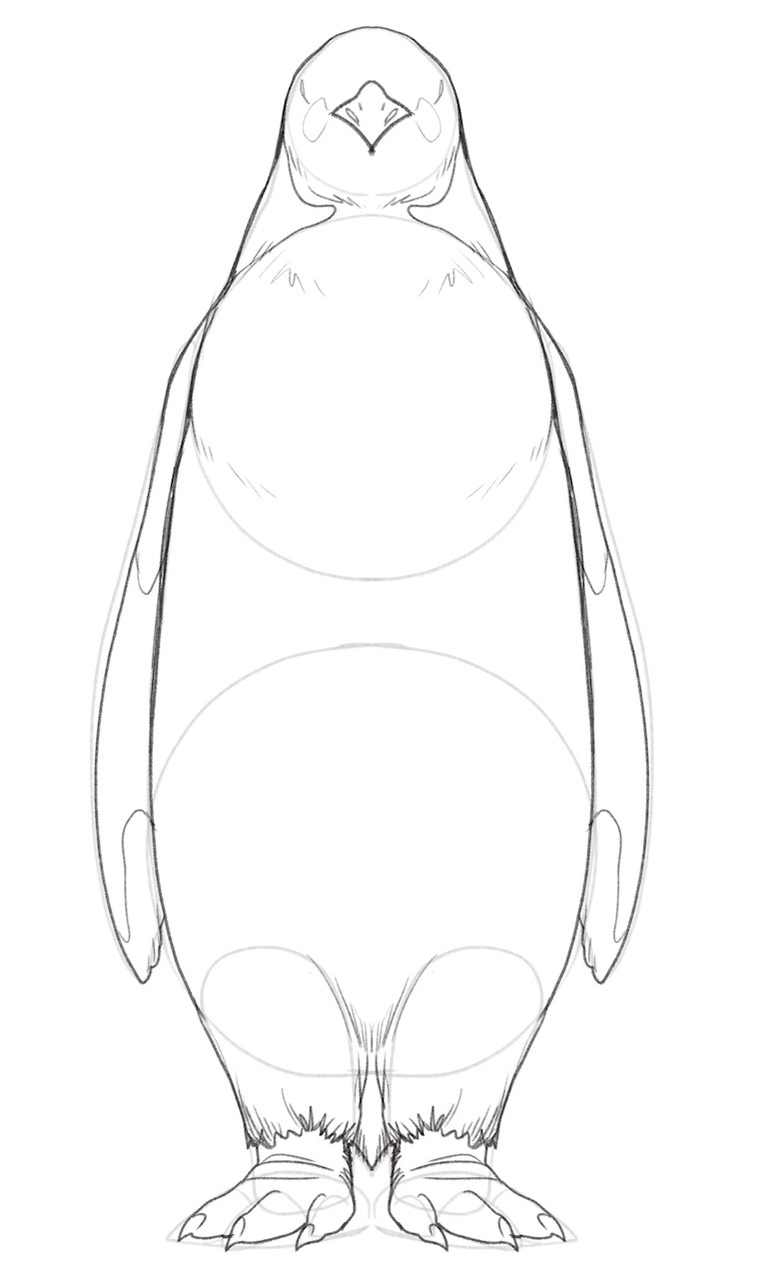
Next, get your eraser and remove the parts you no longer need, including the circles on the inside of the body:
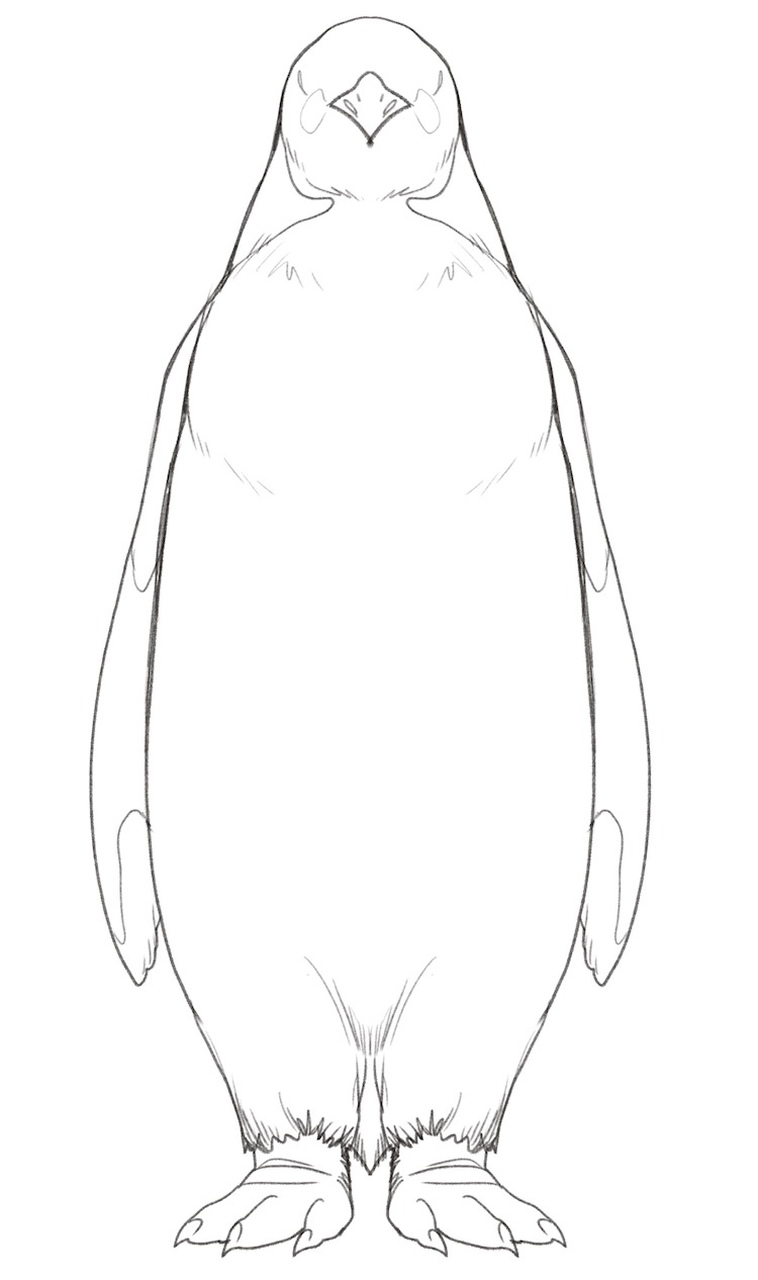
8. Shade Your Penguin Drawing
Recommended tool: HB and B pencils
Here comes the particularly cool part — shading your penguin drawing!
Combine HB and B pencils (or apply different levels of pressure to your pencil) to create different shades of grey.
Make the rhomboid completely dark, then use your eraser to create short, light lines over its surface, to depict the beak.
Make the top and the bottom part of the wings dark and color the feet in the same shade.
As for the chest, belly, and legs, leave them white, but add a soft shadow on the sides:
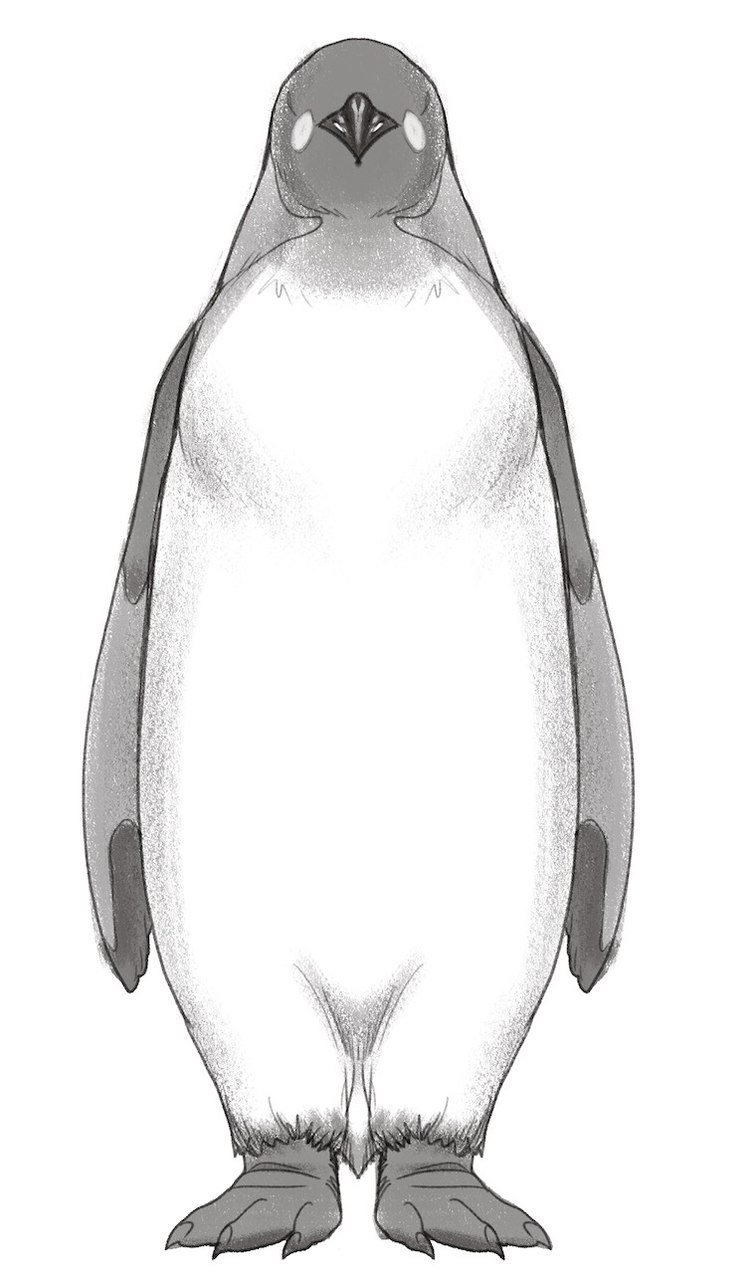
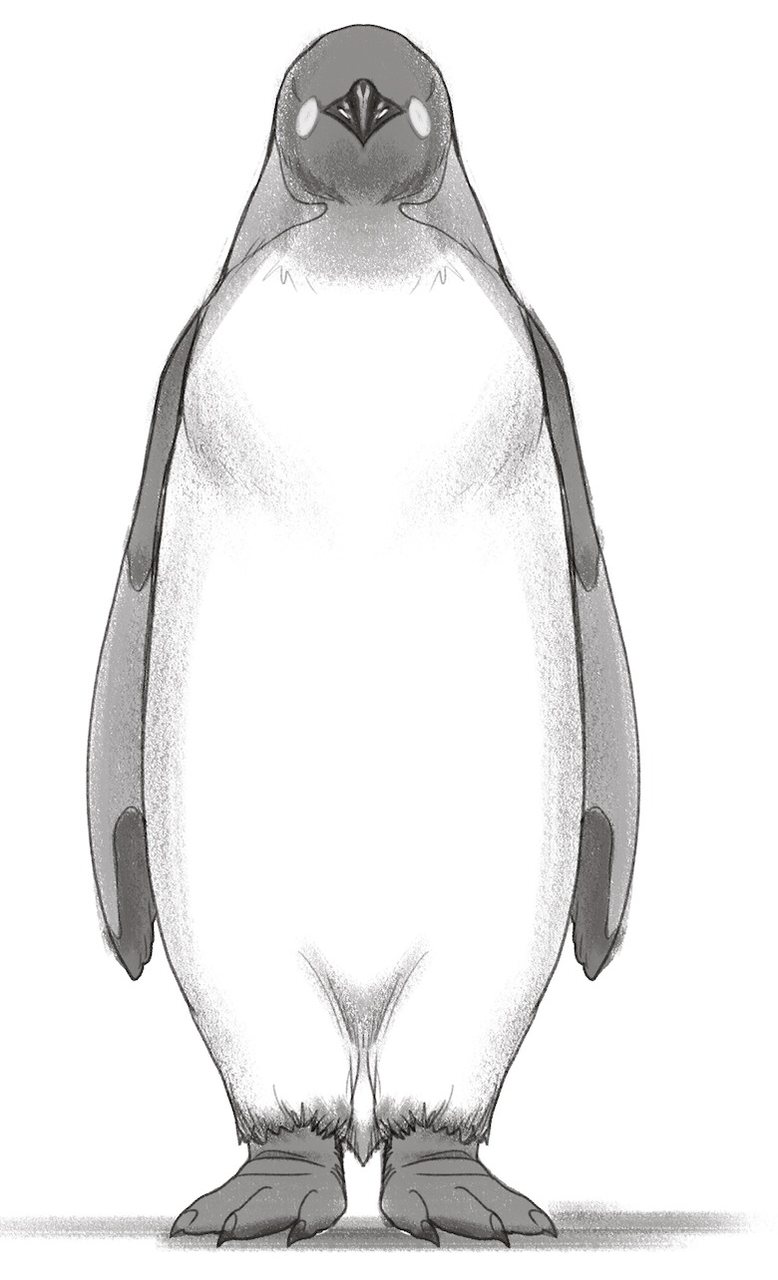
The last step to drawing a penguin from the front is to add more dimension to the sketch.
For that reason, don’t forget to color the area under the penguin’s body dark grey, because that part is in the penguin’s shade:
Now, let’s move on to drawing a penguin from the side!
How To Draw A Penguin From The Side In 5 Steps
When drawing a penguin from the side, we’ll use the same approach — we’ll draw the body parts one by one and then connect them into one big, cute penguin.
1. Draw The Base
Recommended tool: H pencil
The first step to drawing a penguin from the side is the same as when sketching it from the front.
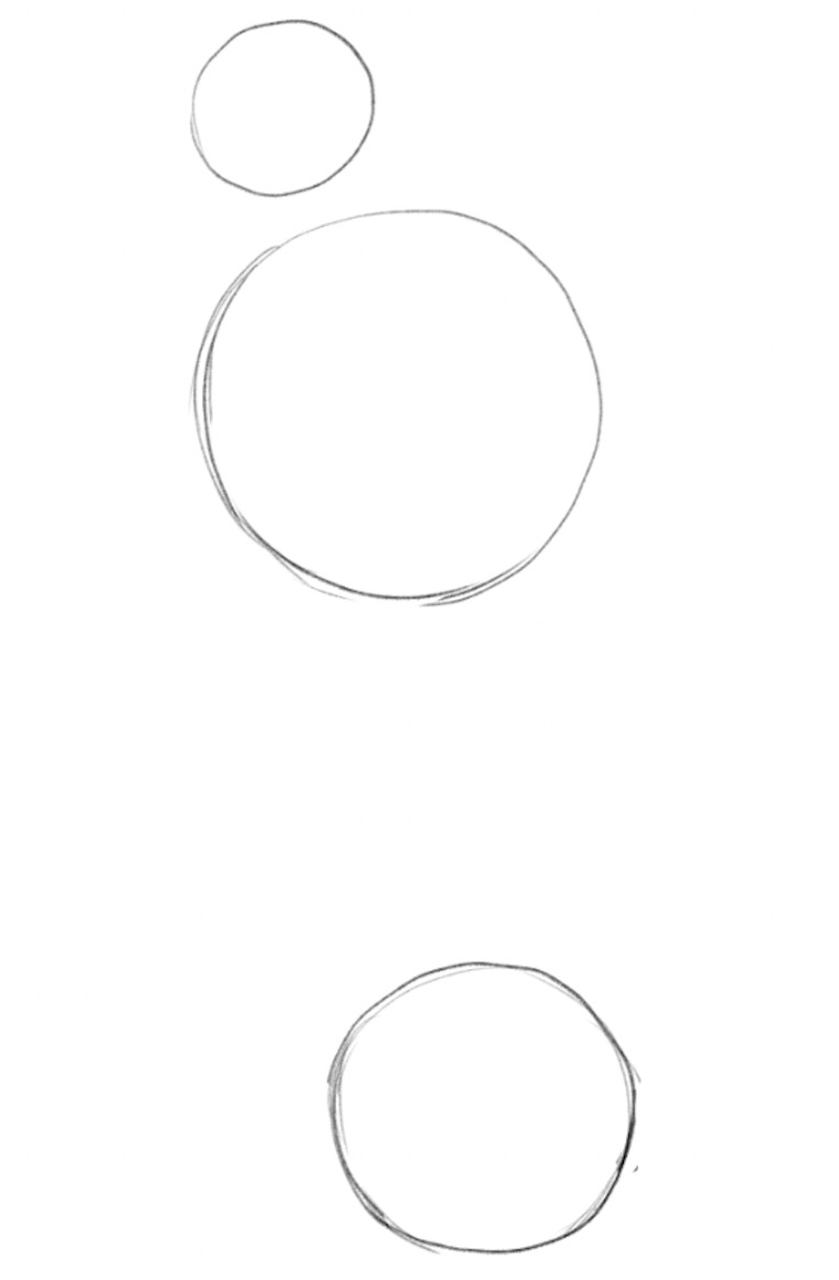
We’ll draw three circles to position the peguin’s head, chest and legs, and determine the length of its body.
The top circle is the smallest, the second the largest, and the third is about two times bigger than the first circle.
When placing the circles, make sure you leave a lot of space between the chest and the legs, like this:
Outline The Penguin’s Body
Recommended tool: H pencil
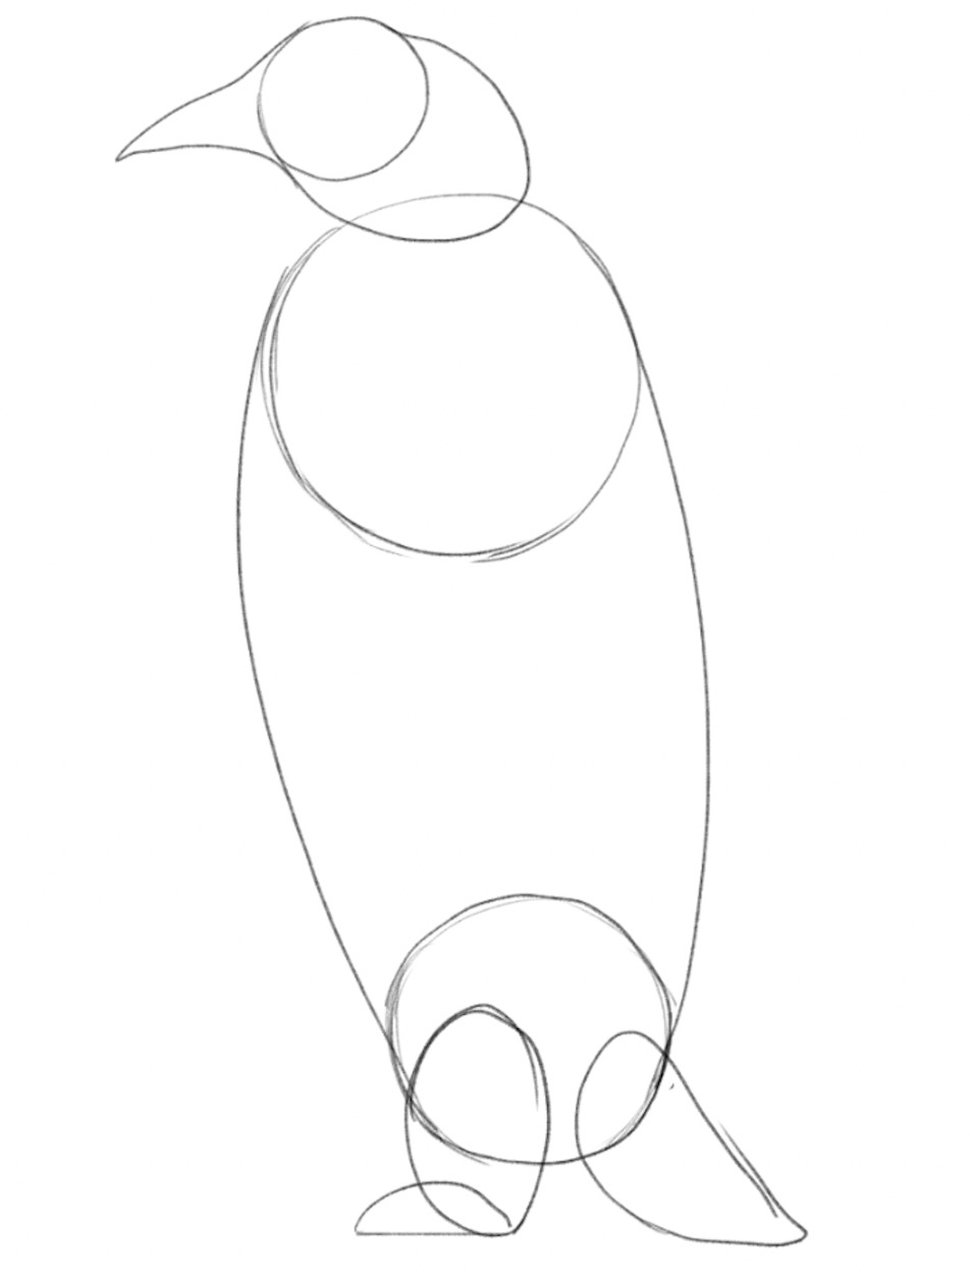
Next, draw the beak and attach it to the top circle.
Then, add an oval shape that envelops the head and touches the middle circle. That’s where the penguin’s head and neck will be.
Now, let’s connect the middle circle with the one at the bottom.
While we’re here, how about we draw the penguin’s leg, foot and tail?
Use an oval shape for the leg and one-half of a circle for both the tail and the foot, like so:
2. Draw The Wing
Recommended tool: H pencil
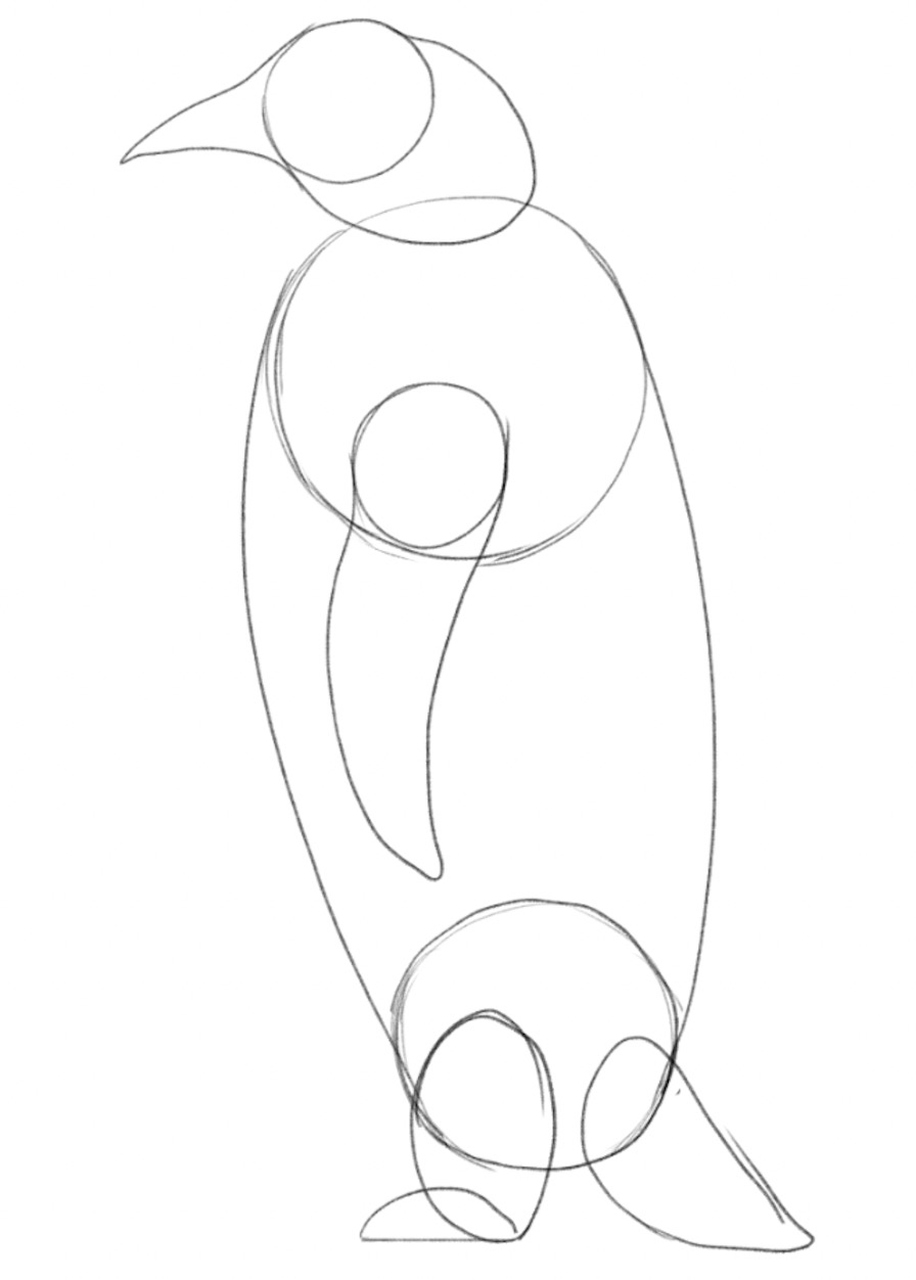
Now, let’s add the wing.
Draw a small circle first and position it in the lower half of the larger middle circle.
Then, add the wing and have it almost touch the bottom circle:
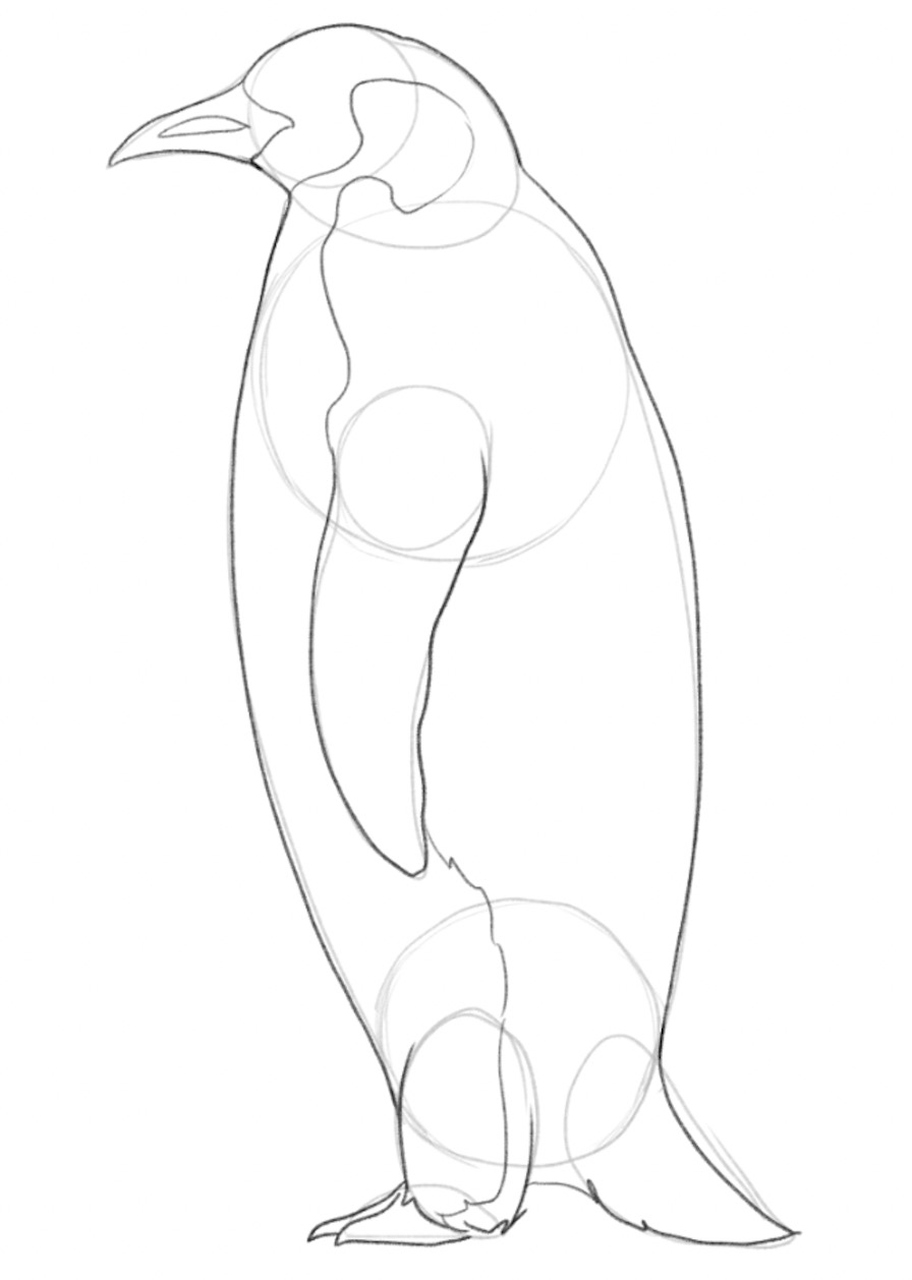
4. Finalize The Outline
Recommended tool: H pencil
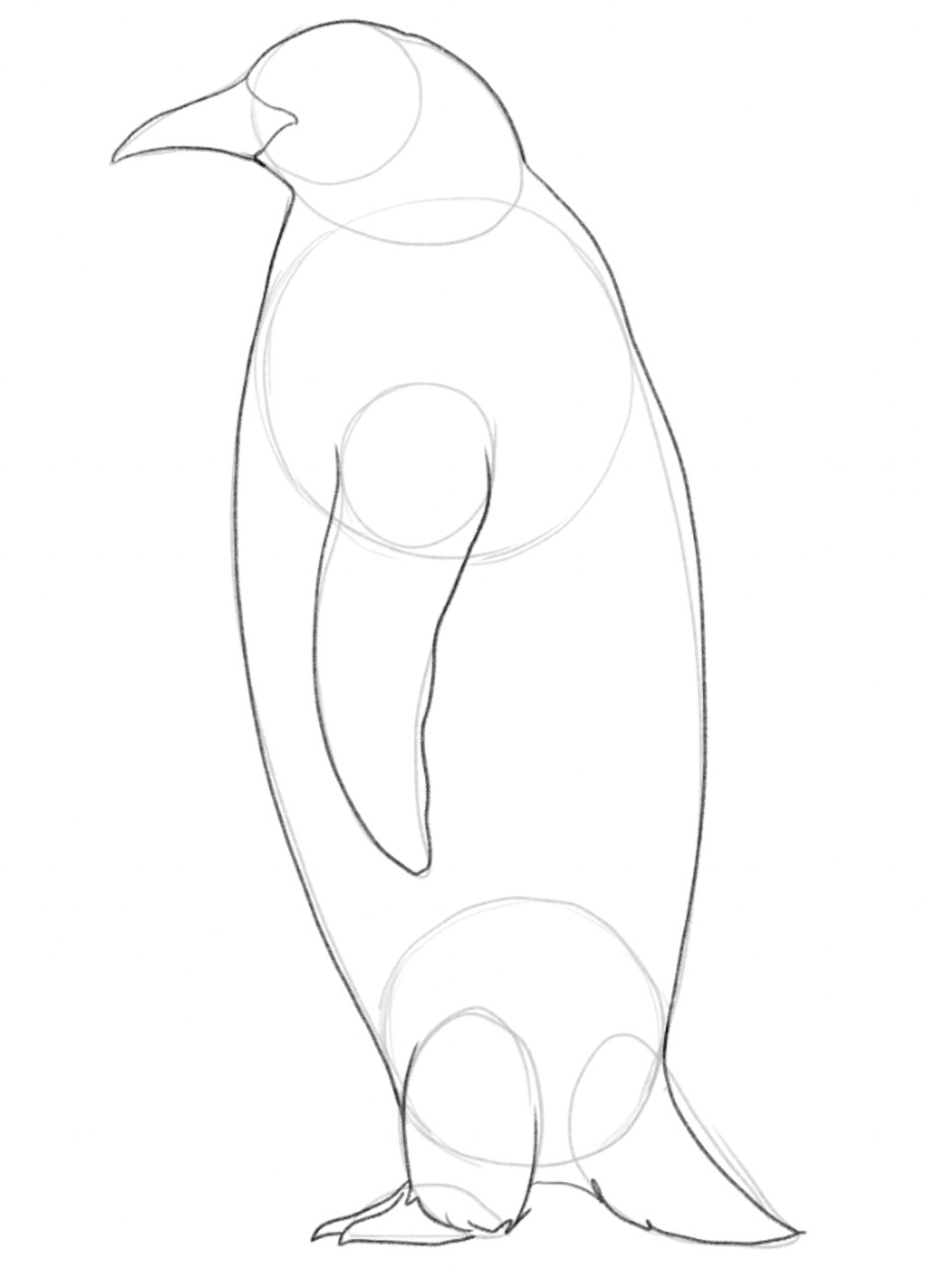
Now that all parts of the penguin’s body are in place, let’s connect them.
You can apply a bit more pressure to the pencil, so that the lines stand out from the circles you used to sketch the body.
At this point, you can divide the foot into at least two parts, since you can’t really see all of the toes from this angle:
Now it’s time to add some details to the sketch.
Draw a small triangle with soft angles on the beak to add more dimension to it; we’ll color this part differently when we get to the shading stage.
Next, start drawing a line from the point where the neck and the chest touch.
Point the line to the right and draw a mushroom-like shape covering about one-half of the head.
Then, point the wavy line down and connect it with the left line of the penguin’s wing.
At the bottom of the wing, continue drawing the same line until you reach the foot:
5. Shade Your Penguin Drawing
Recommended tool: HB and B pencils, kneaded eraser
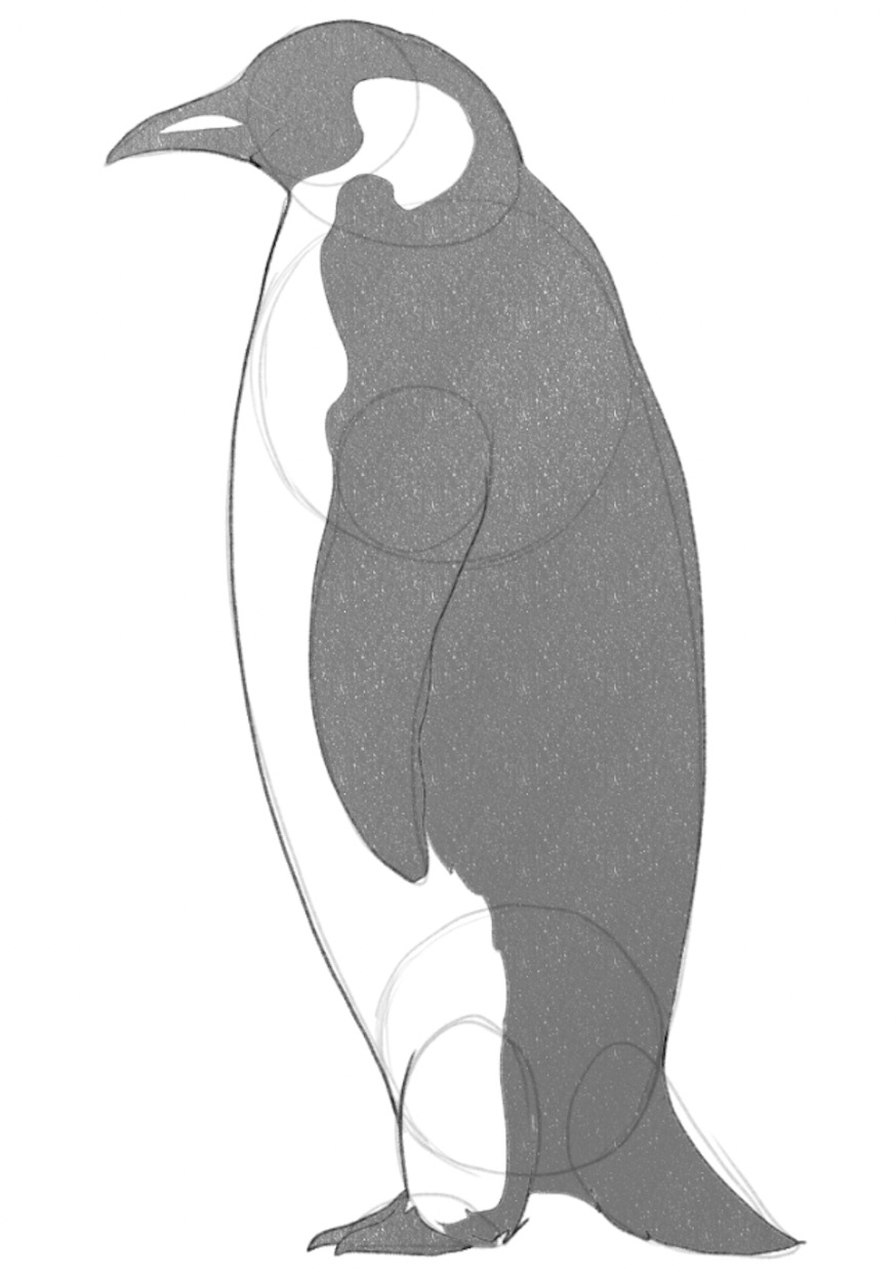
To shade the penguin, you can use your HB or B pencil (or apply more pressure to your pencil of choice).
Now, you know that wavy line you drew earlier from the neck to the foot?
That’s the border between the light and dark parts of the penguin’s body; we’ll leave the left side white and shade the larger part on the right.
For starters, it’s okay to color the right side in one shade of grey, like this:
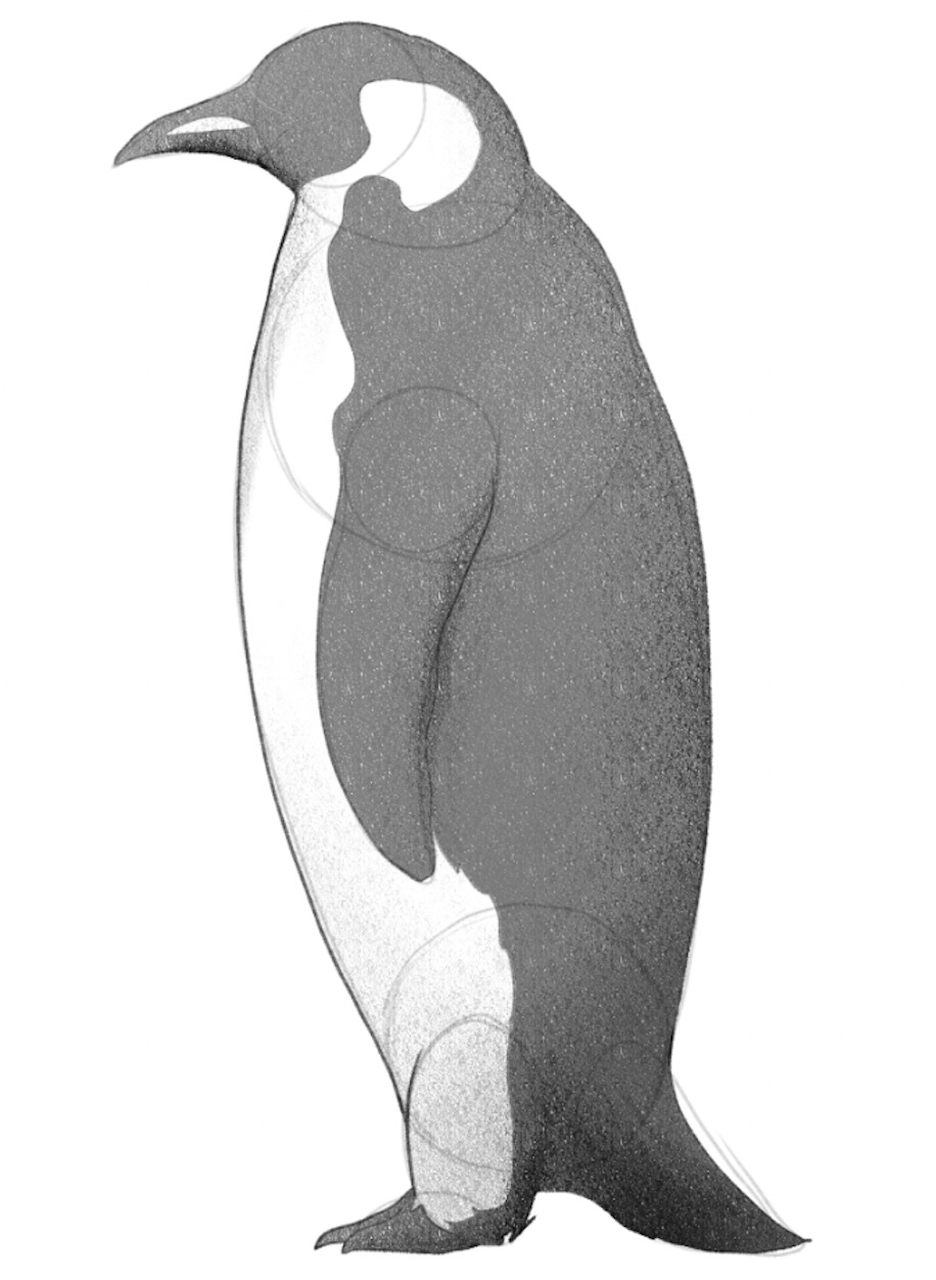
Using a B pencil (or by applying more pressure to whatever lead you’re using), add darker shades of grey on the underside of the beak, on the right side of the wing, and at the bottom of the tail.
Don’t forget about the belly and chest — even though they’re white, you can add soft grey hues below the head and above the feet:
Now, grab your eraser and remove the parts you no longer need:
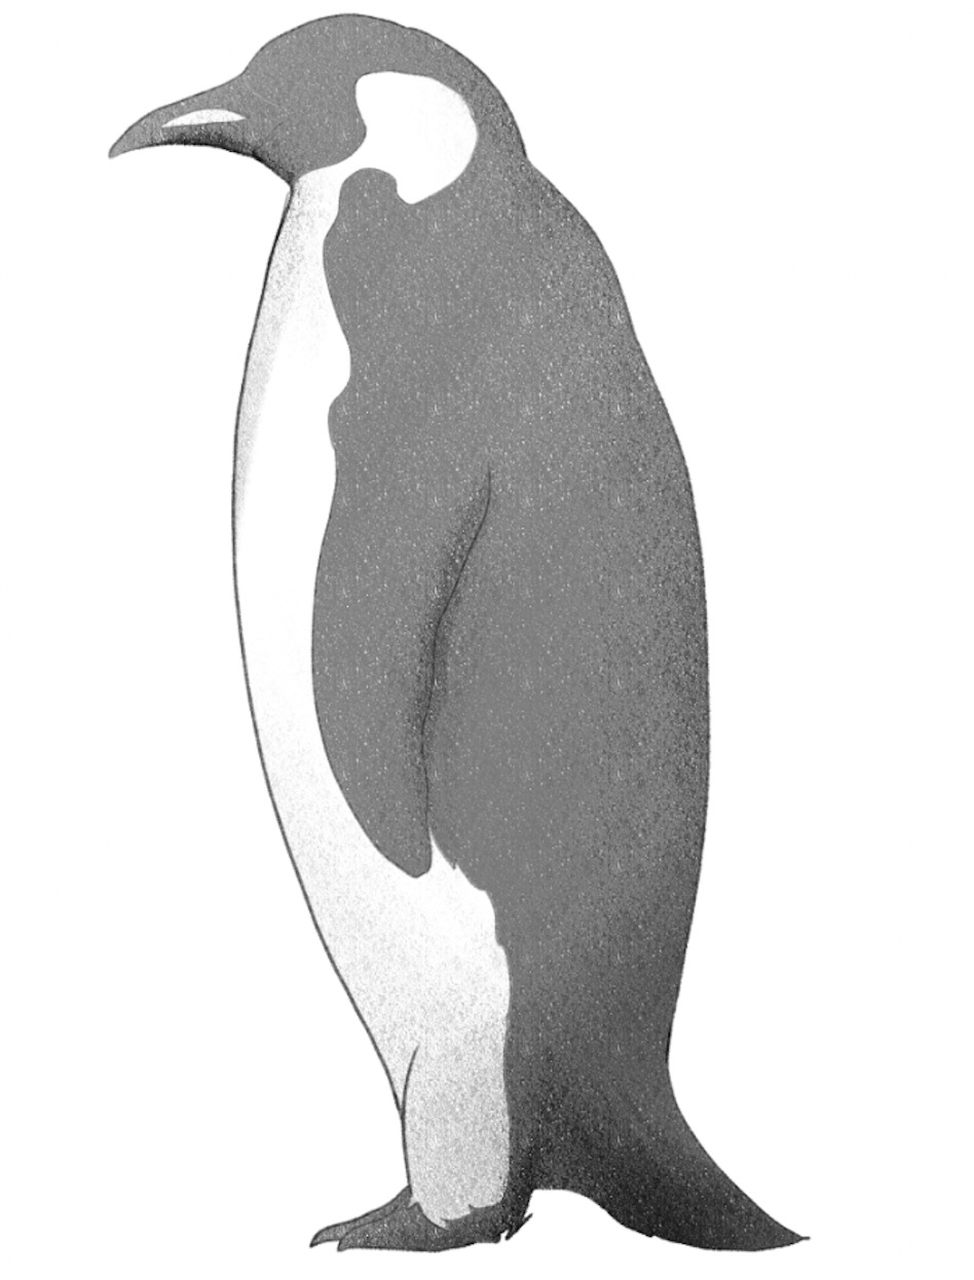
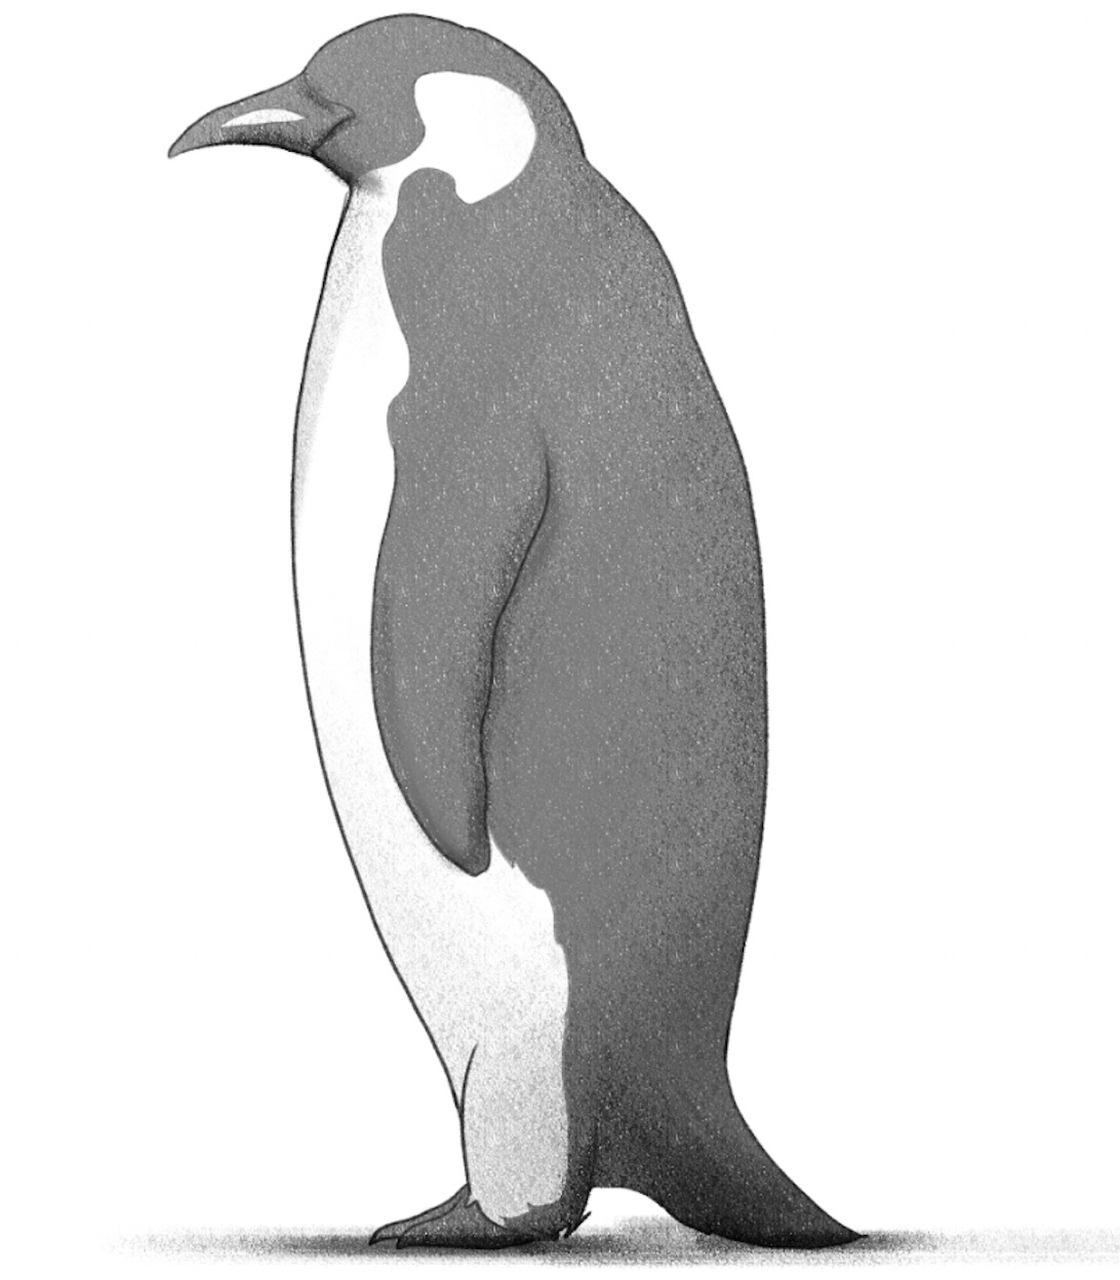
The last step to drawing a penguin is to add a shadow under its body, like so:
Finished Your Penguin Drawing? Try These Next!
Are you up for some more art tutorials?
We have a bunch of them ready, including more guides on animal drawing, including:
- How to draw a bat
- How to draw a panda
- How to draw a wolf
- How to draw a horse
- How to draw a cat
- How to draw a dog
A Recap On Easy Penguin Drawing
Whether you’re drawing a penguin from the front or the side, first define its size and position its head, chest and legs by drawing three circles.
Then, start adding the parts of the penguin’s body, including the legs, the wing, the beak, the feet, the claws, the eyes and feathers.





![Finished drawing of a turkey. Image used in the “Turkey Drawing In 5 Steps For Beginners [Video + Illustrations]” blog post.](https://www.biowars.com/wp-content/uploads/2023/09/turkey-drawing-hero-image-437x413.jpg)