Related Resources
Did you know that turkeys can change the color of their head?
Their skin shifts from blue to white, depending on their emotions. The more excited they are, the more intense the colors!
In this article, we’ll keep the turkey’s level of excitement hidden behind the shades of black and white. You can choose to bring your turkey to life by adding color later on.
Instead, we’ll focus on showing you the steps to simple turkey drawing so that you can enrich your comic book and your drawings with this interesting animal:
If illustrations work better for you — keep reading! We’ll break down the tutorial below so you can explore it at your own pace!
The Tools You Need For Simple Turkey Drawing
Here’s a list of the tools you can use for your turkey drawing:
- An H pencil: The hard lead of H pencils leaves behind a light trace on paper, and this is exactly what you need when sketching and outlining!
- An HB pencil: HB stands for “hard and black,” which means that these pencils strike a balance between hardness and darkness. Their versatility and light darkness make them a great choice when adding details to your turkey drawing and softly shading it.
- A 4B pencil: The “4B” mark indicates that the pencil lead is relatively soft and produces a dark mark. That’s why these pencils are excellent for creating bold lines, strong contrasts and shading.
- A kneaded eraser: These erasers are made of a pliable material that you can mold into various forms, whether edgy or flat. This allows for precise erasing of small areas and details in your turkey artwork.
- Lightly textured paper: The paper’s smooth surface ensures that your pencil glides easily over it, which makes drawing more enjoyable and fun!
You can use any of the tools above, but if you don’t have them — don’t worry!
The most important “tool” when learning how to draw is your determination to practice; as for pencils and other art supplies, you can use the tools you’re most comfortable with!
How To Draw A Turkey In 5 Steps
The easiest way to learn how to draw a turkey is to use geometrical shapes to outline the body.
Here’s how to do it.
1. Draw The Base
Recommended tool: H pencil
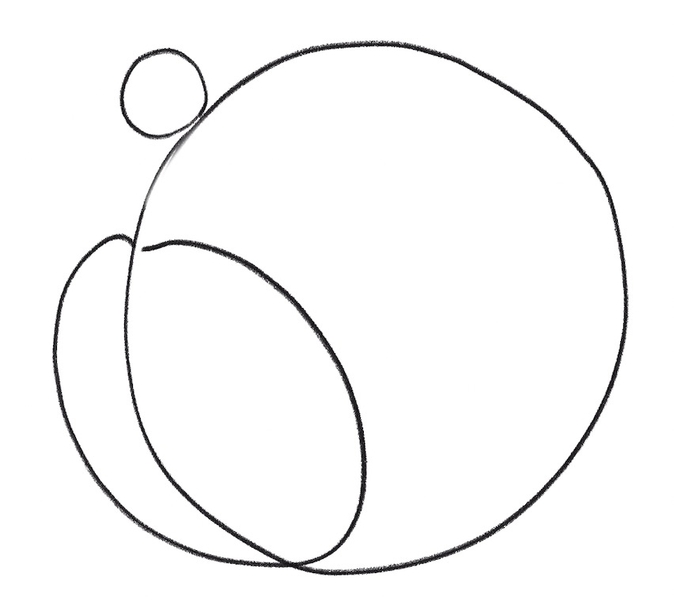
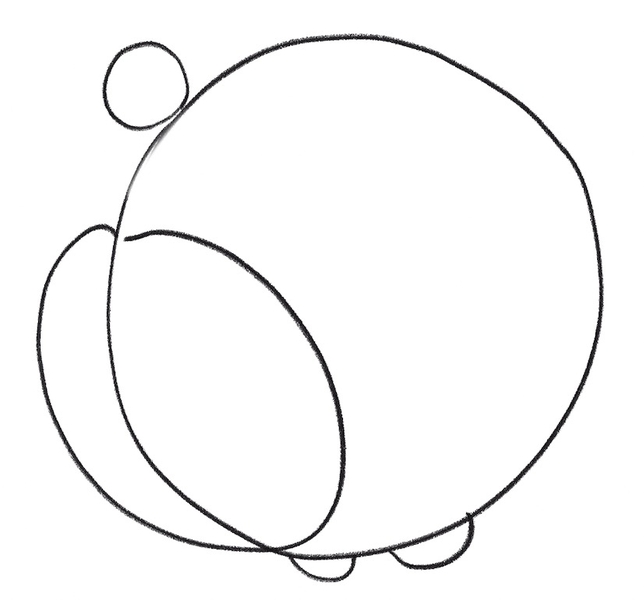
Grab your pencil and start by drawing a large circle. This will be the base of the turkey’s body, i.e., the belly, the chest, and the back. We’ll add details later on!
Next, let’s outline the head.
To do so, sketch a small circle and attach it to the top-left part of the large circle.
Then, add a half-moon outside of the turkey’s belly.
Next up, draw the same shape on the inside of the belly, like so:
2. Draw The Legs
Recommended tool: H pencil
Once the base of the turkey’s body is ready, it’s time to start adding the body parts one by one.
Let’s start off with the legs.
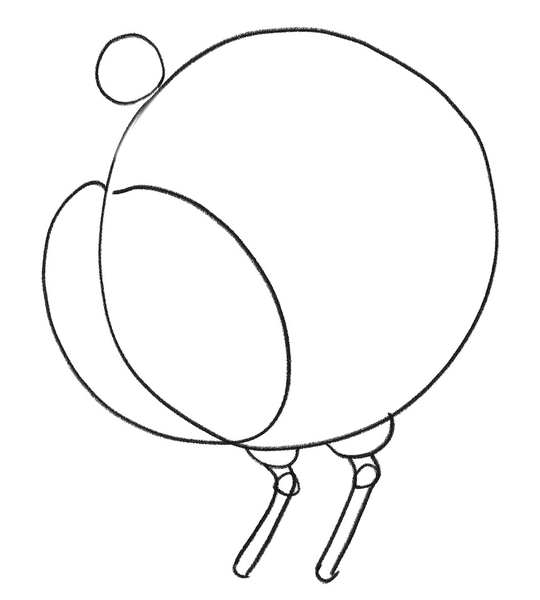
First, sketch two rounded shapes at the bottom of the largest circle, like this:
Then, draw the rest of the legs like this:
3. Draw The Head, The Tail And The Wing
Recommended tool: H pencil
Once the legs are in place, let’s add some details to the turkey’s head.
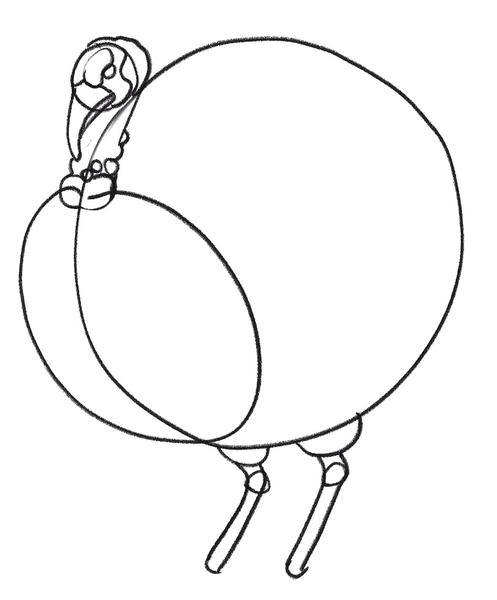
Now, turkeys have a unique head with some eye-catching features. Apart from the beak they use to pick up and eat food, turkeys also have a snood and a wattle.
A snood is a long flap of skin on top of the beak, while a wattle refers to a wrinkled piece of skin underneath the turkey’s beak.
Oh, and when drawing the turkey’s head, make sure not to forget about caruncles — the bumpy bits along the turkey’s head and neck.
Now, you can start off by drawing a neck, i.e., connecting the head with the turkey’s chest.
Then, you can add a snood, a tiny eye, a beak, a wattle and a few caruncles here and there, like so:
Once you outline the head, it’s time to add the tail.
Just like any other bird, turkeys also have feathered tails.
For now, though, we’ll just sketch the tail’s general shape, which, you guessed it, resembles a circle:
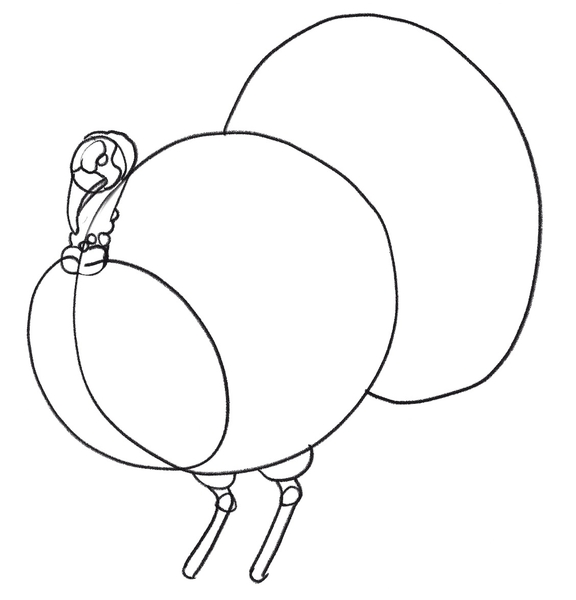
Since the turkey we’re drawing is turned to the left, we can see just its left wing from this angle, while the tip of the right one slightly peaks under the chest, like this:
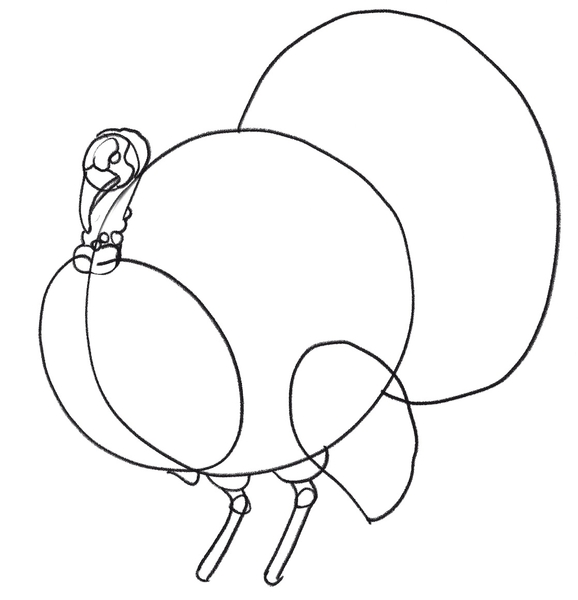
Now, let’s add the shoulder on top of the wing and two toes on each leg:
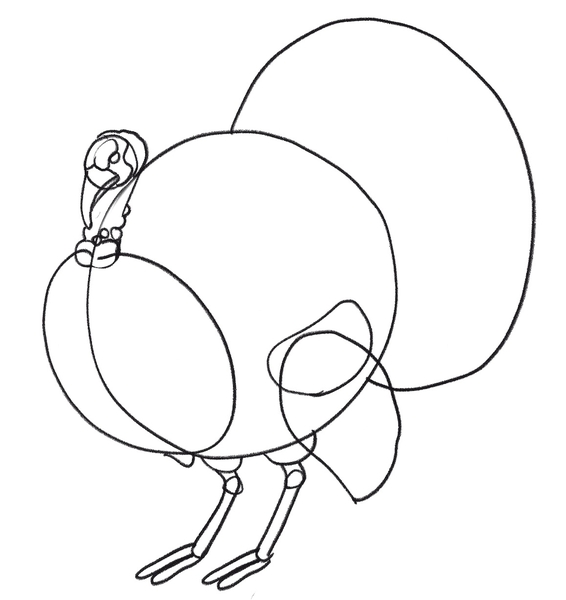
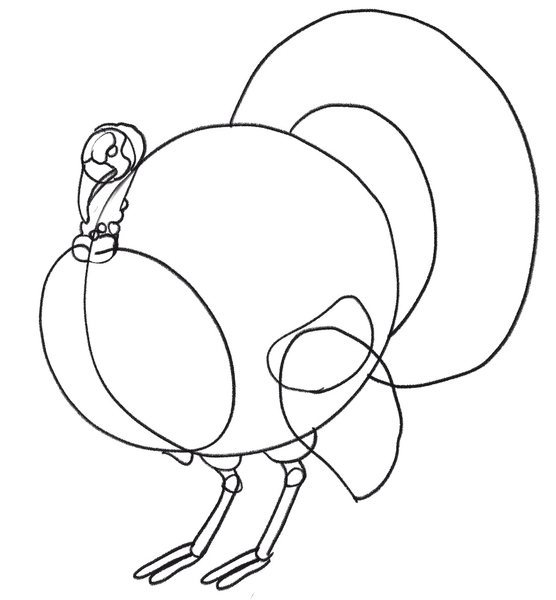
Next, let’s finish outlining the tail.
All you have to do is draw a smaller circle inside the one you drew earlier, like this:
4. Add The Details
Recommended tool: HB pencil, kneaded eraser
At this point, the rough sketch of the turkey is done.
Now’s the time to add the details to the turkey drawing and enhance the lines. For that purpose, we’ll use an HB pencil.
If you don’t have one, you can continue using your preferred pencil of choice and just apply more pressure to it to create darker lines.
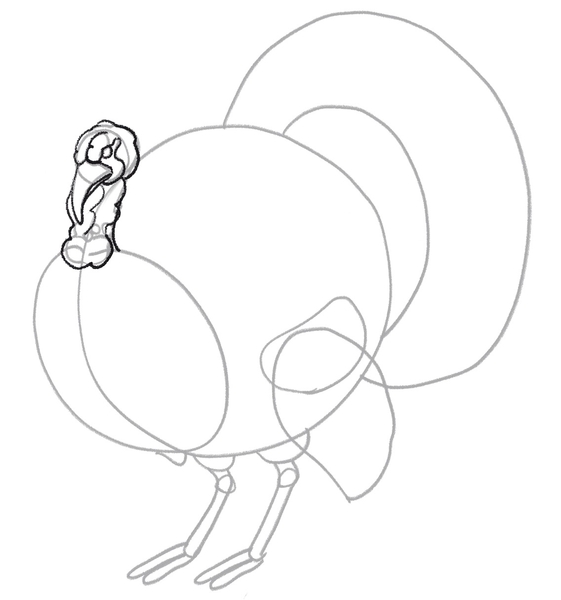
Let’s start at the head.
Go over the details you added earlier, but be careful not to go over the guidelines; you no longer need them and we’ll get rid of them soon:
Then, continue to add details along the turkey’s body.
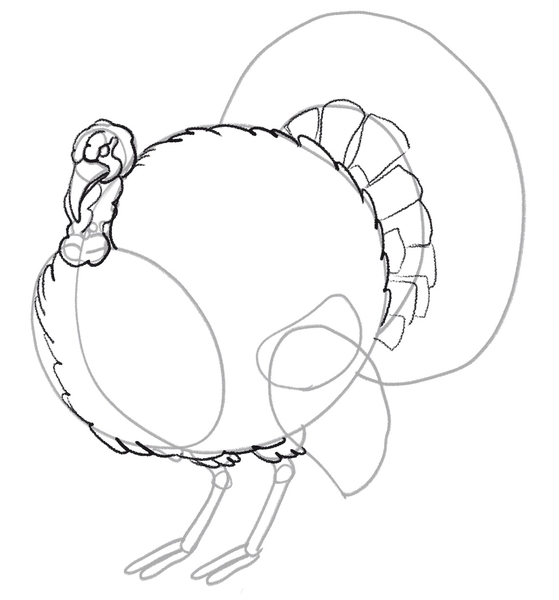
When you finish enhancing the head, go over the largest circle and make it softer using irregular lines.
Then, move on to the tail, and start adding rectangle-like shapes with soft edges to it, like this:
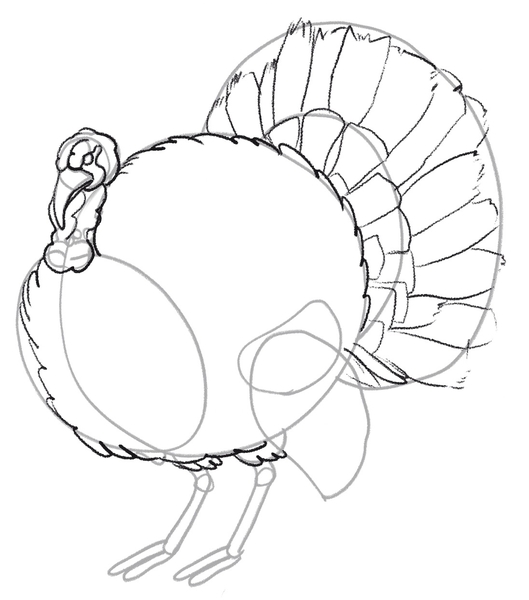
Let’s continue adding details to the tail.
Draw larger rectangles but make their edges feathery, like this:
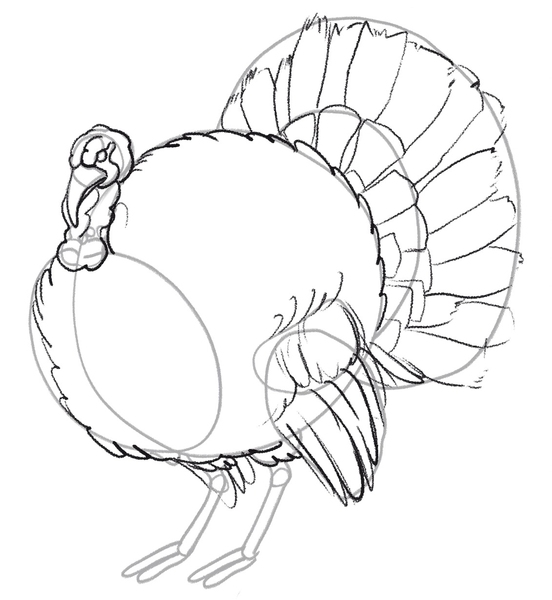
A turkey’s body is entirely covered in feathers, wings included.
So, the next thing you should do is add feathers to the wings, including the tiny bit of the right wing that shows from this angle:
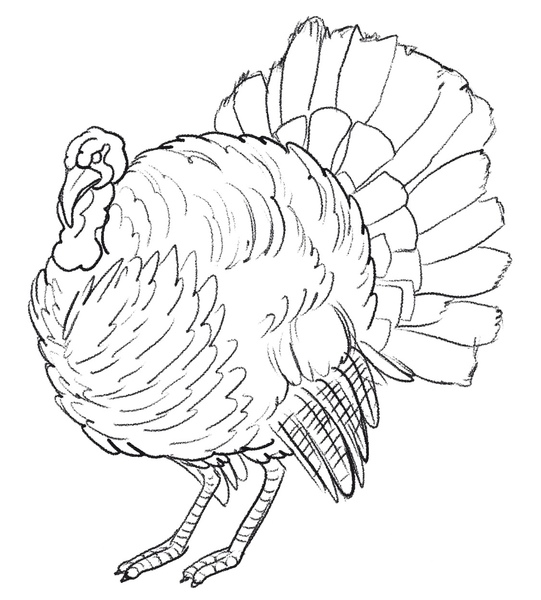
Before you proceed, we suggest you use your kneaded eraser to remove the guidelines, since you no longer need them.
Then, add the feathers all over the turkey’s body, but pay attention to the shape of the feathers on its chest and back, and have them follow the circular shape of the base.
Oh, and don’t forget to add stripe-like details to the legs, like this:
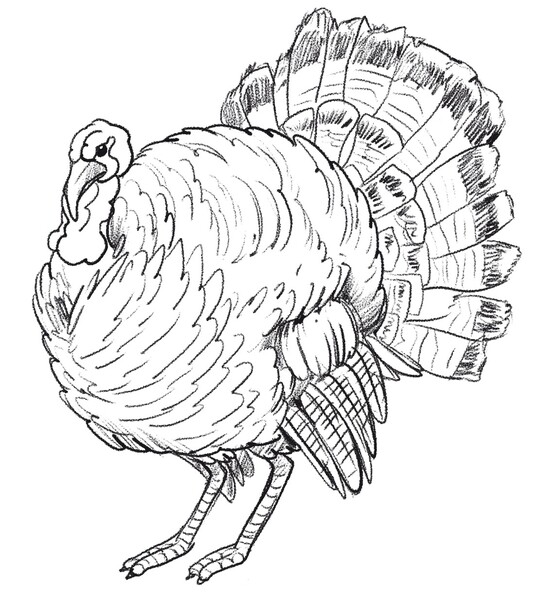
At this point, you’re just adding some finishing touches to your sketch.
You can color the inside of the turkey’s eye in dark grey (or black, depending on the pencil you’re using).
Then, add more tightly knitted lines along the ends of the tail and the wings:
5. Shade Your Turkey Drawing
Recommended tools: HB and 4B pencils, kneaded eraser
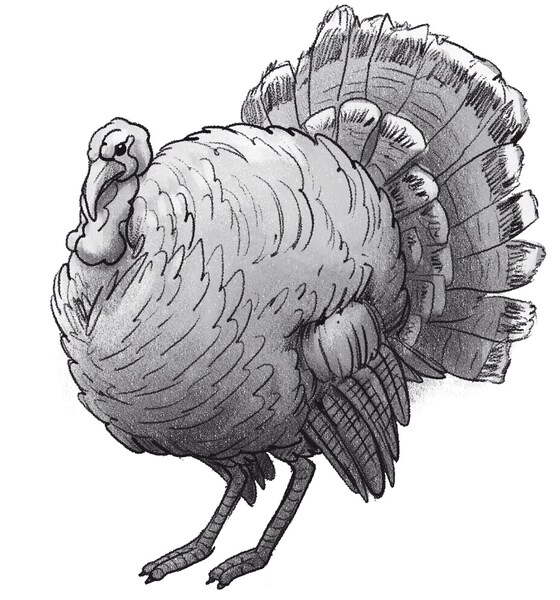
All that’s left to do at this point is to shade your turkey drawing!
To do that, either apply different levels of pressure to your pencil to create different shades of grey or combine an HB and 4B pencil.
Since you’re still learning how to draw a turkey, it’s probably best to go light on the shading.
You can keep it simple and shade the entire turkey in a soft grey hue, then add darker tones for the parts of its body that aren’t exposed to light.
Keep the top of the tail the lightest — you can use your eraser to highlight this part:
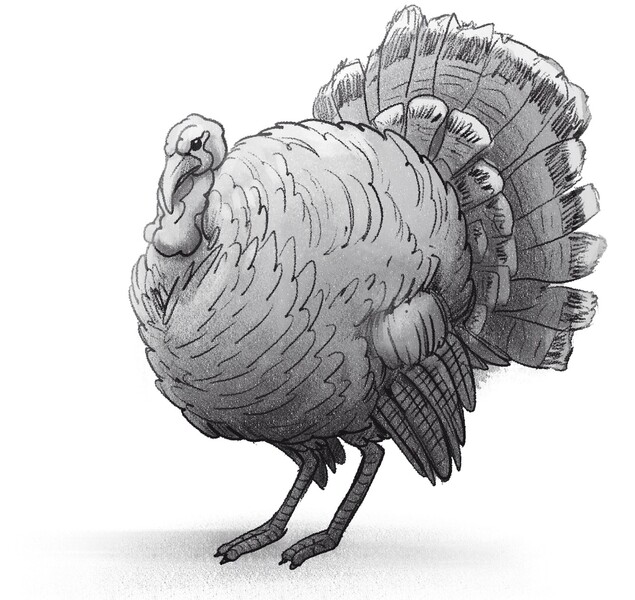
And lastly, to make sure the turkey doesn’t look like it’s floating, shade the area under its legs, like so:
Finished Your Turkey Drawing? Try These Next!
Now that you know how to draw a turkey, why stop here?
We invite you to explore more of our beginner-friendly tutorials and keep sketching!
Whether you want to learn how to draw animals, humans or landscapes — we have it all covered!
Some of the art guides you’ll find on our site include:
- How to draw a dog
- How to draw a cat
- How to draw a horse
- How to draw a fox
- How to draw a cow
- How to draw an elephant
- How to draw a deer
- How to draw a dragon
- How to draw a rose
- How to draw a forest
- How to draw a face
Meet The Artist
The artist responsible for the video and pictures demonstrating how to draw a turkey is Goncalo Lopes — the same talented guy who designed the main characters for the BIOWARS comic book.
Goncalo boasts extensive experience in the field of art, having contributed his skills to renowned projects like Transformers, GI-Joe, TMNT, Adventure Time, Godzilla, and many others.
Pay attention to his tips and tricks — he definitely knows what he’s doing!
A Recap On Easy Turkey Drawing
The easiest way to learn how to draw a turkey is to draw one part of its body at a time.
As you can see, using geometrical shapes, i.e., circles, helps a lot — especially during the outlining stage.
Once you create the base for your drawing, you can start adding details to it, such as feathers and enhancing the lines.
The last step to turkey drawing is shading, which adds dimension to your sketch.

![Finished drawing of a turkey. Image used in the “Turkey Drawing In 5 Steps For Beginners [Video + Illustrations]” blog post.](https://www.biowars.com/wp-content/uploads/2023/09/turkey-drawing-hero-image.jpg)


