Related Resources
Did you know that cows form close friendships? These beautiful animals usually have two to four best friends with whom they like to spend time.
How cute is that?!
Whether you’re sketching a solo cow or a group of cow friends, we put together a guide to show you how to draw this friendly animal in five easy steps:
Even if you’re a beginner, you’ll be able to easily follow this five-step tutorial!
The Tools You Need For Simple Cow Drawing
Here are the tools you can use for your cow drawing:
- An H pencil: These pencils have a hard lead which leaves behind a light trace on paper — this is just what you want when creating guidelines and outlining your cow drawing!
- An HB pencil: This type of pencil has a medium-hard lead, so its trace is slightly darker than that of an H pencil. We recommend using an HB pencil to lightly shade your sketch and add details to it.
- A 4B pencil: The softest lead of the three, a 4B pencil is a good choice for shading.
- A kneaded eraser: Kneaded erasers are elastic, so you can tweak their shape and size depending on what you want to erase.
- Lightly sketched paper: The smooth surface of this paper ensures that your pencil glides easily over it, which is why drawing on this kind of paper is so enjoyable. Erasing mistakes is easy, too!
You can use any combo of the tools above, but if you don’t have them — that’s okay!
What matters the most is that you’re willing to learn how to draw a cow and you can use whatever tools you’re most comfortable with to practice!
How To Draw A Cow In 5 Steps
When learning how to draw a cow (or pretty much anything else), the best thing to do is to start slow and create the guidelines first.
We’ll show you how to outline one body part at a time and then connect the parts into a cohesive whole.
Step 1. Draw The Base
Recommended tool: H pencil
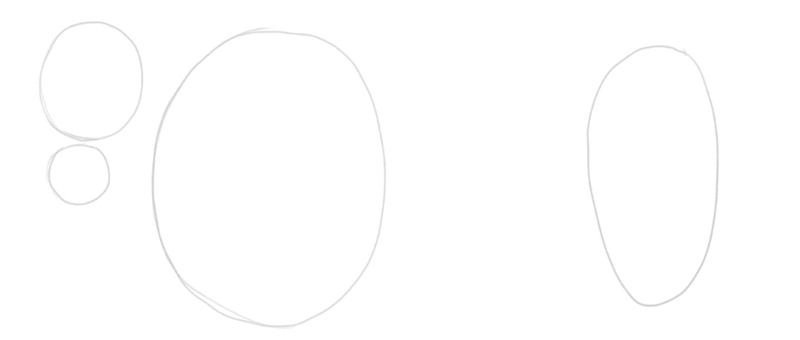
The first step to drawing a cow is to outline its head.
To do that, let’s draw two circles — one below the other.
The top circle should be larger — this is where we’ll add the cow’s eyes and ears later on.
The smaller circle is for the muzzle and nostrils:

Next, let’s add two more shapes to position the cow’s belly and its backside.
For the belly, draw a large circle and make sure that the top of the circle is in line with the top of the head.
As for the backside, add an oval shape that’s slightly shorter than the belly outline.
The distance between the belly and the backside should approximately match the width of the belly outline, like so:
Step 2. Outline The Back & The Chest & Add The Ears
Recommended tool: H pencil
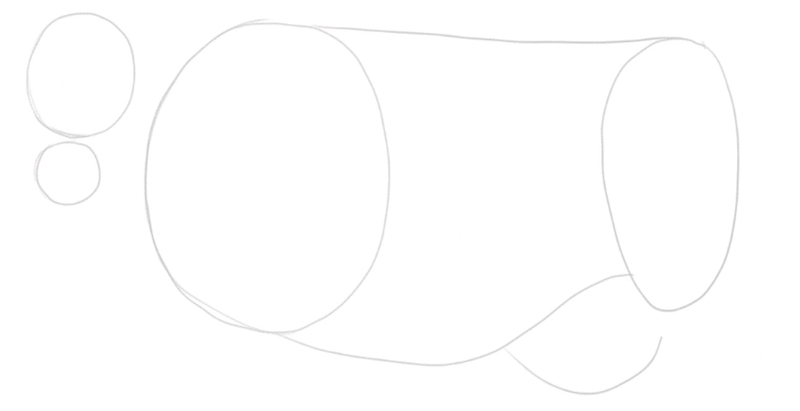
Now, let’s connect the chest, belly and backside outlines to create the cow’s body.
You can keep the back straight-ish; as for the chest and the belly, draw a wavy line that gently rises toward the oval shape in the back.
To sketch the udder, add a round line below the belly dip, like so:
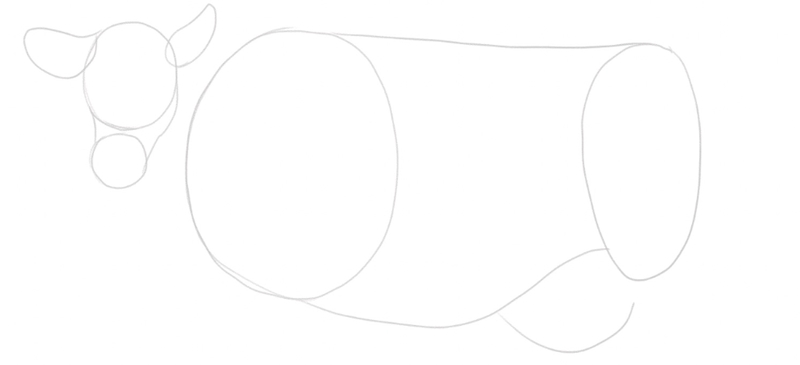
Next, let’s connect the front two circles to connect the head and the muzzle, using softly curved lines.
Then, add the ears on the sides of the head.
They don’t have to be the same size; depending on how the cow positions her ears, their shape and size may differ from your point of view:
Step 3. Draw The Legs
Recommended tool: H pencil
Now it’s time to draw the legs.
Let’s start by sketching the front thighs.
Their shape is irregular — it’s wider at the top and becomes narrow toward the bottom, like this:
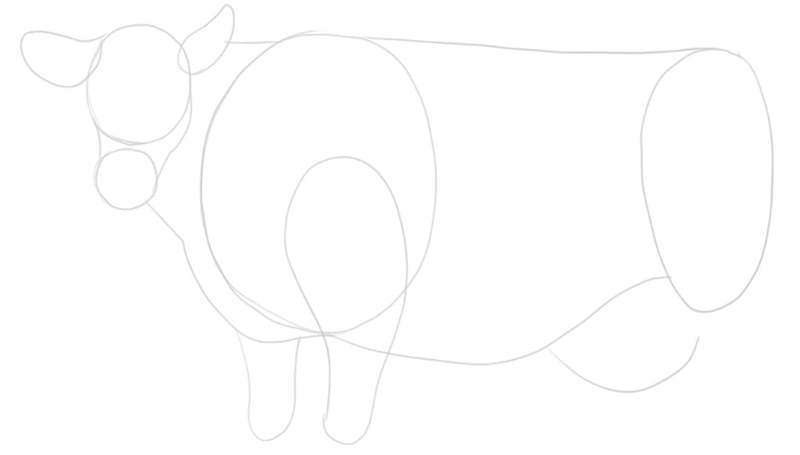
To finish drawing the front legs, sketch the pasterns and outline the hooves, like this:
Next up, let’s draw the back legs.
The upper part of the legs should start at the top of the oval shape you drew earlier to outline the cow’s backside.
Make sure to draw the hock — the pointy part of the hind legs:
![Back legs are added to the sketch. Image used in the “Cow Drawing 101: A Simple 5-Step Guide [Video + Images]” blog post.](https://www.biowars.com/wp-content/uploads/2023/03/cow-drawing-back-legs.jpg)
Step 4. Add The Details
Recommended tool: HB pencil, kneaded eraser
Once the basic outline is ready, it’s time to add the details to your cow drawing.
Let’s start at the head.
You can grab an HB pencil now or simply apply more pressure to your pencil of choice to create darker lines.
Go over the ears, draw the big eyes and add the nostrils.
And since cows have hair that covers their hide, use zig-zag lines to depict the hair at the top of the head, like this:
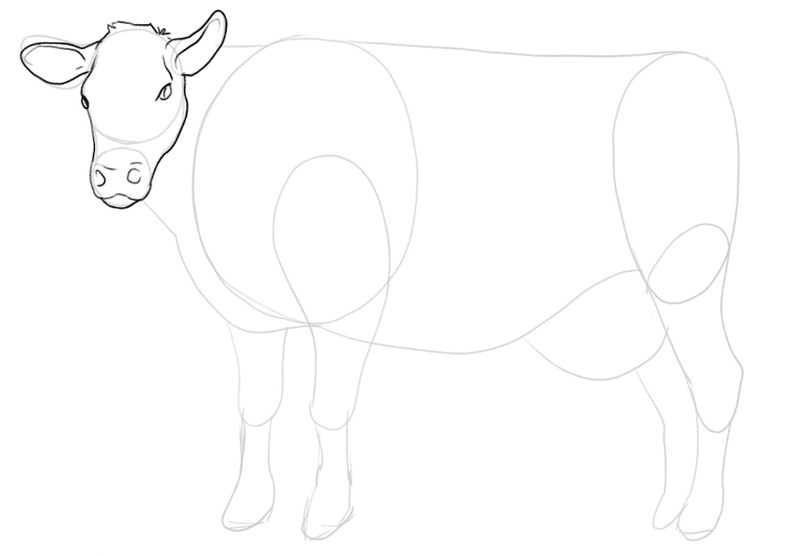
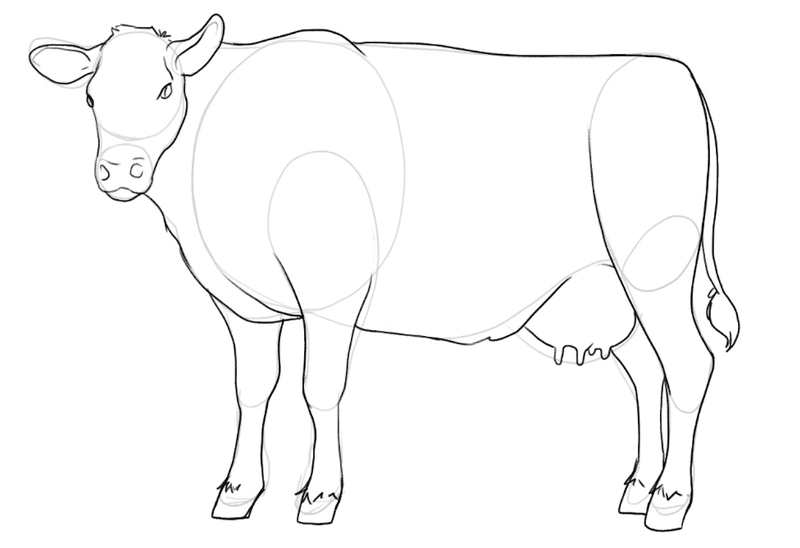
Continue going over the guidelines to make the lines pop.
Add the teats and draw the tail, like this:
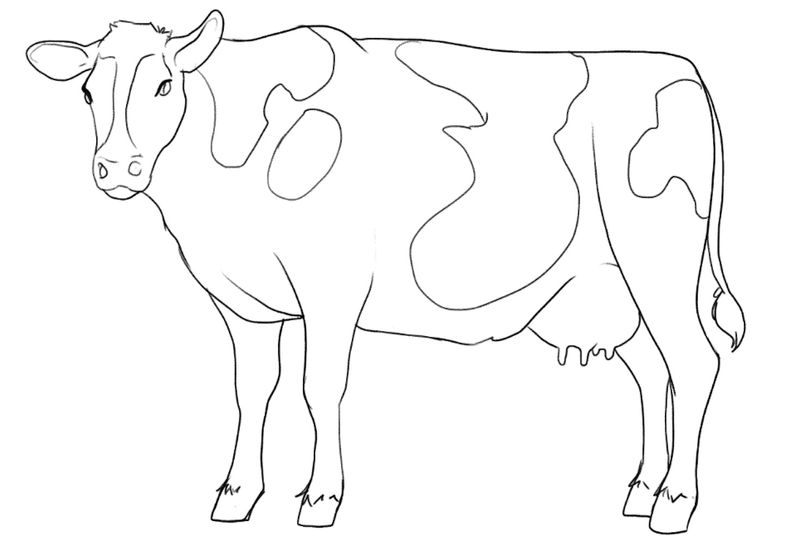
Next, let’s outline the patches that most cows have as a result of codominance, which makes them black-and-white or brown-and-white.
But, before you draw the patches, get an eraser and remove the guidelines you no longer need.
Then, use your HB pencil to draw irregular shapes all over the cow’s back, like so:
Step 5. Shade Your Cow Drawing
Recommended tool: HB and 4B pencils, kneaded eraser
The final step to drawing a cow is to shade your sketch!
To do that, we recommend you combine HB and 4B pencils, to create grey hues of different intensities.
But, before you start shading, decide where the light source is.
We placed ours on the left side, so the cow’s head and the front part of its body are lighter than its back.
You should make the eyes and the bottom of the tail dark too, since no light can reach it from this angle.
Then, color the patches in dark grey hues and keep the rest of the cow’s body light grey.
Oh, and don’t forget to shade the ground beneath the cow’s feet so that she doesn’t look like she’s floating in the air:
![Shaded cow drawing. Image used in the “Cow Drawing 101: A Simple 5-Step Guide [Video + Images]” blog post.](https://www.biowars.com/wp-content/uploads/2023/03/cow-drawing-final.jpg)
Finished Your Cow Drawing? Try These Next!
Since you enjoyed learning how to draw a cow, why stop here?
Check out more of our helpful art tutorials, continue practicing and keep those creative juices flowing!
If drawing animals is your thing, these guides are for you:
- How to draw a dragon
- How to draw a fish
- How to draw a penguin
- How to draw a bat
- How to draw a wolf
- How to draw a horse
- How to draw a cat
- How to draw a dog
We have a lot more how-to’s in store, and you’ll find them all on our blog and YouTube channel!
Meet The Artist
This beginner-friendly guide was made by Goncalo Lopes – a professional comic book artist who has vast experience in projects ranging from comics and games to TV series and films.
He’s worked on some pretty famous projects, including Godzilla, Transformers, GI-Joe, TMNT, Adventure Time and more.
Pretty cool, huh?
A Recap On Easy Cow Drawing
When learning how to draw a cow, we recommend using geometrical shapes to create the basic sketch and position the body parts.
Use circles for the head, the muzzle, the belly and the chest.
For the backside, draw a large oval shape and align it with the top of the chest outline.
Then, draw the udder and the legs and slowly start adding details; sketch the ears, eyes, nostrils, teats, and tail.
Once your cow outline is finished, shade your sketch by combining an HB and 4B pencil or apply different levels of pressure to your preferred pencil to create different shades of grey. Shading will help you enhance the cow’s features and bring your sketch to life!
Lastly, don’t forget to shade the area under the cow so it’s not suspended mid-air.
