Related Resources
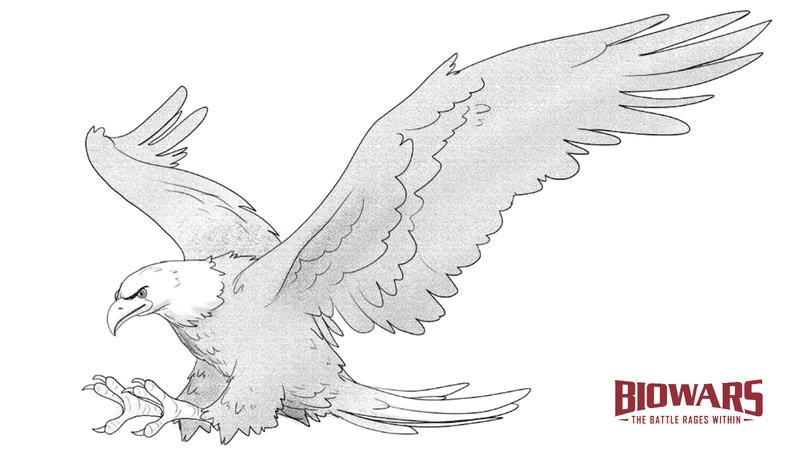
Discover how to easily draw an eagle!
Eagles are majestic birds of prey known for their impressive size, powerful flying skills and keen eyesight. In fact, their eyesight is so sharp that they can see up to eight times better than humans!
From their keen eyes to their powerful wings, these majestic birds are among the most beautiful symbols of freedom and strength.
If you wish to enrich your sketch or a comic book with a cool eagle drawing, look no further!
In this step-by-step guide, we’ll show you how to draw a bald eagle in just seven simple steps:
And if you prefer to look at illustrations and draw at your own pace, keep reading to explore images for every step!
The Tools You’ll Need When Learning How To Draw An Eagle
When you start learning how to draw an eagle, we recommend you get your hands on these tools:
- An H pencil: “H” stands for “hard,” which means that these pencils have a hard lead. This type of lead is just what you need in the outlining stage since it allows you to create thin, light lines that you can easily erase and/or enhance.
- An HB pencil: “HB” means “hard black.” These leads are somewhere in the middle between the “H”, i.e. the hardest type of lead and the “B”, i.e. the softest lead. HB pencils are “medium hard” and we recommend them when adding details to your eagle drawing and softly shading it.
- A 4B pencil: “B”, i.e. “black”, is the softest type of lead and as such, it’s ideal for shading.
- A kneaded eraser: These erasers are soft and malleable, so you can tweak their shape and size depending on what you want to erase. Plus, you can use them to highlight parts of your eagle sketch.
- Sketch paper: Last but not least, the right choice of paper can make drawing all the more enjoyable. We like sketch paper with micro-perforations because the pencil glides over it and erasing is also easier.
If you don’t have all of these tools — that’s fine! What matters the most is your willingness to practice and learn how to draw an eagle!
And in case you prefer to create digital masterpieces over pencil art, check out our guide on the best digital drawing tools.

How To Draw An Eagle In 7 Steps
The easiest way to learn how to draw an eagle is to break down the process into simple steps.
Let’s start from scratch.
1. Draw The Body
Recommended tool: H pencil
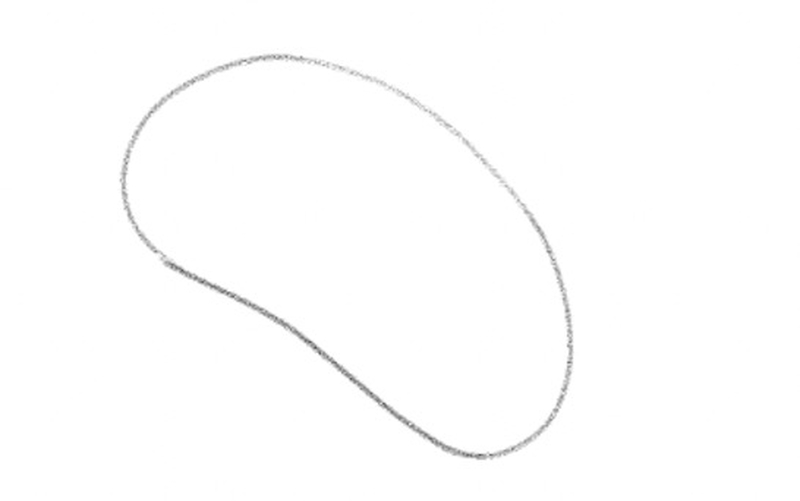
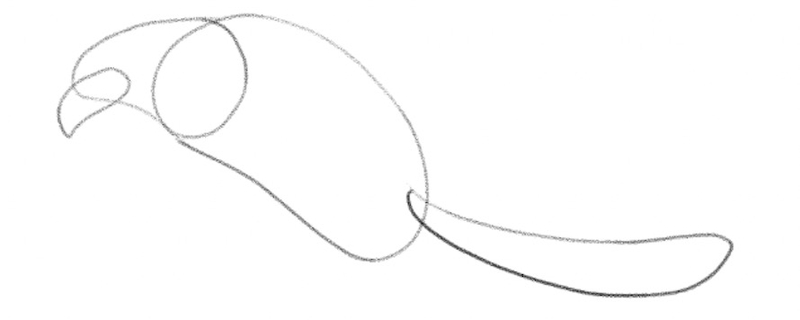
The first thing we’ll outline is the eagle’s body.
When drawing it, make sure to leave enough space for the large wings as they will take up quite a bit of room.
Now, to sketch the body, draw a bean-like shape, like this:
2. Draw The Head, The Beak And The Tail
Recommended tool: H pencil
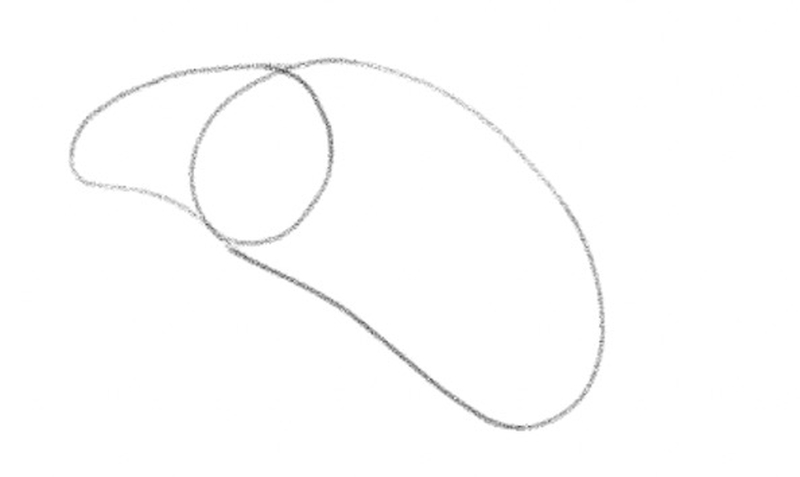
Next up, let’s draw the eagle’s head.
Draw a shape like below and make it about two times smaller than the chest. Oh, and make sure the front part of the head is narrower than the neck, like so:
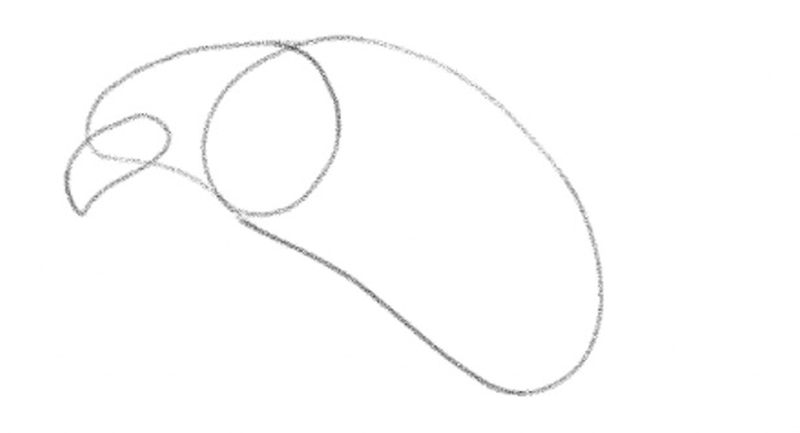
Once the head is in place, let’s draw the beak.
Did you know that eagles’ beaks are made of keratin, like human fingernails?
These powerful birds use their strong beaks to pierce through the flesh and devour their prey.
When drawing the beak, make sure that it’s hooked, like this:
Now, let’s outline the tail.
Start at the back of the body and sketch a moderately long tail, like so:
3. Draw The Legs
Recommended tool: H pencil
Next, it’s time to draw the legs.
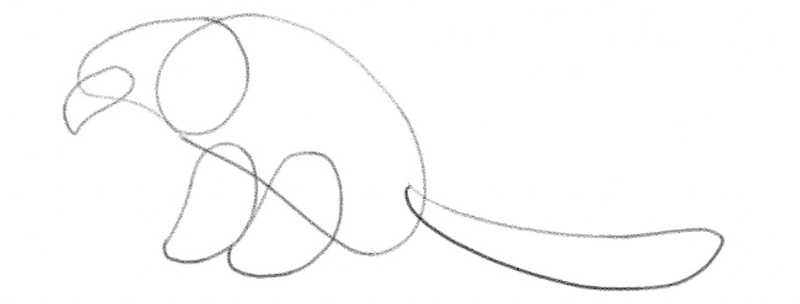
To outline them, sketch small bean-like shapes, similar to the one you drew earlier when sketching the eagle’s body.
Place the legs around the middle of the eagle’s body, like this:
Now, let’s draw the feet.
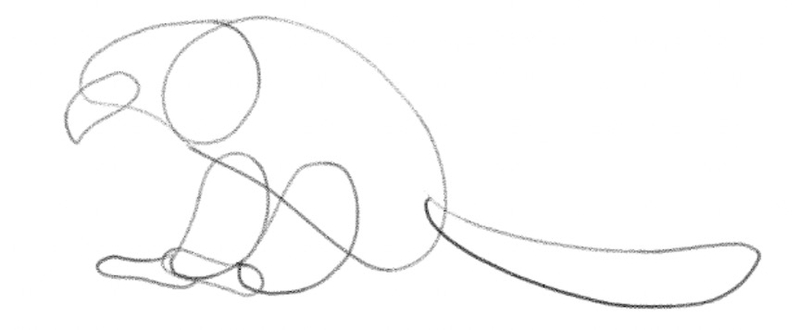
Attach them to the bottom of the eagle’s legs and point them a bit upward.
We’re drawing an eagle that’s approaching something to grab or hold onto, so we want the feet to look like this:
4. Draw The Wings
Recommended tool: H pencil
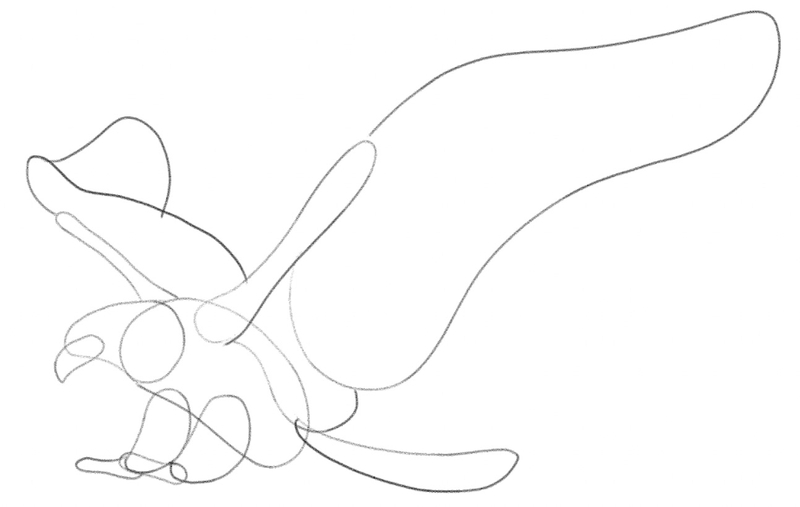
Now it’s time to start drawing the wings.
Start by sketching the front part of the wings.
Draw two long shapes with round edges and point them upward, to depict an eagle with spread wings, like so:
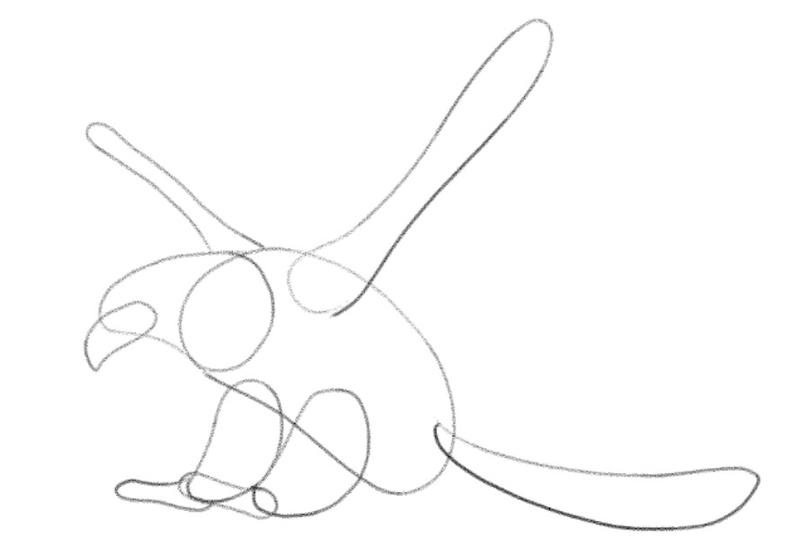
Keep in mind the fact that bold eagles have a wingspan that ranges from 5 ft 11 in and 7 ft 7 in, which means that you need to draw a large set of wings:
5. Draw The Talons
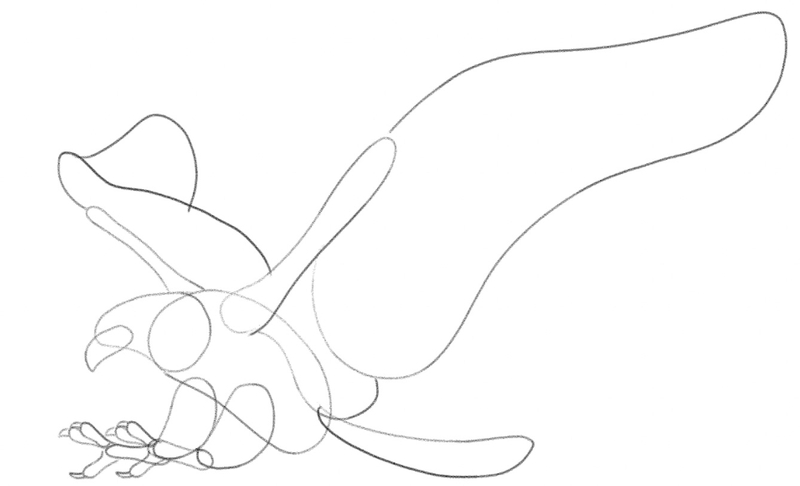
Recommended tool: H pencil
To finalize the outline of the eagle’s body, let’s draw the talons, i.e., the large claws, like this:
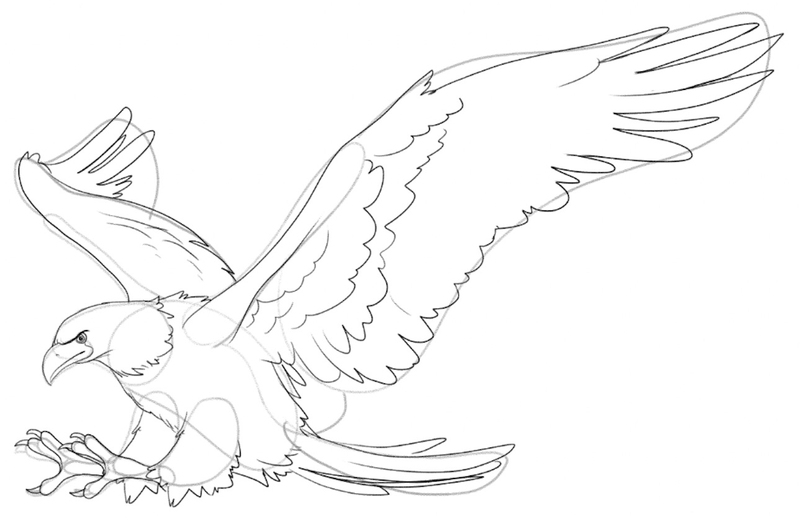
6. Enhance The Lines And Add The Details
Recommended tool: HB pencil
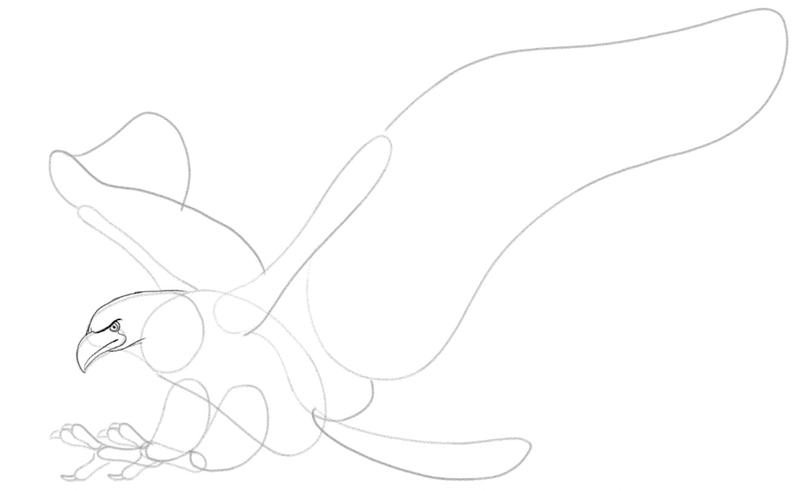
The next step to drawing an eagle is to enhance the lines and add details to the sketch.
For this stage of eagle drawing, we recommend using an HB pencil. If you don’t have one, you can simply apply more pressure to your pencil, to create slightly darker lines.
Let’s start with the head and the beak.
Go over the lines and then add the brow ridge and draw the eye.
Don’t forget to “split” the beak into two, to depict the tomia, i.e., the beak’s sharp edges:
As you go over the basic shapes, don’t follow blindly the straight lines.
Instead, use zig-zag lines, to depict the eagle’s feathery body.
After the head is done, go over the outline of the legs:
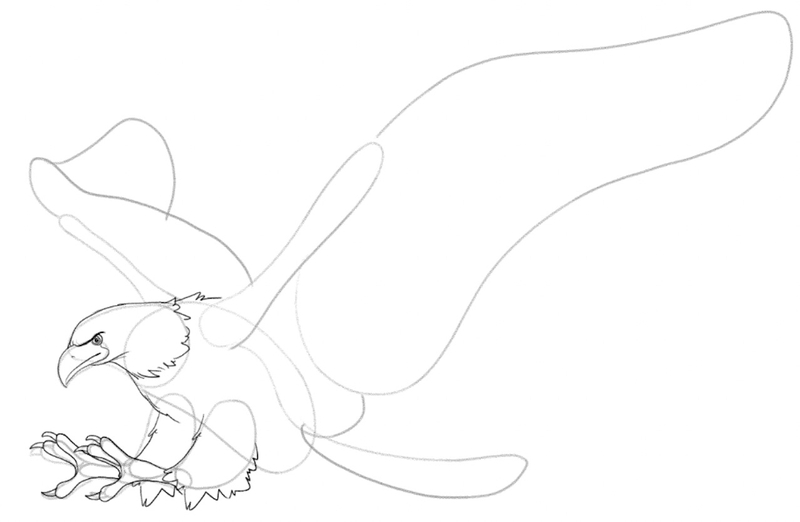
Move on to the wings and the tail so that they look like this:
7. Erase The Guidelines And Shade Your Eagle Drawing
Recommended tools: HB and 4B pencils, kneaded eraser
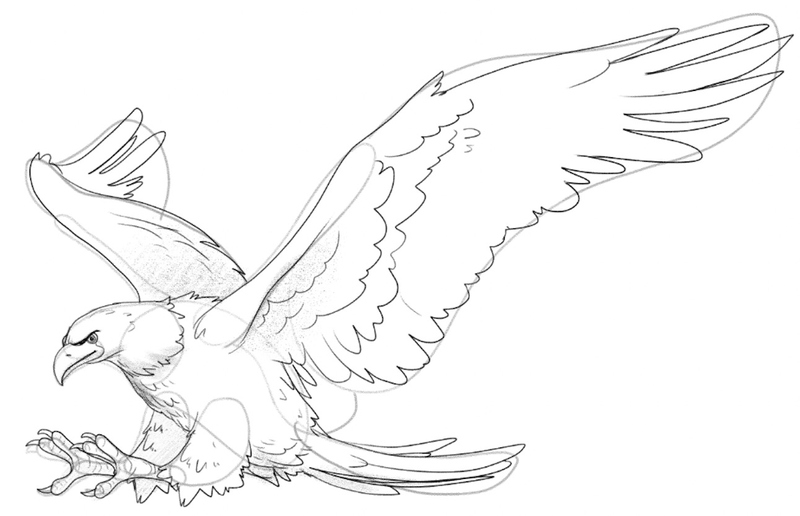
Now’s the time to finish adding the details to your eagle drawing.
Add more zig-zag lines on the legs and to the eagle’s chest.
Then, apply slightly more pressure to your pencil and start softly shading the wings, like this:
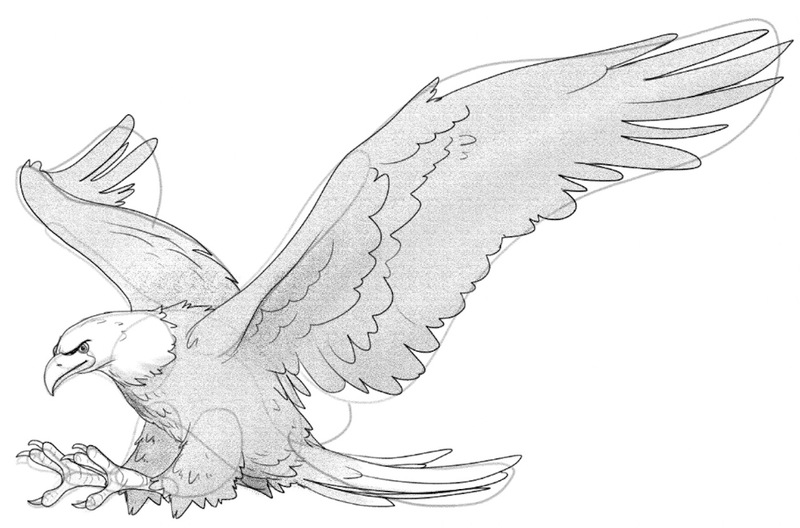
Next, use a 4B pencil or add more pressure to your preferred pencil to create dark grey hues along the eagle’s wings, chest and legs:
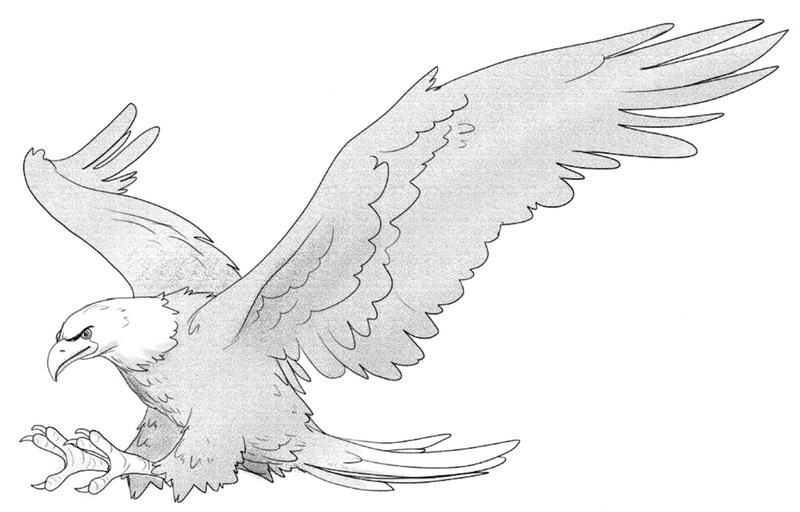
The last step to eagle drawing is carefully erasing the guidelines:
Finished Your Eagle Drawing? Try These Next!
Once you master the skill of eagle drawing, why stop here?
Keep practicing and perfecting your drawing skills with our beginner-friendly tutorials.
If you’d like to keep practicing how to draw animals, explore these guides:
- How to draw a deer
- How to draw a fish
- How to draw a horse
- How to draw a cat
- How to draw a dog
- How to draw a penguin
- How to draw a bat
- How to draw a wolf
In case you want to learn how to draw landscapes, check these guides:
- How to draw a forest
- How to draw a rose
- How to draw a mushroom
- How to draw a Christmas tree
- How to draw a snowflake
And if you want to learn how to draw people, these tutorials are for you:
- How to draw eyes
- How to draw a person
- How to draw a nose
- How to draw a mouth
- How to draw hands
- How to draw ears
- How to draw a face
We also encourage you to check out our YouTube channel and watch the beginner-friendly video guides created by our lead BIOWARS artist.
Meet The Artist
BIOWARS beginner-friendly art tutorials are created by Goncalo Lopes — a professional artist with vast experience in the entertainment world.
He has worked on numerous comics, games, TV series and films, including the globally popular Transformers, GI-Joe, TMNT, Adventure Time, Godzilla and many others.
We think it’s safe to say that you’re in good hands!
A Recap On Easy Eagle Drawing
When learning how to draw an eagle, the most important thing is to start small.
Outline the body parts one by one, and use simple shapes during this phase.
Once you create the sketch, you can then connect the lines into a cohesive whole and start adding the details.
Lastly, shade the wings, legs and chest in dark grey hues and ensure that the head, feet and tail remain white to depict the bald eagle’s natural look.

