Related Resources
Did you know that dolphins sleep with one eye open?
They like to keep an eye (no pun intended) on potential threats, and, let’s be real, who can blame them with how wild the underwater life can be?
Dolphins are playful and cute, and we can help you draw them in just six steps:
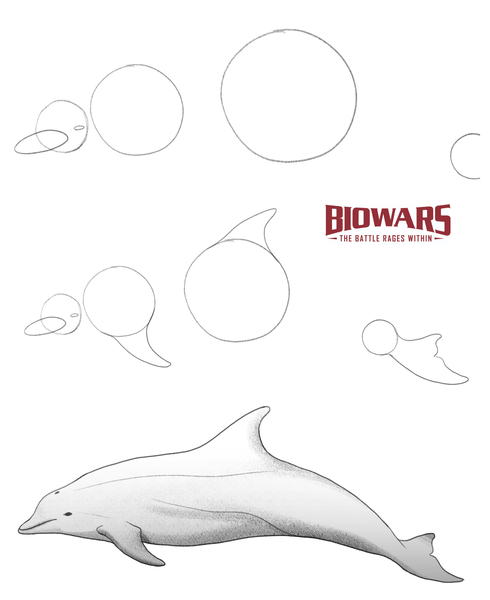
We’ve also made a set of illustrations you’ll see below to accompany each step in the video.
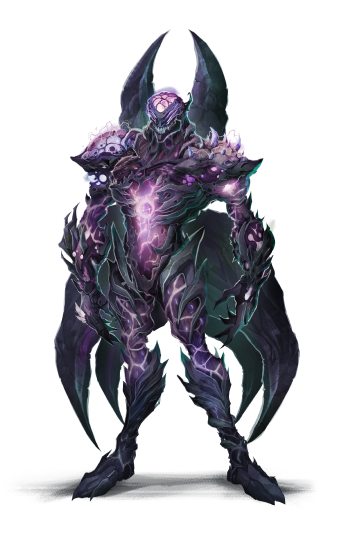
You’re in good hands. I mean, did you see how cool BIOWARS characters look? Our artistic team knows what they’re doing.
Sketching Tools To Draw A Dolphin
Even though you should use whatever pencil and paper you like, here are some tools you’d might want to add to your “arsenal:”
- An H pencil: When sketching, we recommend using an H pencil because of the thin, light trace it leaves on the paper. This type of lead is easy to build, but also erase when you’re unhappy with some details.
- An HB pencil: A “medium-hard” hard lead leaves a darker trace than an H pencil. This makes an HB pencil good for making some lines slightly darker than others and gently shading your drawing.
- A B pencil: For shading, we recommend a B pencil because of its super soft lead that leaves the darkest trace of the three.
- A kneaded eraser: These erasers are a good choice because it’s easy to customize their shape. You can stretch a kneaded eraser, twist it and do whatever you like with it to get the right shape and size.
- Lightly textured sketch paper: The aper’s smooth surface is a great choice because pencils glide over it.
How To Draw A Dolphin In 6 Steps
If you explored any of our previous guides, you already know the drill — we’ll show you how to draw a dolphin by sketching one part of its body at a time.
Let’s begin!
1. Draw The Belly
Recommended tool: H pencil
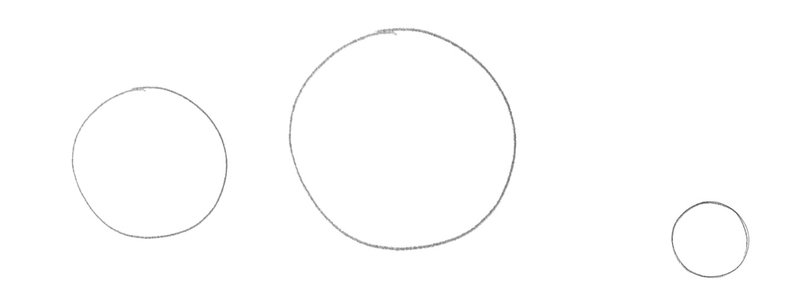
To create the outline of the dolphin’s body, we’re going to use a simple geometrical shape — a circle!
Let’s start by sketching the widest part of the dolphin’s body — the middle of its belly.
Make sure to leave enough room on the left and the right of the circle since you need space to add other body parts.
Oh, and you’ll need some room above the circle for the dorsal fin!
Now, draw a medium-sized circle, like this:

Next, let’s continue drawing the belly, but this time, let’s add circles to mark its front and back part.
At the front, draw a circle that’s about one-third smaller than the middle of the belly. Its bottom side should be in line with that of the middle circle.
You should leave some space between the two circles, but don’t overdo it as you don’t want to mess up the proportions.
As for the circle in the back, its position marks the length of the dolphin’s body in the back. Later on, you’ll attach the tail to it.
Now, the top of the dolphin’s body is slightly curved. That’s why you’d want to position the back circle lower than the other two. You can imagine that there’s a line going from the bottom of the front circles through the middle of the back circle.
Oh, and make sure that this back circle is the smallest of the bunch.
The distance between the circle in the middle and the one in the back should be approximately three times larger than the distance between the front and middle circles:
2. Draw The Head, Eye And Beak
Recommended tool: H pencil
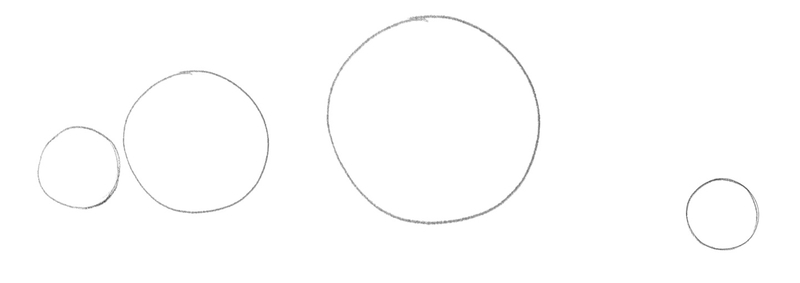
To draw the dolphin’s head, sketch a circle at the front.
Its bottom should be in line with the circle next to it.
As for its size, make it about three times smaller than the second circle:
Now, let’s draw the dolphin’s eye and determine the position of its beak.
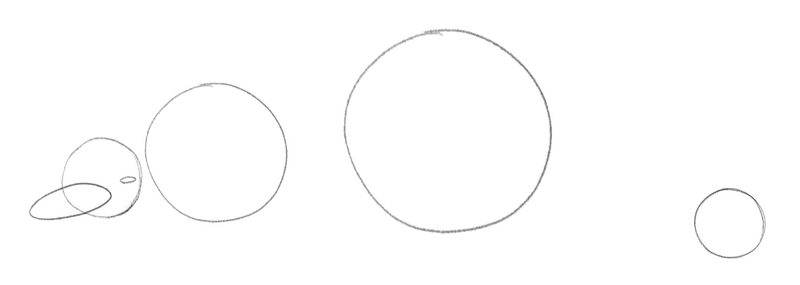
As for the eye, draw a super small oval shape next to the right side of the “head circle.” Align the eye with the center of the circle.
For the beak, add another oval form and place it so that one half of it covers the head and the other peaks outside of it, like so:
3. Draw The Fins And The Tail
Recommended tool: H pencil
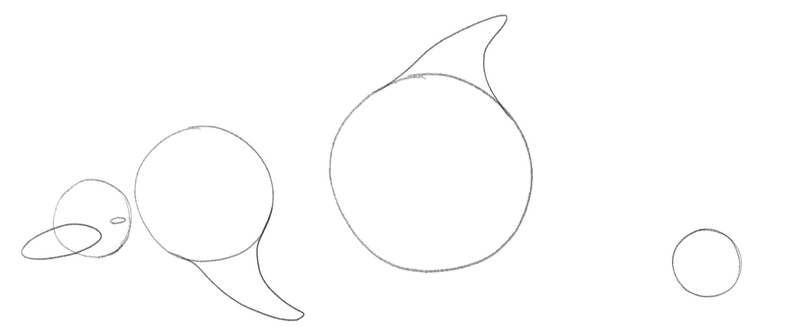
Next, let’s draw the fins or flippers.
Dolphins have two fins — dorsal and pectoral.
The pectoral fin is at the front and we’ll attach it to the second circle.
As for the dorsal fin, we’ll add it to the top of the largest circle.
When sketching the fins, simply draw large spikes, like so:
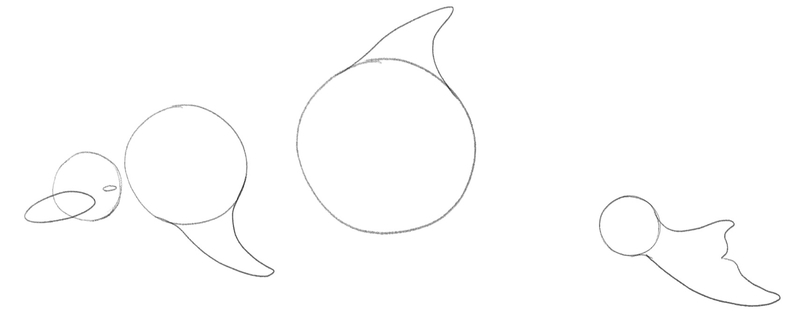
The dolphin’s tail is comprised of two lobes which are called the flukes.
The flukes are flat and concave. They are connected in the middle with a so-called median notch.
Attach the flukes to the smallest circle in the back; don’t draw them too large as dolphins don’t have big tails:
4. Outline The Dolphin’s Entire Body
Recommended tool: H pencil
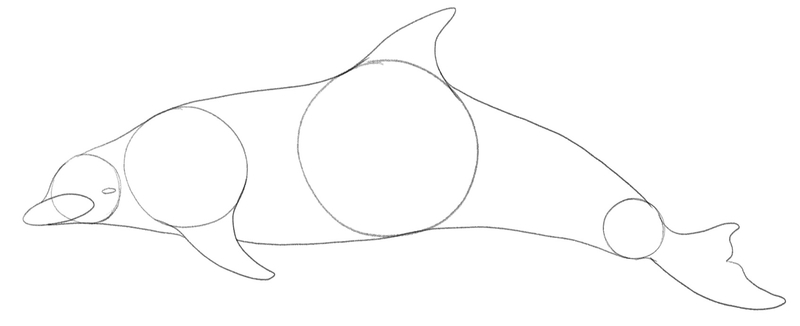
Now that all elements of the dolphin’s body are in place, it’s time to connect them.
Start at the front, from the beak.
Attach the beak to the top of the head, the back, the dorsal fin and then to the tail.
Repeat the same at the bottom of the dolphin’s body, but make sure that you don’t touch the second circle; instead, go slightly under it, like this:
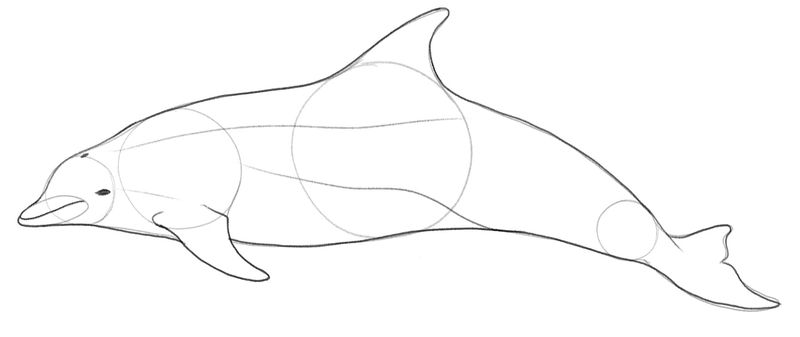
5. Add The Finishing Touches
Recommended tool: HB pencil
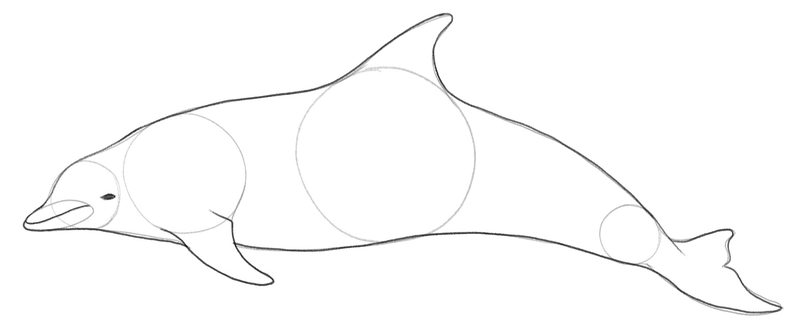
At this point, we recommend you grab an HB pencil or simply apply more pressure to your “weapon” of choice.
The goal is to make the outline darker, so go over the lines you drew in the previous step.
Then, make the eye dark grey/black and add the line across the middle of the oval shape you used to place the beak to sketch the dolphin’s mouth:
Now, let’s add several horizontal lines across the dolphin’s body to give it more dimension.
You can draw one at the top, the other in the middle and the third at the bottom of the dolphin’s body:
6. Shade Your Dolphin Drawing
Recommended tools: HB and B pencils, kneaded eraser
Combining different types of leads (or applying different levels of pressure to your pencil), you can create grey hues of various intensities.
You should shade the dolphin’s belly, the part behind its dorsal fin, its tail and the area around its mouth in soft grey tones, like this:
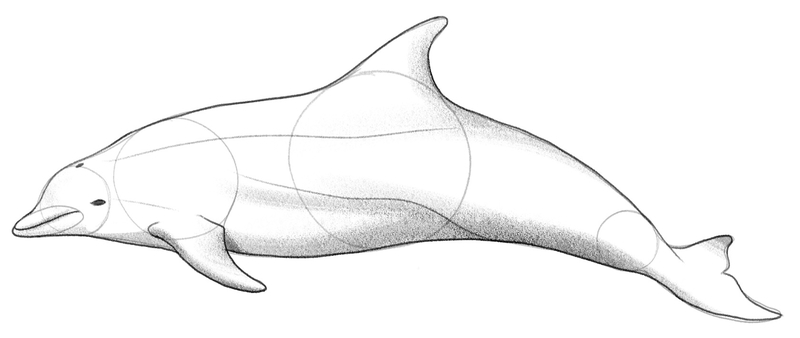
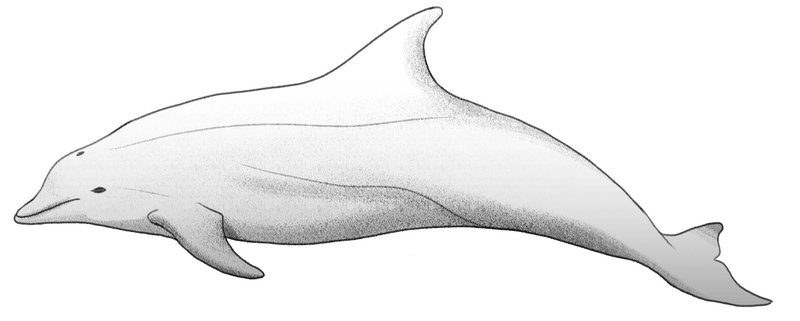
The final step is to erase the circles you used when outlining your dolphin.
Just be careful not to mess up the parts that are staying.
Then, feel free to continue shading the sketch. You can color the rest of it in a light grey color, like so:
Finished Your Dolphin Drawing? Try These Next!
Alright, boss, that was awesome! You showed some impressive skills there.
Now, are you ready to practice drawing other animals? We have a bunch of guides you can explore, including:
- How to draw a bat
- How to draw a panda
- How to draw a horse
- How to draw a cat
- How to draw a dog
- How to draw a dragon
We also have guides on drawing elements in nature, such as:
And if you want to draw people, we got that covered to! Just take your pick from the following tutorials:
- How to draw a person
- How to draw a face
- How to draw a mouth
- How to draw a nose
- How to draw eyes
- How to draw hands
- How to draw feet
Meet The Artist
All how-to-draw tutorials on the site were created by Goncalo Lopes — the BIOWARS art team lead.
He’s an experienced artist who’s worked on many well-known comic books, TV shows and movies.
Transformers, GI-Joe, TMNT, Adventure Time and Godzilla ring any bells?
Yep, Goncalo worked on those, so make sure to pay attention to his tips and tricks and use them to improve your drawing skills!
A Recap On Easy Dolphin Drawing
When learning how to draw a dolphin, sketch one part of its body at a time.
Start by:
- Drawing its belly
- Adding its head, the eye and the beak
- Sketching the fins and the tail
- Adding the finishing touches to enhance the dolphin’s appearance
- Shading your drawing
